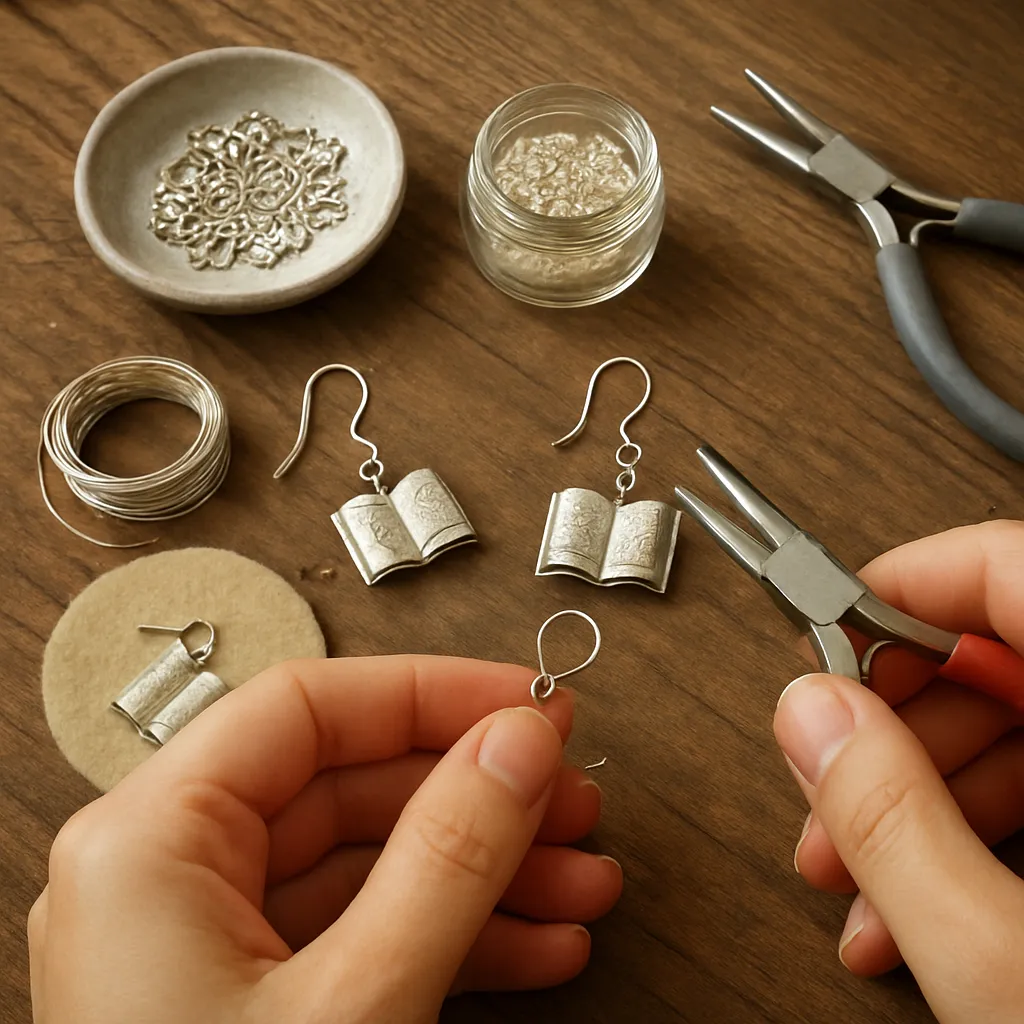
Books leave traces not only in our minds but also on our hands: smudges of ink, the warm grain of paper, the glint of a brass corner on a cherished cover. Jewelry for book lovers transforms those tactile memories into wearable keepsakes. Whether you’re setting a line of type into resin, forging a clasp shaped like a quill nib, or stitching a miniature leather-bound volume, the goal is to distill the heart of reading into metal, fiber, and light. Below you’ll find an artisan’s roadmap—from materials and techniques to design decisions and finishing touches—that will help you craft pieces that feel like little libraries against the skin, imbued with care, intention, and enduring craftsmanship.
Why Literature Makes Remarkable Jewelry
Book-themed jewelry thrives because it carries stories on two levels: the wearer’s personal connection to a text and the maker’s interpretation in form, texture, and technique. A pendant that frames a sentence bridges old-world ornament with modern minimalism. A pair of earrings shaped like open pages swings with the rhythm of walking, just as a reader turns pages with cadence and curiosity.
The best pieces aren’t merely decorative. They weave narrative through scale and structure: a locket that opens to reveal a map of a fictional realm, a bracelet that hides a cipher from a mystery novel, or a ring that nests a tiny compartment for a secret note. In these objects, material choices echo themes: walnut wood for warmth and memory; oxidized silver for timeworn melancholy; milk-white enamel for innocence in a coming-of-age tale.
Literary jewelry is also a conversation with the body. It respects ergonomics—weight distribution, clasp reach, skin contact—so the story is not only beautiful but comfortable to wear all day. A pendant that snags on knitwear or a ring that digs into adjacent fingers will eclipse its poetry. When you integrate usability into concept, the result is quiet magic.
Materials and Tools for Bookish Handicraft
Found and Purpose-Made Components
- Paper: Offcuts from damaged books, deckle-edge papers, or cotton rag sheets. Choose pH-neutral or buffered stocks for archival stability. Avoid sacrificing valuable, intact books; source already-damaged volumes or public-domain text reprints.
- Metals: Brass, bronze, copper, sterling silver, and stainless steel for findings. Brass and copper develop a mellower patina that suits vintage aesthetics; stainless offers hypoallergenic strength.
- Resins and sealants: UV resin for quick domes; two-part epoxy for deep-set bezels; water-based sealants for initial paper protection.
- Leather and textiles: Vegetable-tanned leather for miniature bindings; book cloth, linen thread, silk ribbon, or cotton cords for ties and necklaces.
- Wood: Walnut, cherry, or maple for inlays and page motifs. Laser-cut veneers give crisp silhouettes; hand-carving adds soul.
- Type and stamps: Metal letter stamps, vintage movable type, micro-stencils, or etched plates for quotes and initials.
- Cabochons and glass: Watch crystals, magnifying domes, and sapphire cabochons to magnify small print or maps.
Essential Tools
- Jeweler’s saw and bench pin for cutting metal and wood.
- Files, sandpapers (320–2000 grit), and polishing compounds.
- Bezel cups, prong settings, or custom bezels fabricated with solder or cold connections (rivets).
- Pliers set: chain-nose, round-nose, flat-nose; flush cutters.
- Mini press or hand burnisher for adhering paper to surfaces without bubbles.
- Soldering kit or micro butane torch, pick, flux, solder (lead-free), and a fire brick.
- Ventilated curing station for resins; UV lamp if using UV-cured products.
- Leather tools for miniature books: awl, bone folder, punching irons, small needles, waxed linen thread.
Designing with Story: From Concept to Sketch
Every piece should begin with intention. Ask what essence of a beloved book you want to capture: a single line, a motif, a setting, or a character’s arc. Translate that into shapes, textures, and mechanisms. If the novel centers on a journey, consider a compass rose inlay or a rotating pendant ringed with engraved destinations. If it’s about metamorphosis, carve a page-edge motif that slowly shifts into feathers around the circumference of a cuff.
Sketch multiple thumbnails before committing. Adjust proportions for comfortable wear and structural durability. When incorporating words, think about legibility at scale: a 10–12 pt serif can read cleanly under a 20–25 mm glass cabochon, while tiny sans serif glyphs suit resin micro-tiles. Map your layers: paper sealed twice, set into a bezel, resin dome, then final polish. Anticipate how light will glance off facets or domes and how shadows might obscure print.
Technique 1: Paper-in-Resin Pendants and Earrings
What This Achieves
This technique preserves text, illustrations, or maps under a protective dome, creating jewelry that looks like a distilled page. The resin magnifies fine details, and the bezel frames the content like a miniature exhibition.
Step-by-Step
- Select your text or image. Test print placement on scrap. If using original paper, trim from damaged pages to maintain ethical sustainability.
- Seal the paper: Brush two thin coats of water-based sealer front and back, letting each coat dry fully. This prevents resin from darkening fibers and forming bleed spots.
- Prepare the bezel: Clean with alcohol, roughen the base with fine sandpaper for adhesion. Optionally apply a thin layer of pigment or leaf to warm the background tone.
- Adhere the paper: Use a pH-neutral adhesive. Burnish to remove bubbles and ensure full contact at edges.
- Mix resin: Follow manufacturer’s ratios, stirring slowly to avoid microbubbles. Let the mix rest 2–3 minutes.
- Pour in layers: Add a thin base pour, pop bubbles with a heat gun at a distance, let it gel, then add the dome pour for a smooth meniscus.
- Cure and finish: Protect from dust. After curing, wet-sand any spills and polish the bezel rim. Add ear wires or chains with secure jump rings.
Pro Tips
- Curate contrast: A cream paper in a warm brass bezel feels nostalgic; a stark white in stainless feels modern.
- Frame the keyword: Align a single, resonant word at the center line of the cabochon for immediate focus.
- Bubble control: Warm the bezel slightly before pouring; cool resin traps fewer bubbles in fibers.
Technique 2: Miniature Book Pendants and Charms
Why It Works
Mini-books capture the tactile joy of binding in wearable form. They can be blank, contain micro-prints, or hold a concealed message stitched into the spine lining.
Materials
- Vegetable-tanned leather (0.8–1.2 mm), book cloth, or fine cork fabric.
- Text paper at 60–90 gsm, cut into small signatures (e.g., 15 x 20 mm folded).
- Waxed linen thread, micro-awl, bone folder.
- Headbands (embroidered thread), endpapers, tiny magnets if closure is desired.
Binding Steps
- Cut 4–6 signatures, 3–4 sheets each, grain aligned vertically for clean page flips.
- Prick holes with a jig for consistent spacing. Sew on tapes or sew each signature to the previous with kettle stitches.
- Glue up the spine lightly; form rounded spine with gentle pressure.
- Add headbands and mull. Attach endpapers.
- Make a case: Trim leather, score hinge lines, wrap boards, add a tiny title plate or foil-stamped initials.
- Case in: Apply glue sparingly, align spine to case. Press under light weight until dry.
- Hardware: Install a tiny eyelet at the top back board, reinforcing with a hidden brass plate for strength.
Embellishment Ideas
- Foil-stamp a monogram that nods to the author’s initials.
- Add a micro pocket with a secret note—a cipher from a detective novel or a line from a sonnet.
- Edge gild the pages for sparkle, or use graphite for a dusky edge that suits gothic stories.
Technique 3: Metal-Stamped and Engraved Quotations
Choosing Text Ethically
Use public-domain lines, your own words, or very short excerpts. Keep characters per line low to maintain readability and aesthetic spacing.
Process
- Cut and prepare blanks: 0.8–1.2 mm thick strips for bracelets or 20–30 mm discs for pendants.
- Layout: Use a center line and letter spacing marks. Test on scrap metal to confirm strike depth.
- Stamp: Hold stamps perpendicular; one decisive hammer blow per character. Fill with enamel paint or liver-of-sulfur patination for contrast, then sand back to brighten the field.
- Form: Curve bracelet blanks on a mandrel; dome pendants with a dapping block.
- Finish: Burnish edges and polish. Seal patinated brass or copper with microcrystalline wax.
Letterforms and Scale
Typography carries emotion. Sturdy romans suggest authority; delicate scripts hint at romance. Prioritize spacing and optical balance, aiming for clear reading at arm’s length. The integrity of letter shapes under wear relates to both aesthetics and durability.
Technique 4: Page-Edge Motifs in Wood and Metal
Page edges create rhythmic stripes that translate well to bangles, hoops, and ring shanks. Laminate thin veneers of contrasting woods to mimic deckled pages, or engrave parallel lines into metal and tumble-polish to soften the ridges. For extra depth, insert a slender strip of cotton rag paper under a rock-crystal window set into a locket so the edge pattern shows through like a hidden library.
Making It Wearable: Findings, Weight, and Balance
Hardware choices can make or break a piece. For necklaces, place the bail at the true center of mass so the pendant doesn’t roll. Choose lever-back ear wires to prevent loss. For rings, keep bezels low-profile and undercut sharp edges. Test movement and noise; a charm bracelet that clinks pleasantly can become cacophonous with the wrong jump ring sizes.
Back surfaces matter. Smooth them to a silk finish, especially where skin meets metal. Use hypoallergenic options for sensitive wearers, and always consider clasp reach: a bracelet should close with one hand without strain. In other words, your story must meet the body with grace and embedded ergonomics.
Surface Treatment: Aging, Color, and Texture
- Oxidation and patination: Controlled sulfur baths deepen recesses, highlighting stamped words. A soft brown or blue-green layer adds a timeworn feel, while a hand-burnished edge reintroduces light.
- Cold enamel and resin tints: Color-code themes—midnight blue for fantasy skies, sepia for history, verdigris for maritime tales.
- Wax and oils: Finish wood with shellac and wax for a tactile glow; seal papers with UV-protective topcoats to prevent yellowing and preserve provenance details.
Ethical Sourcing, Care, and Longevity
Respect the objects behind your objects. Salvage already-damaged books; reprint public-domain pages as needed; credit artists whose illustrations you license. Track material origins to build a chain of provenance your clients can trust. Choose plant-based or recycled packaging; line boxes with cotton rag offcuts or book cloth remnants. Consider your environmental footprint—tiny decisions like water-based sealers, closed-loop polishing compounds, and recycled metals add up to better sustainability.
Offer care instructions: avoid prolonged sunlight on resin domes; keep leather mini-books away from soaking moisture; re-wax copper finishes seasonally. Provide polishing cloths and instructions for gentle cleaning. Emphasize that marks from wear can form a beautiful patina, echoing the way book spines crease through loving use.
Project Plans for Different Skill Levels
Beginner: Map Dome Pendant
- Cut a circle of map print to match a 25 mm bezel.
- Seal, set, and dome with UV resin.
- Add a simple chain with a lobster clasp.
Intermediate: Stamped Cuff with Hidden Message
- On the outside: title abbreviation and tiny star dividers.
- On the inside: a short, personal line, darkened with patina.
- Curve on a mandrel, sand edges silky smooth.
Advanced: Miniature Book Locket
- Fabricate a silver box frame with a hinge and magnetic closure.
- Set a rock crystal window; beneath it, a stack-laminated wood-and-paper “page” core.
- Engrave spine bands and inlay a gold title panel.
Typography and Micro-Layout for Tiny Spaces
Tiny text demands discipline. Prioritize x-height, letter spacing, and ink spread. Laser-printing on high-resolution settings or using archival pigment ink yields crisper lines. Avoid condensed fonts unless the concept requires tension; generous counters and open apertures improve micro-scale clarity. Put readability first—good legibility conveys the message faster than any ornament.
Combining Media: Hybrid Pieces with Texture and Light
Some of the most evocative pieces mix media. Imagine a hammered bronze bookmark with a stitched leather tassel and a resin-set ex libris seal at the end. Or a layered pendant: a thin sterling frame holding a translucent vellum quote over a foiled paper sky, glowing when backlit. Wood warms cold metal; paper softens glass; leather grounds the whole composition. When you design hybrids, plan assembly order so adhesives and finishes don’t interfere with each other’s cure times.
Finishing Workflow and Quality Control
- Sequencing: Sand and polish metal before adding paper. Seal paper before any wet processes nearby. Install stones or domes last.
- Edge discipline: Chamfer edges lightly to prevent catching on fibers and skin.
- Hardware integrity: Solder closed jump rings for stress points; use split rings only where appropriate.
- Stress tests: Tug-test connections, wear-test prototypes for a day, check for twisting and balance.
- Documentation: Note materials, techniques, and finishes in a maker’s log. If you sell, this record underpins your guarantee and informs future repairs.
Packaging, Gifting, and Storytelling
Wrap the piece like a prologue. A small card describing materials and inspirations lets the wearer retell its origin. Include a certificate that names the text source, printing method, and care tips. Hand-stamp the box with a custom library mark; tie it with linen thread and a wax seal in the color family of the piece. The unboxing becomes the first page the recipient turns.
Pricing, Editions, and Custom Commissions
Budget time for design, bench hours, consumables, prototyping, finishing, and packaging. Limited editions suit pieces that require specific texts or specialty materials; open editions fit modular designs like stamped cuffs. Offer customization tiers: client-supplied quotes (cleared for use), initials on spines, birthstones on bookmarks, or engraved dedications inside lockets. Keep a queue and realistic timelines; under-promise, over-deliver.
Safety, Comfort, and Studio Practice
- Ventilation: Cure resin in a fume-controlled area; wear gloves and eye protection.
- Heat and flame: Use a fire extinguisher, tie back hair, and keep a clear soldering surface.
- Lead-free solders and nickel-aware findings: Protect wearers with sensitive skin.
- Ergonomic bench setup: Reduce fatigue so your hands can render detail day after day.
Troubleshooting Common Issues
- Paper darkens under resin: Seal more thoroughly or switch to a barrier coat like shellac; test on offcuts.
- Resin bubbles persist: Warm components, pour in thin layers, use a brief torch pass, and protect from drafts.
- Stamped text looks crooked: Use a jig and tape guides; mark each letter’s landing; practice consistent blows.
- Mini-book warps: Align paper grain, press under even weight, and avoid over-gluing.
- Metal scratches post-polish: Use separate buffs for different compounds; clean the bench of grit; store finished parts in soft pouches.
Inspiration Sources and Motif Libraries
Mine the margins: chapter ornaments, drop caps, printer’s flowers, illuminated initials, and binding tools like sewing frames or nipping presses. Botanical illustrations work beautifully as translucent overlays. Cartographic flourishes—rhumb lines, compass points, and sea monsters—become pendants and brooches. Borrow structure from book mechanics: hinges for motion, clasps as metaphors for closure, hollow forms for secrets.
From Keepsake to Heirloom
What elevates a piece from charming trinket to heirloom is your attention to the invisible: file strokes smoothing a hidden corner, the selection of a pH-neutral adhesive, a chain matched to pendant weight. Treat each decision as part of the storytelling. If the book behind the piece shaped a life, let your materials honor it for decades. Archival choices and careful finishes invite future generations to discover an echo of the original text, like finding a pressed leaf between old pages.
A Maker’s Reflection
Jewelry for readers is quiet work. It asks you to listen—to the cadence of a sentence, the lilt of a serif, the hush of a turning page—and then translate that into metal and fiber. When someone reaches for a pendant before leaving home the way they reach for a dog-eared paperback on a train, you’ll know you’ve succeeded. The piece has become a portable chapter, a companion. In it live choices of symbolism, the comfort of good ergonomics, and the promise of archival care; on it time will write a gentle patina. Anchor your work in provenance and thoughtful sustainability, protect words with materials chosen for durability, and compose with attention to legibility. Above all, let the narrative lead. When story and form lock together, the result is not just jewelry—it’s memory, worn close to the heartbeat.
