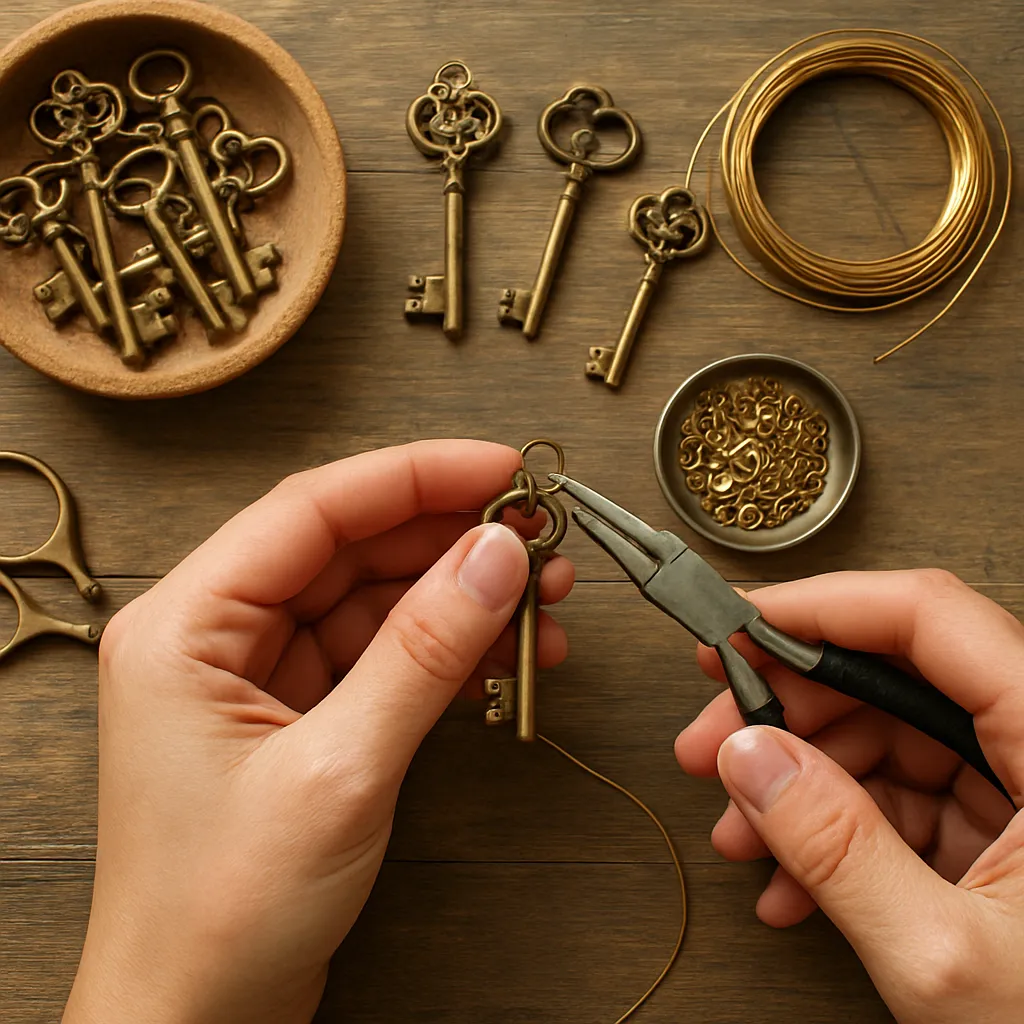
Old keys carry stories. Each nick came from a turning hand, each worn tooth once guarded a drawer of letters or a workshop door. Turning those little relics into wearable art invites you to preserve memory while making something beautiful and modern. This guide walks you through selecting, cleaning, designing, and assembling jewelry from vintage keys so you can transform ordinary hardware into heirloom pieces that honor history as much as they celebrate making.
Why Vintage Keys Make Exceptional Jewelry
Keys straddle the line between sculpture and tool. They are small yet architectural, gridded with teeth, stamped with makers’ marks, and cast in alloys that age gracefully. Their silhouettes are instantly recognizable, but their details vary widely—from delicate skeleton shafts to chunky modern blanks—offering a natural vocabulary for pendants, earrings, bracelets, and brooches.
Beyond looks, keys embody layered meanings: guardianship, secrets, thresholds, and permission. A pendant made from a desk key carries the idea of industriousness. A locket-style key becomes a metaphor for loyalty. As wearable talismans, they reward attention; they feel purposeful, not merely decorative. And thanks to their durability, they’re perfect foundations for experimentation, from forged metal overlays to beadwork and leather wraps.
Working with reclaimed keys also supports sustainability and mindful making. Instead of purchasing fresh materials, you give renewed life to objects headed for the junk drawer or landfill. That act—choosing to design within the limits of an existing form—often sparks more original ideas than starting with a blank sheet ever could.
Finding and Selecting Vintage Keys
Where to Source
- Flea markets and estate sales: Dig through tool bins and cigar boxes; ask vendors if they keep keys separate.
- Architectural salvage yards: Old door hardware often includes skeleton keys and ornate barrel keys.
- Antique shops and auctions: Curated selections, sometimes pricier but historically interesting.
- Locksmiths: Many keep odd lots of decommissioned blanks and unclaimed keys.
- Online marketplaces: Search by era (Victorian skeleton, early 20th-century cabinet, hotel keys) and material (brass, steel, nickel silver).
What to Look For
- Material: Brass and nickel silver resist corrosion and take finishes well. Steel is strong but heavier and may rust without sealing.
- Scale: Small cabinet and clock keys make great earrings; larger house keys become bold pendants or brooches.
- Surface: Look for interesting stamps, numbers, monograms, or makers’ shields. These small marks anchor narrative.
- Integrity: Avoid keys that are cracked, deeply bent, or flaking chrome. Moderate wear is charming; structural damage is not.
- Duplicates: Pairs of similar keys simplify earring and cufflink projects.
On History and provenance
If you can learn where a key came from—an old hotel, a typewriter desk, a theater prop room—record that story. Even a few notes add value and connection. Consider attaching a small tag or including a card with each finished piece recounting the tale; buyers treasure narrative transparency as much as sparkle.
Preparing Keys: Cleaning, Stabilizing, and Finishing
Initial Cleaning
- Degrease: Soak keys in warm water with dish soap; scrub with a soft brass brush or old toothbrush.
- Remove rust: For steel, use fine steel wool (0000) or a fiberglass pen. For heavy rust, a brief soak in a 1:1 vinegar-water solution, then neutralize in baking-soda water, dry thoroughly.
- Descale green crust: A cotton swab with diluted lemon juice can lift verdigris on brass. Rinse and dry immediately.
Protecting Original patina
Not every key should gleam. Decades of oxidation map light and shadow across the surface; that depth is called patina. If you love it, stabilize gently: wash only, dry completely, then seal with microcrystalline wax. Buff to a soft glow. Minimal intervention respects age while preventing further tarnish transfer onto skin or clothing.
Shaping and Drilling
- Edges: Soften sharp corners with fine files. Work away from yourself; test with your fingertip.
- Holes: Use a center punch to prevent bit walking. A 1.5–2.0 mm bit suits jump rings; lubricate with beeswax, drill at medium speed.
- Heat control: Metals get hot fast. Dip in water between passes; hold with locking tweezers to protect fingers.
Allergy Considerations
Nickel can irritate some wearers. If you’re unsure of alloy content, add a barrier: clear lacquer on contact points, or mount keys to hypoallergenic backings (titanium, niobium, surgical steel). For necklaces, keep the key on a chain long enough that it rarely touches skin directly.
Design Principles for Balanced, Wearable Pieces
Start With the Silhouette
Turn the key in your hand and notice its negative spaces: bow holes, notches, shafts. Sketch three quick outlines before you add any embellishment. Ask what the key already suggests—an arrow, a leaf, a gateway. Let the existing geometry guide your composition.
Scale, Weight, and ergonomics
- Earrings: Keep each under 7–9 grams for comfort. Skeleton keys can be hollow and deceptively light; modern house keys may be dense. Balance pairs by weight, not just size.
- Necklaces: Center of mass matters. If a key wants to flip, add a counterweight (a bead or charm) near the bail or shift the attachment point.
- Bracelets: Hands move constantly; avoid protruding spikes. File teeth, round corners, test with a sweater to ensure it won’t snag.
Color and Contrast
Brass glows warm; nickel silver reads cool; steel sits neutral. Mix metals intentionally: two warms and a cool can feel cohesive if one tone dominates. Introduce soft color using enamel, resin, or bead accents, but preserve enough metal to keep the key identifiable. Controlled oxidation—darkening recesses—emphasizes stamps and ornament while leaving raised areas bright.
Techniques: From Simple Assemblies to Signature Methods
Cold Connections
- Jump rings: Use properly sized rings (16–18 ga for pendants) and close with a firm twist, not a pull.
- Rivets: Drill matched holes through key and element; set tube or wire rivets with gentle taps. Great for attaching plates, bezels, or tags without heat.
- Screws and micro-bolts: Industrial look, fully reversible for cleaning or redesign.
Elegant wire-wrapping
Wire embraces without piercing. Use dead-soft or half-hard wire (18–22 ga) in copper, brass, sterling, or plated. Anchor wraps through the key’s bow hole or around the shaft; create framed cages for stones or tiny vials. Strive for tension and clarity—fewer, cleaner passes look more refined than dense tangles. Tuck cut ends securely and burnish smooth.
Adhesives and Composites
- Two-part epoxy: Strong, gap-filling; ideal for cabochons or attaching small plates. Mix thoroughly; clamp while curing.
- UV resin: Cures on demand under a lamp; perfect for embedding tiny watch parts or dried flowers within the bow’s opening. Seal backings to prevent leaks.
- Cyanoacrylate: Quick tack, but brittle; use sparingly for temporary positioning or non-structural details.
Finishes and Patinas
- Heat tinting: On steel, controlled heat can create straw-to-purple tones; practice on scrap, avoid overheating.
- Chemical patinas: Commercial brass browns or liver-of-sulfur alternatives produce depth. Neutralize, rinse, dry, and wax.
- Paint and enamel: Thin coats preserve detail; contrast matte and gloss. Cold enamel (epoxy) is durable; baked enamel requires proper ventilation and metal prep.
Soldering (Optional, Advanced)
Soldering opens doors: custom bails, frames, and bezels. But heat can destroy lacquer, warp thin keys, or release old plating fumes. If you solder, strip finishes first, use proper flux and ventilation, and test on expendable keys. Many artisans build complex looks entirely with cold methods to honor the object’s age.
Core Projects to Build Skill
Pendant with Framed Story
- Choose a brass skeleton key with a large bow opening.
- Cut a tiny paper fragment (map, ledger line, music) to fit the opening; seal both sides with archival varnish.
- Create a bezel-like wall using 22 ga wire around the opening; secure with two discreet rivets through existing holes or with epoxy.
- Flood the frame with UV resin to protect the paper; cure, sand edges, and dome a final thin layer.
- Attach a handmade bail and hang from a 1.5 mm rolo chain.
Result: a literal window into history anchored by the key’s form.
Layered Bracelet Focal
- Flatten a small steel key gently with a jeweler’s hammer between two brass plates to avoid marring details.
- Rivet it to a textured copper strip sized for the wrist; round corners and curve the strip on a mandrel.
- Add side loops and a clasp; wrap selective sections with thin leather lacing for comfort and color.
Earrings from Matching Blanks
- Find two similar cabinet keys.
- Drill top holes precisely centered; add delicate bead drops for equal weight.
- Attach to niobium ear wires; confirm lengths match when dangling.
Brooch with Botanical Motif
- Trace the key onto thin brass sheet; saw out leaf shapes that echo the key’s bow.
- Texture leaves with a rolling mill or hammer; rivet them along the shaft.
- Attach a quality pin back. Oxidize recesses; polish highlights.
Personalization and Meaning
Numbers, Letters, and Marks
- Metal stamps: Add initials, dates, or short words on flat shafts. Support on a steel block; one confident strike per character.
- Engraving: Hand or rotary engraving allows curves and flourishes; practice spacing to keep things legible.
- Found typography: Sometimes the key already carries initials or hotel numbers; feature them rather than covering.
Color Through Mixed Media
- Silk ribbons: Thread through bow openings to soften industrial edges.
- Seed beads: Ladder-stitch a sleeve around a shaft for texture.
- Leather: Punch and lace for bracelets; edge-dye to match metal tones.
Embedded Miniatures
The openings in keys are perfect stages for tiny worlds. Press-dry petals, watch cogs, postage stamp corners—set them with resin. Keep scale disciplined: one focal element, not a clutter of many, reads as intentional and refined.
Hardware Choices: Chains, Clasps, and Findings
- Chains: Rolo and cable chains complement geometric keys; snake chains feel sleek but can twist a pendant. Choose thickness to match the key’s weight.
- Bails: A wide, fixed bail prevents flipping; a simple jump ring keeps things minimal. Hand-forged bails echo the handmade story.
- Clasps: Lobster clasps are secure; toggles add style but need correct weight to hang properly.
- Earring wires: Use hypoallergenic metals; a tiny coil or bead adds detail without bulk.
Safety, Care, and Longevity
- Eye protection: Always wear safety glasses when drilling, cutting, or wire-brushing.
- Ventilation: Patinas, resins, and adhesives require fresh air; follow manufacturer guidance.
- Dust control: Collect metal dust with a damp towel; wash hands before eating or touching your face.
- Finish durability: Seal patinas with wax or lacquer; retouch as needed. Include care cards: avoid prolonged moisture, perfume, and chlorine.
Design Variations That Stand Out
Key and Coin Assemblages
Pair a small key with a smooth, drilled coin from the same decade. The roundness of the coin balances the linearity of the key; together they frame time and place. Rivets maintain visual honesty and allow disassembly for cleaning.
Resin Windows and Night Skies
Paint the inside of a bow window midnight blue, then embed a brass star or tiny moon sliver with resin. The negative space becomes a miniature cosmos, and the key’s shape suggests a doorway to it.
Textured Wraps and Woven Details
Wrap shafts with thin wire and add occasional seed pearls; weave waxed linen through bow openings. These textile gestures soften metal and invite touch.
The Story Layer: Meaningful Motifs and symbolism
Keys offer narrative shortcuts: a graduation gift can include the recipient’s birth year stamped discreetly. A wedding pendant might bind two small keys together with a forged ring—equal partners unlocking the same future. For memorial pieces, a single small key with a handwriting engraving creates quiet gravity. Let your client’s language lead the design; listen for metaphors they already use about doors, choices, and turning points.
Respecting the Object: Ethics of upcycling
Reusing materials is powerful, but do so responsibly. Never repurpose a key still tied to a working lock. Avoid items with cultural or religious significance unless you have permission and context. Credit original makers when their marks remain legible. Consider the ecological costs of new chain and packaging; recycled metals and paper help your practice align with sustainability in action, not just sentiment.
Building a Workshop Flow
- Batch prep: Clean and drill a dozen keys at once to streamline production.
- Design trays: Group keys by shape and tone; pair with candidate chains, stones, and findings.
- Documentation: Photograph each key before modification to archive its baseline state for your records and the buyer’s story card.
- Quality checks: Tug test every connection; file every burr; wear-test prototypes for a day.
Pricing, Photography, and Presentation
Pricing Foundations
- Track time: Design, fabrication, finishing, and admin hours.
- Materials: Keys may be inexpensive, but chains, clasps, and resins add up; include consumables.
- Overhead and margin: Cover tools, studio, and future growth; pay yourself for your craftsmanship.
Photography Tips
- Light: Soft, directional light reveals texture; avoid harsh reflections on polished metal.
- Scale: Include a hand or a coin once per listing to communicate size honestly.
- Context: Style with old paper, wood, or linen to echo the object’s era without stealing attention.
Packaging With Purpose
Use recycled boxes and cotton or wool inserts. Add a small card recounting the key’s provenance if known, plus care instructions. A wax seal or hand-stamped monogram nods to the world of letters, locks, and passages that keys inhabit.
Troubleshooting and FAQs
- Key flips on the chain: Shift the bail to a balance point or add a small counterweight charm.
- Resin bubbles: Warm resin slightly, pour in thin layers, and pass a heat gun quickly at a safe distance.
- Uneven patina: Clean thoroughly before applying; degrease fingerprints; build color in cycles with neutralization between.
- Earrings feel heavy: Switch to hollow skeleton keys, shorten dangles, or distribute weight with airy beadwork.
- Nickel itch: Add a barrier coat, swap to hypoallergenic findings, or back the key on a leather pad where it touches skin.
Advanced Explorations
Hybrid Metals and Inlays
Saw a thin copper moon to inlay on a nickel-silver key. Use inlay adhesive or low-temp solder with a heat sink clamp. Finish with selective oxidation to amplify contrast, then wax.
Miniature Bezels on Keys
Braze a small bezel cup onto a broad bow, set a rose-cut stone, and rivet a backing plate for security. The stone becomes the “lock,” the key its keeper—an object lesson in playful logic.
Moving Parts
Add a tiny hinge or swivel to let a charm rotate within the bow. Moving elements invite interaction and make the jewelry feel alive without sacrificing durability.
Teaching, Exhibiting, and Community
Key jewelry workshops engage beginners: the object is familiar, the results fast, and the stories flow. Provide pre-cleaned keys and a menu of techniques (wrapping, riveting, resin). Exhibitions benefit from displays that reference doors, drawers, and maps. Invite viewers to consider what each piece might have once opened—and what it might unlock now.
Care and Conservation for Heirloom Quality
- Storage: Keep pieces in soft pouches; separate metals to reduce mutual abrasion.
- Cleaning: Wipe with a soft cloth after wear; refresh wax occasionally. Avoid dips that strip patina.
- Service: Offer lifetime tightening of connections and finish refreshes; this extends relationships as much as objects.
A Practical Workflow: From Box of Keys to Finished Collection
- Curate: Sort by metal, size, and narrative potential; tag favorites with quick concept notes.
- Prep: Clean, deburr, and drill standardized holes for bails or links.
- Prototype: Build one of each design idea, then refine attachment points and lengths through wear tests.
- Produce: Batch in small runs for consistency, but keep variations to preserve uniqueness.
- Present: Photograph, write stories, and package with care cards; launch as a coherent series with a unifying theme.
A Maker’s Mindset
Working with vintage keys is a dialogue with time. You bring skill, patience, and imagination; the key brings form, history, and suggestion. The most compelling pieces feel inevitable, as though they were waiting in the object all along. Notice what the metal wants to do—the curve it suggests, the shadow it throws, the way a ribbon tucks through a bow. Build on those clues, and let restraint be part of your style.
Above all, enjoy the search. Let one flea-market find spark a chain of experiments—new finishes, quieter attachments, braver color. As you hone your eye, you’ll spot potential in unlikely shapes, and your bench will fill with small, purposeful mysteries ready to become talismans for the next wearer. That is the quiet power of keys: they invite us to keep turning, to keep looking for what opens next.
