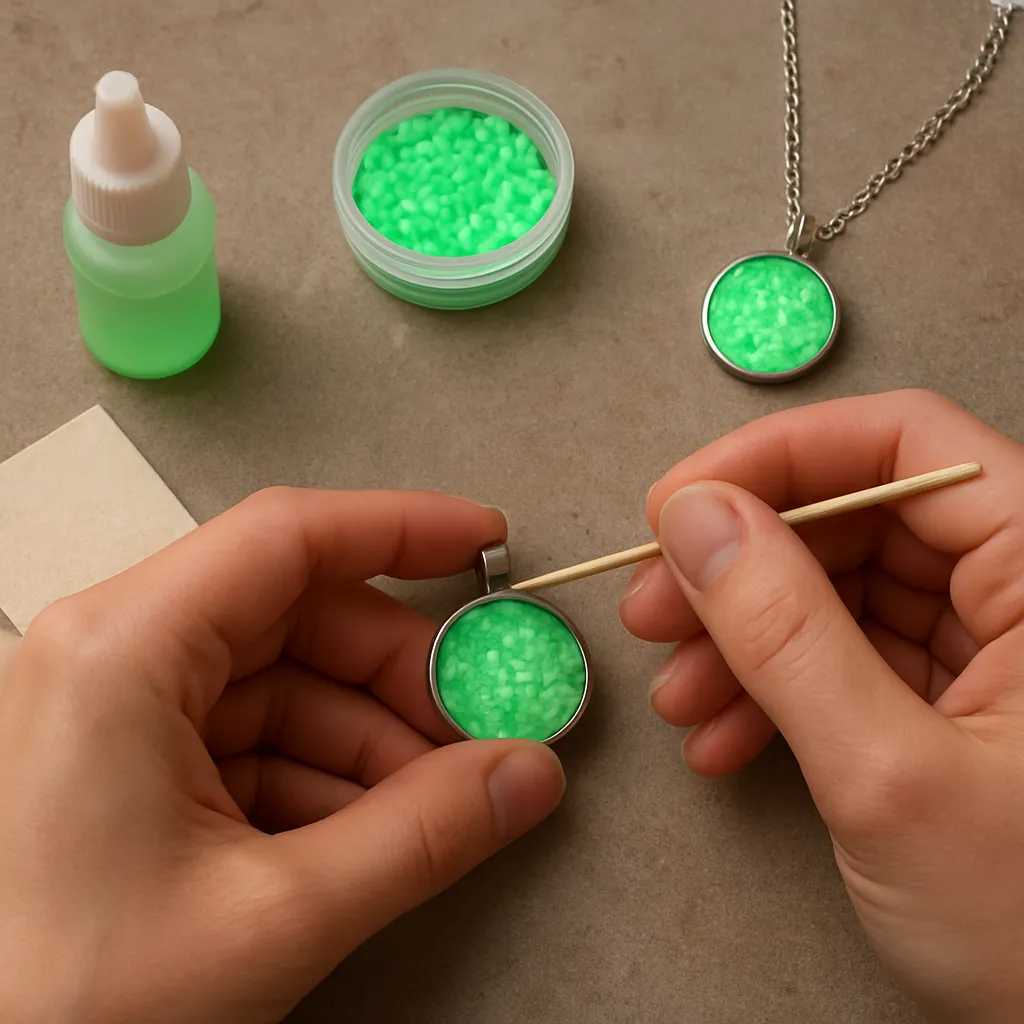
Glow-in-the-dark jewelry bridges science and craftsmanship, turning light into a wearable memory that lingers after dusk. Whether you want a moonlit pendant that stores daylight, a constellation ring that shimmers under a blacklight, or beadwork that softly pulses at a music festival, the core idea is simple: a pigment is charged by light and gradually releases that energy as a gentle shine. Master a few techniques, and you can fold this effect into everything from minimal studs to elaborate, heirloom-grade pieces.
The glow behind the sparkle: how it works
At the heart of every luminous piece is a class of pigments that exhibit phosphorescence. These pigments absorb energy from a light source—preferably bright natural daylight or a UV lamp—and then release it slowly, creating a visible after-effect. The most effective modern pigments are based on strontium aluminate, which replaced older zinc sulfide formulas thanks to a dramatically brighter and longer-lasting glow. In practice, that means a pendant charged for a minute or two under a strong LED can glow for hours, with the first 20–40 minutes being the most intense.
Glow pigments come in several colors: green is generally the brightest, followed by blue and aqua; yellow and orange are moderate; pink and purple are softer and may require optimization for visibility. Particle size also matters: larger particles glow more strongly but can feel gritty in thin coatings; finer particles disperse smoothly but may deliver a subtler effect. For jewelry, balance brightness with finish quality—coarser grains are fantastic in resin inlays where a thick, clear binder can encapsulate them; finer grains are better for painted or clay-based surface treatments.
Charging sources influence performance. Sunlight or a 365–405 nm UV flashlight works best. Indoor LEDs and incandescents work, but charge more slowly and less fully. Pre-charging a piece before a show or a night out is a simple way to ensure that first bright phase impresses, while reminding wearers that different environments will produce different intensities.
Materials and tools you’ll actually use
Stocking a luminous bench is straightforward. Start with a few proven essentials and expand as your style matures.
- Pigments: High-grade strontium aluminate in green and aqua for brightness, plus a favorite accent color. Choose both coarse and fine grades for different applications.
- Binders and mediums:
- Epoxy resin (two-part, clear, doming or deep-pour depending on project depth)
- UV-curing resin for fast, thin layers and bezels
- Polymer clay for beadwork and sculptural settings
- Acrylic medium or clear varnish for painted effects and topcoats
- Jewelry-grade epoxy adhesive for setting stones, cabochons, and hardware
- Findings: Stainless steel, titanium, or gold-filled for skin-safe wear; quality jump rings, clasps, earring posts, and pin backs.
- Molds and bezels: Silicone molds for resin; open-backed bezels for UV resin; metal bezels for stability and a finished look.
- Tools: Silicone mixing cups, stir sticks, precision scales, pipettes, tweezers, flush cutters, round-nose pliers, fine files.
- Finishing: Micromesh or high-grit sandpapers (1000–5000+), polishing compounds, soft cloth wheels, and a clear topcoat compatible with your binder.
- Safety and work discipline: Nitrile gloves, respirator suitable for organic vapors when working with resin, good ventilation, and protective eyewear when sanding.
Ratios matter. For resin, a common starting point is 20–30% pigment by weight relative to the mixed resin; for very deep pours, use the lower end to keep viscosity manageable and avoid excessive settling. In polymer clay, too much pigment can cause crumbling—mix a bit at a time until you reach a saturated but workable blend, often around a teaspoon per 28–56 g (1–2 oz) of translucent clay. For paint and varnish, work in thin, well-sealed layers to avoid a chalky surface.
Core techniques: from simple charms to heirloom inlays
Below are reliable build methods that translate across styles and skill levels. Each highlights a different way to support and showcase glow pigments.
Resin bezel pendants
- Prepare the bezel: Clean with isopropyl alcohol; if open-backed, apply a strong, transparent tape to create a temporary base, burnishing edges to prevent leaks.
- Mix resin: Combine resin and hardener by manufacturer instructions; allow bubbles to rise. In a second cup, pre-mix pigment with a small portion of resin for a lump-free paste, then blend into the main batch.
- Pour in layers: Add a thin clear base for depth, then a pigmented layer. If embedding inclusions (metal shapes, mica flakes), position them after partial gel to avoid sinking.
- De-gas and set: Gently warm the surface (briefly with a heat gun held at distance) to pop bubbles. Cover against dust and allow to cure fully. For UV resin, use thin layers and cure with a 365–405 nm lamp.
- Finish: Sand drips, then apply a doming coat for a lens-like finish. Add a protective topcoat if the piece will see heavy wear.
Polymer clay beads with luminous cores
- Condition translucent clay thoroughly for a smooth, bubble-free base. Split the batch: one portion stays clear; the other is tinted with glow pigment.
- Form a small core bead from the pigmented blend. Wrap in a thin jacket of translucent clay to act like a diffuser, softening texture and amplifying glow.
- Pierce holes with a skewer or needle tool, rotate slightly to prevent distortion, and smooth seams with a fingertip dipped in alcohol.
- Bake per clay instructions (usually 110–130°C/230–266°F, 15–30 minutes depending on size). Overbaking can discolor; monitor closely.
- Cool, sand to refine, and burnish or glaze. A thin varnish can enhance surface clarity, improving visibility of the glow core.
Shrink-plastic eclipse charms
- Lightly sand one side of clear shrink film. Paint a thin layer of clear medium mixed with glow pigment; let dry.
- Draw or stamp your design on the opposite side. Punch a hole for a jump ring before shrinking.
- Shrink in a preheated oven per instructions; flatten immediately under a silicone mat.
- Seal with a clear gloss spray or brush-on varnish to lock in the pigment and improve clarity.
Inlaid cabochons for rings or bracelets
- Carve or select a cabochon with a shallow recess. Alternatively, create a recess in polymer clay or wood and harden/seal the base.
- Mix a slightly thicker batch of resin and pigment to reduce settling. Spoon into the recess, level, and cure.
- Sand flush and polish the surface so the inlay reads as one smooth plane with the host material.
Fabric and knotting with luminous accents
- Use glow-infused thread to outline motifs in macramé chokers or wrap it around cord cores for striped effects.
- Seal knots with flexible fabric glue. Avoid thick pigment clumps that can flake under flex.
Design strategies for brightness and style
Think of glow as a hidden layer of personality that complements daylight aesthetics. Here are choices that maximize the night effect without compromising daytime beauty.
- Contrast is king: Dark bezels and frames act like a picture frame for the glow, making it appear brighter to the eye.
- Depth equals drama: A millimeter or two of clear resin above the pigmented layer acts as a lens, enhancing dimensionality and perceived brightness.
- Selective exposure: Focus glow pigment where light can enter—backs and edges of opaque settings can block charging. Consider open-backed designs or translucent overlays.
- Layered color: Sandwich a thin, intense glow layer between translucent, tinted layers for a soft gradient that still delivers a strong night presence.
- Patterning: Use stencils or decals to create constellations, botanical silhouettes, or geometric grids that reveal themselves in the dark.
- Wearer interaction: Add small, touchable textures or engraved symbols that are easy to find in low light—practical and poetic.
Safety, workability, and the long game
Glow pigments are generally inert and safe when used correctly, but your binders and sanding steps need respect. Wear gloves; keep the studio ventilated; use a respirator suitable for the materials you’re sanding. Avoid using radioactive light sources; modern pigments provide ample brightness without exotic hazards.
Storage matters for consistency. Keep pigments dry in airtight jars; moisture can cause clumping. Store resins in a stable, room-temperature environment to reduce yellowing, and avoid direct sunlight on uncured work. For UV resins, cap bottles quickly and keep them away from windows and lamps that can trigger premature curing.
Maximizing durability comes down to good adhesion, proper cure times, and suitable topcoats. Avoid shortcuts: resin that feels “hard enough” can still be in an early cure stage; give it the full time recommended before sanding or wearing. For jewelry that encounters sweat and lotions, domed surfaces tend to resist micro-scratches better than perfectly flat planes, and periodic polishing keeps clarity high.
Troubleshooting: clear fixes for common issues
- Surface bubbles: Warm your resin slightly before mixing; stir slowly; exhale gently over the surface or use a controlled heat source. In UV resin, shorter light bursts at first can reduce bubble lock-in.
- Settling pigment: Thicken the medium slightly, pour in thinner layers, or use intermittent stirring for the first 5–10 minutes of gel time on deep pours.
- Chalky finishes: Overly high pigment loads can create matte, delicate surfaces. Back off the ratio or add a clear cap layer to restore gloss and protect particles.
- Yellowing over time: Choose resins with UV inhibitors, use topcoats with UV protection, and design with warm metals or tints that harmonize with the inevitable patina.
- Weak glow: Verify pigment quality, increase exposure to a strong light source, reduce dye or mica additions that block light, and ensure the glow layer isn’t buried too deeply under opaque elements.
- Poor adhesion in mixed-media pieces: Lightly scuff smooth metals or plastics, degrease thoroughly, and use the right primer or adhesive.
Project walkthrough: a moon phase pendant that shines
This project pairs clean geometry with high impact and teaches layer control, bubble management, and optical depth.
- Template: Sketch eight lunar phases in a narrow arc to fit a 40–50 mm bezel pendant.
- Base layer: Pour a 1–2 mm clear resin layer; cure until firm but still slightly tacky.
- Masking: Apply small, circular masks where glow moons will sit. Airbrush or brush a smoky ink wash around them to create a night-sky vignette; let dry or seal if needed.
- Glow pour: Remove masks and spoon a thickened glow-resin mix into the circles, slightly underfilling each well to leave space for a final dome.
- Stars: Toothpick-dab tiny specks of bright glow mix in the background for scattered stars; vary size for realism.
- Final dome: After full cure, add a crystal-clear dome. Tilt the piece while wet to coax a perfect meniscus, then dust-cover and cure.
- Hardware: Attach a bail and chain, choosing a dark finish to frame the night-sky effect.
Finishing touches: polishing, protection, and comfort
Finishing transforms a good idea into a professional piece. Step through grits patiently, rinse often, and check under a raking light to catch scratches before moving on. Polishing compounds create a crisp window that lets the glow read at full strength. If your design calls for a soft sheen rather than high gloss, a microcrystalline wax can be buffed to a gentle luster that still protects edges.
Skin comfort is as much a design choice as an engineering one. Favor smooth contact surfaces, rounded edges, and posts or hooks made from metals less likely to irritate. If you sell, label metals clearly and consider offering a hypoallergenic option by default.
Water resistance varies. Cured resin is splash-proof; fully submerged wear (showers, pools) accelerates wear on metal finishes and topcoats. Communicate realistic care expectations with your buyers; they will reward honesty with trust.
Charging, color mixing, and optical tricks
Color and light are your painter’s palette. Keep the bright greens and aquas dominant in the glow layer to power the effect, then tint the clear overcoat with transparent dyes for interesting daylight color shifts. Thin white layers in front of a glow bed can scatter light and improve visible size at night, while too much opaque pigment will block charge. For dramatic on/off reveals, stencil opaque enamel patterns over a bright glow layer so designs emerge only when the lights drop.
Always test before committing. Paint small tiles with your planned stack: substrate, glow mix, tint, topcoat. Charge them for a set time and compare brightness over 5, 15, and 60 minutes. Notes from these tests become your pattern library, saving hours later.
Creative variations to expand your repertoire
- Geode slices: Use coarse glow pigment near the center and finer pigment at the edges; blend with translucent tints and metallic leaf for a natural, crystalline feel.
- Compass and wayfinder pendants: Engrave a metal disk, backfill with glow resin, and polish flush. Pair with a matte black chain for high contrast.
- Mini dioramas: Layer tiny silhouettes—trees, mountains, spacecraft—between clear resin layers, with a glow sky behind. A shallow bezel and careful depth planning are key.
- Bead embroidery: Stitch glow cabochons onto felt, surround with seed beads, and back with leather. Add a touch of reflective bead types to mirror the glow.
- Marquetry in wood: Inlay thin channels with glow resin along carved veins in wooden pendants; seal the wood first to prevent bleed.
Sustainability and mindful making
Thoughtful material choices reduce waste and extend the life of your work. Favor long-lasting metals, refillable or repairable designs, and timeless forms that invite re-wear. Leftover resin can be poured into small charm molds or used to pre-make cab backers for future projects, avoiding excess. Choose packaging that protects pieces while minimizing plastic. Make it easy for clients to request refurbishing, from a fresh dome coat to a clasp replacement—each repair keeps a story alive.
Glow pigments last a very long time if protected from abrasion and contamination. That longevity complements a studio ethic that values repair and reuse. When you speak to clients about care, you’re also speaking about sustainability—the idea that beauty should be durable, maintainable, and considerate of resources.
Photographing and presenting luminous work
Photos sell the magic. For glow shots, pre-charge pieces and shoot in a dim room with a tripod. Balance a short exposure to retain highlight detail; if your camera over-brightens, the piece will look neon rather than beautifully radiant. Include a daylight photo and a side-by-side to set expectations. In person, keep a small UV flashlight at your booth so buyers can “charge and see.” Care cards with simple charging tips encourage long-term enjoyment.
Care, cleaning, and everyday use
Most luminous jewelry benefits from the same gentle care as standard costume or artisan pieces. Wipe with a soft cloth after wear; avoid harsh solvents or abrasives. Store away from prolonged heat and direct sunlight to minimize resin yellowing over years. If a finish dulls, a light polish or a new topcoat can restore clarity; many artists offer refurbishing as part of their brand promise.
Frequently asked questions
- How bright is it, really? Brightness depends on pigment quality, color, load, layer thickness, and charging. Green and aqua are strongest; a one- to two-minute UV charge can produce an impressive first half hour of glow with a gentle taper thereafter.
- Is it safe on skin? Quality pigments and fully cured binders are considered safe for normal wear. Avoid powdered pigment contact with eyes or lungs; seal all surfaces; and choose skin-friendly metals for posts and chains.
- Will water ruin it? Occasional splashes are fine; remove before swimming or showers for best longevity of metal finishes and topcoats.
- Can I mix glow pigments with mica or dyes? Yes, in moderation. Transparent dyes and very fine mica can add depth, but too much can block charging light.
- How long will the pigments last? Strontium aluminate pigments can perform for many years when protected from abrasion and contamination. The binder and topcoat typically determine the service life, not the pigment.
Your first collection: a practical roadmap
Plan three complementary pieces that share a theme—say, tides and starlight. Build a resin bezel pendant with a layered sky, a pair of polymer clay studs with embedded glow cores, and a bracelet with two or three small inlays. Standardize your hardware finishes and chain lengths to streamline assembly. Test every mix on scraps, then scale to production. Package each with a minimalist card explaining how to charge the glow and how to care for the finish. The set tells a story in daylight and whispers a second story at night—exactly the duality that makes luminous jewelry so compelling.
From craft to keepsake
Glow-in-the-dark jewelry rewards experimentation. As you refine ratios, master bubble control, and design for both daytime and night, you’ll discover combinations that feel uniquely yours. A well-made piece captures more than light; it captures the memory of where that light came from—a sunny morning, a gallery opening, a festival dusk. With careful material choices, clean technique, and a focus on comfort and longevity, your work will deliver not just brightness but lasting delight in every soft, quiet afterglow that follows.
Glossary of useful concepts for makers
- Glow pigment: Inorganic crystals that absorb and later emit light; strontium aluminate offers the strongest performance for jewelry.
- Binder: The clear or translucent medium that holds pigment and adheres it to a surface—resins, varnishes, clays.
- Charge: Exposure to a light source that excites electrons in the pigment, enabling emission in the dark.
- Emission color: The hue of light emitted; green and aqua are most efficient.
- Encapsulation: Physical protection of pigment within a binder or beneath a clear coat for enhanced longevity and polish.
Build on these foundations, and you’ll be able to integrate precise optics with expressive form. From a scientific standpoint, it’s disciplined material design; from an artistic one, it’s storytelling with light. Anchor each project with sound technique—clean surfaces, measured ratios, thoughtful encapsulation—and finish with care, and your luminous pieces will stand up to daily wear and admiring eyes alike. Over time, your bench notes will accumulate: which lamp charges best, which grit sequence clears fastest, which bezel depths make the brightest window. That evolving notebook is your compass, guiding you deeper into the craft of wearable luminescence—and the small, wondrous revelations it brings when the lights go down.
