Making jewelry with children blends play, craft, and gentle skill-building into a single, colorful activity. Little hands learn patterning, counting, and knotting while shaping something they can wear with pride. Parents and educators appreciate that the process is calm, focused, and easy to scale for different ages and abilities. With smart planning, careful material choices, and steady supervision, children’s jewelry can be both joyful and responsibly designed, turning beads and cords into keepsakes that are safe, practical, and expressive.
Why Make Jewelry With Kids?
Children’s jewelry-making creates a quiet pocket of concentration in a day full of movement. Stringing beads and tying knots develop fine-motor coordination, hand–eye accuracy, and patience. Patterns encourage early math concepts like sequencing and repetition. Color choices open conversations about contrast, harmony, and mood. Most of all, the finished piece becomes a wearable reminder of effort and confidence. This is handicraft at its most approachable: simple tools, attainable steps, and results that feel personal.
Jewelry also fits easily into family and classroom routines. A small tray of beads can travel to the kitchen table or a craft corner without taking over the room. Projects can be completed in short sessions, paused between steps, and adapted for special events—party favors, holiday gifts, or school spirit accessories. With an emphasis on safety, the experience models care and responsibility: kids learn how to select materials, check quality, and respect tools.
Core Safety and Material Principles
Children’s jewelry is a “wearable toy,” and that means material choices and assembly methods matter. Think beyond style to consider standards, break strength, and skin contact. The list below will help you choose wisely:
- Age matters. Under 3 years old: avoid small parts entirely. For ages 3–5: use jumbo beads and cords that are hard to break, plus closures that release under tension. School-age children can handle standard beads with guidance, and tweens can learn basic wire and crimp techniques with proper tools.
- Size the beads. A quick rule of thumb: if a bead easily fits through a cardboard toilet-paper tube, it may be too small for toddlers and preschoolers. For younger makers, choose large wooden beads, felt balls, and big-hole silicone beads designed for children’s crafts.
- Choose non-toxic materials. Prioritize products labeled compliant with recognized standards for children’s products. Seek out water-based, low-VOC finishes and dyes that are colorfast. If in doubt, rub a sample on a damp white cloth; if color transfers, seal or skip it.
- Avoid heavy metals and allergens. For metal parts that touch skin, use hypoallergenic options like titanium, niobium, or 316L surgical-grade stainless steel. Avoid nickel and cadmium. Be cautious with unknown metal charms and bargain-bin findings.
- Pick safe closures. For necklaces intended for play, use plastic breakaway clasps designed to release under tension. For bracelets, choose soft elastics or adjustable sliding knots that can give way rather than tighten.
- Eliminate sharp edges. Skip glass shards, cracked beads, and thin metal components with burrs. Avoid memory wire for younger crafters—it can be sharp when cut and springy under tension.
- Mind adhesives. Prefer water-based craft glues for securing knots. Avoid solvent-based industrial glues for kids; they can off-gas, irritate skin, and glue fingers together.
- Guide usage. Teach kids to remove jewelry before bed, sports, and baths. Store pieces out of reach of younger siblings.
For reference, U.S. and EU markets use clear benchmarks for children’s products, including jewelry. In the United States, consumer product safety rules restrict lead and other hazards in children’s items, and there is a dedicated jewelry standard. In Europe, migration of certain metals and chemicals in toys is regulated. While home crafters don’t perform lab tests, you can align with the spirit of these rules by purchasing materials from reputable suppliers, reading product data sheets, and avoiding unknown metal mixes. When possible, choose brands that state compliance with children’s product regulations.
Choosing Beads, Cords, and Closures
Beads
- Wood: Lightweight, warm to touch, and available in large sizes. Look for unfinished or sealed-with-water-based coatings. Seal raw wood with a food-safe oil or plant-based varnish if color rub-off is a concern.
- Felt and crochet beads: Soft texture, big volume without heavy weight. Great for young makers and sensory-friendly designs.
- Silicone craft beads: Choose versions explicitly labeled for children’s crafts and compliant with food-contact-grade standards. Avoid tiny shapes; favor large, smooth forms.
- Acrylic and resin: Bright colors and many shapes. Purchase from reliable sources and confirm they’re intended for children’s crafting.
- Glass: Best for older kids; can chip and be heavy. Avoid cracked or sharp-edged beads.
- Paper and fabric beads: Lightweight and fun to make. Seal with water-based varnish to resist moisture and color bleed.
Cords
- Elastic cord: Ideal for bracelets. Use high-quality elastomer cord 0.8–1.0 mm for typical children’s beads; 1.2–1.5 mm for jumbo beads. Pre-stretch before stringing to prevent sagging.
- Waxed cotton or polyester: Smooth for easy stringing; ends can be heat-sealed by an adult. Works well with sliding knots.
- Paracord (Type I or micro): Sturdy for older kids’ bracelets and keychains. Use quick-release or breakaway hardware for wearable pieces.
- Nylon lacing with plastic tips (aglets): Excellent for small hands; reduces the need for needles.
Closures and Findings
- Breakaway clasps: Designed to release under tension. Match the release strength to the age group; too strong defeats the purpose.
- Button-and-loop closures: Easy to fasten and adjust. Use large, flat buttons and thick loops to avoid small detachable parts.
- Knotted elastic: Hide the knot inside a larger bead or bead cone with large holes. Add a dab of water-based glue.
- Slider knots: For adjustable necklaces and anklets; teach children how to loosen them for safe removal.
Setting Up a Child-Friendly Workspace
- Low, stable table and good lighting to reduce eyestrain and spills.
- Non-slip bead mats or trays with compartments to prevent rolling beads.
- Child-safe tools: blunt-tip scissors, plastic beading needles, and bead stoppers.
- Clear containers with lids; label by color or size to simplify cleanup.
- A “finished parts” bowl for completed sections to keep them separate from loose pieces.
- Hygiene supplies: handwashing station, baby wipes for quick cleanup, and a lint-free cloth for drying pieces. Good hygiene is part of craft etiquette.
Design Principles Kids Understand
Design is not just decoration; it’s planning with purpose. Children learn to make choices that serve comfort, durability, and style. Use these simple principles:
- Big to small: Start and end with slightly larger beads to “cap” a design and protect smaller beads from friction near knots.
- Repeating patterns: ABAB or ABCABC sequences improve focus and make counting natural.
- Texture balance: Combine smooth and soft elements—wood with felt, silicone with cotton—for tactile interest without scratchiness.
- Weight and length: Keep necklaces short enough to sit mid-chest for school-age children and use breakaway clasps. Bracelets should fit with room for one finger to slide underneath.
- Color stories: Invite kids to choose a “mood”—calm, bright, bold—and group colors accordingly. It turns instinct into vocabulary.
- Functional accents: Add a single charm, initial bead, or bead tassel. Avoid crowded pendants that add weight and swing.
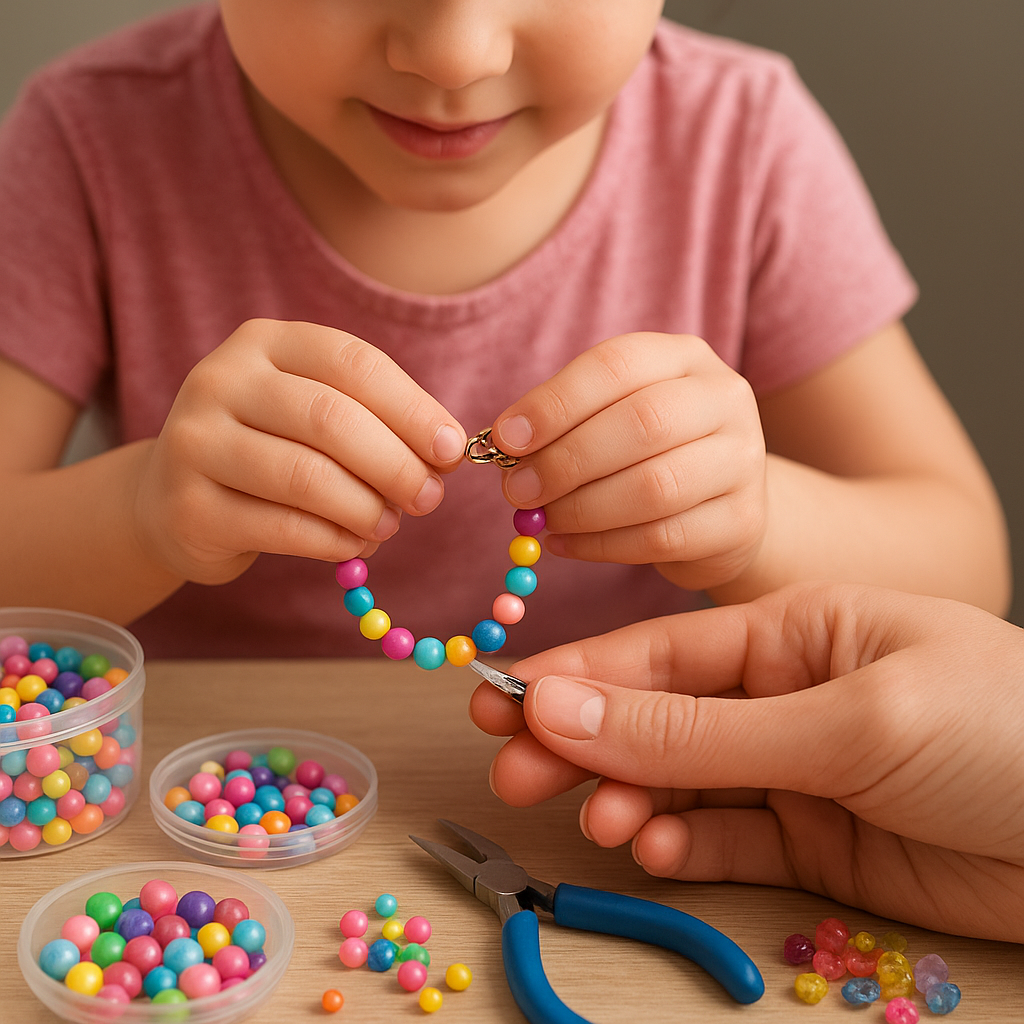
Project 1: Stretch Bracelet With Hidden Knot
Age: 5+ with guidance
- Materials: 0.8–1.0 mm elastic cord, medium acrylic or wood beads with smooth edges, one bead with larger hole, water-based craft glue.
- Steps:
- Measure: Wrap the elastic around the wrist, add 3–4 cm extra for tying.
- Pre-stretch: Gently pull the elastic to reduce later sagging.
- String: Create a simple pattern. Leave a 5–7 cm tail at the start.
- Tie: Finish with a surgeon’s knot (double overhand with extra wrap). Pull tight slowly.
- Secure: Dab the knot with glue; let it set for a minute.
- Hide: Slide the large-hole bead over the knot. Trim tails.
Tip: Demonstrate tying the knot on a scrap cord first. Kids love practicing on a “knot station.”
Project 2: Breakaway Necklace With Sliding Knots
Age: 6+ with guidance
- Materials: Waxed cotton cord, large wooden or silicone beads, plastic breakaway clasp, bead stopper.
- Steps:
- Cut cord to child’s chest length plus 30 cm.
- Attach bead stopper to one end, then string large beads.
- Attach breakaway halves to each cord end per manufacturer instructions.
- Add simple slider knots if you prefer adjustable length, keeping them away from the collarbone.
- Test release gently to ensure the clasp separates under tension.
Note: Avoid heavy pendants; even with breakaway clasps, lightness improves comfort and ergonomics.
Project 3: Button-Loop Friendship Bracelet
Age: 7+
- Materials: 1 mm waxed cotton cord, 2–3 holes of larger beads, one flat 2–2.5 cm button.
- Steps:
- Cut two cords, each 60–70 cm. Tie together at one end.
- String beads in mirrored patterns on each side; tie knots between beads for texture.
- Form a loop with one end, size it to the button diameter, and secure with a firm knot.
- Sew or tie the button onto the opposite end using the cord tails.
Why it’s great: No metal parts touching the skin, easy for kids to fasten, and adjustable as they grow.
Project 4: Felt Ball Lacing Necklace
Age: 4+ with help
- Materials: Large felt balls (2–3 cm), pre-punched with a skewer by an adult; thick blunt plastic needle; soft cord; breakaway clasp.
- Steps:
- Thread the plastic needle with cord. Tie a big stopper knot.
- Let the child lace felt balls in a simple pattern: 1–2–1–2.
- Secure ends, attach breakaway clasp halves, and test the release.
Felt reduces clatter and rolling, making it ideal for group settings where noise and lost beads can be distracting.
Project 5: Paper-Bead Pendant
Age: 8+
- Materials: Strips of magazine or art paper, water-based varnish, wooden skewer, cotton cord, large jump ring (stainless steel or titanium), breakaway clasp optional.
- Steps:
- Roll the paper strip onto the skewer with a taper for a cone shape; glue the end with school glue.
- Let dry and coat with water-based varnish; dry completely.
- Slide off, add a jump ring through a reinforced hole or wrap with cord to create a pendant bail.
- String on cotton cord and finish with a knot or breakaway clasp.
Tip: Seal twice for sturdiness. Paper beads are light, so they work well for younger wearers when sized appropriately.
Project 6: Paracord Fishtail Bracelet (Quick-Release)
Age: 9+ with adult setup
- Materials: Type I or micro paracord, plastic side-release buckle or breakaway connector, tape, scissors.
- Steps:
- Measure wrist and cut two lengths: wrist length times 2.5 each.
- Attach cords to the buckle; tape buckle to the table to stabilize.
- Weave the fishtail pattern: left over center, right over center, repeat.
- Finish by threading tails back and trimming; singe ends slightly (adult only) to prevent fray.
Why it’s great: Durable, washable, and customizable in school or team colors.
Project 7: Tassel-and-Bead Key Clip for Backpacks
Age: 7+
- Materials: Nylon cord, large beads, stainless steel carabiner-style clip with smooth gate, scrap yarn for tassel.
- Steps:
- Make a small yarn tassel and tie tightly.
- String large beads on nylon cord and tie onto the clip using a lark’s head knot.
- Attach tassel to the base bead or directly to the clip.
This project keeps adornment off the neck and wrists—good for schools with strict accessory rules.
Project 8: Fabric-Wrapped Bangle
Age: 8+
- Materials: Plain smooth bangle core (plastic or wood), fabric strips 1.5–2 cm wide, water-based fabric glue, flat brush.
- Steps:
- Brush a thin layer of glue on a section of the bangle.
- Wrap fabric with a slight overlap; press smooth.
- Tuck ends under previous wraps and secure with more glue.
- Let dry; optionally add a sealed fabric bow or a single large bead accent.
Comfortable, lightweight, and an excellent way to repurpose favorite outgrown clothes.
Age-Appropriate Guidelines At a Glance
- Toddlers (2–3): No wearable jewelry for independent use. If crafting, use giant components at the table with hands-on oversight; finished items are for supervised play or display.
- Preschool (3–5): Jumbo beads, felt balls, and breakaway closures. Keep designs light and short; emphasize taking jewelry off before playtime and naps.
- School Age (6–9): Medium beads on elastic or cord, simple closures. Teach measuring, pattern planning, and careful knotting.
- Preteens (10–12): Introduce crimps, simple wire loops, and stamping—always with protective eyewear and tool rules.
Skin-Friendly Metals and Findings
When metal touches skin, choose wisely. Titanium and niobium are excellent for sensitive skin, as is 316L stainless steel. For ear jewelry, defer to professional piercers and medical advice; many children prefer clip-ons with silicone pads or screw-backs designed for comfort. Avoid unlabeled base-metal charms and chains that might contain nickel or lead. When in doubt, test small components with consumer lead test swabs as a preliminary check and replace any suspicious parts. Good metal choice supports creativity without irritation.
Color, Pattern, and Learning Benefits
Jewelry-making quietly reinforces early learning. Ask children to count beads, predict the next color in a sequence, or design a symmetrical arrangement left-to-right. Introduce vocabulary—hue, shade, tint—while comparing warm and cool palettes. Encourage storytelling: a blue bead for the sky, a green bead for a garden, a silver charm for rain. This transforms making into narration and reflection. For kids who prefer open-ended play, provide a “buffet” of sorted colors and invite them to discover patterns on their own.
Storage, Cleaning, and Repairs
- Storage: Use divided boxes with latching lids. Label by size or project to make setup faster next time.
- Cleaning: Wipe finished jewelry with a damp cloth and mild soap; dry thoroughly. Avoid alcohol-based sanitizers on elastic cords, which can embrittle them.
- Repairs: Keep a small kit with spare breakaway clasps, elastic, scissors, and glue. Plan for maintenance—elastic bracelets typically need restringing after months of regular wear.
- Refresh: If wooden beads look dry, lightly oil with a food-safe finish and buff.
Group Projects: Classrooms and Parties
- Pre-sort kits: Place enough beads for one project in a small cup with cord and a clasp. This reduces spills and arguments over colors.
- Demonstration station: Show the knot or pattern once to a small group; let peer helpers assist others.
- Safety briefing: A short reminder about not mouthing beads, wearing completed necklaces only after the session, and calling an adult to fix knots.
- Quiet choices: Offer felt and fabric beads for sensory-sensitive kids; minimize jangly, high-contrast options if they’re overstimulating.
- Cleanup game: Set a timer and challenge the group to gather all stray beads by color into bowls.
Sustainability and Upcycling
Thoughtful sourcing supports sustainability and teaches stewardship. Repurpose buttons, fabric scraps, and paper offcuts into unique beads and charms. Choose wooden beads from responsibly managed sources and plant-based finishes. Reuse containers—mason jars, tins—for organizing. Ask local makers for offcuts of leather or cork to turn into soft pendants. This approach enriches the story behind each piece and reduces waste.
Common Pitfalls and How to Avoid Them
- Too-small beads for young children: Err on the side of larger beads and shorter projects.
- Weak elastic knots: Use a surgeon’s knot and a dab of glue; pre-stretch the cord to prevent slack.
- Heavy pendants on kids’ necklaces: Keep everything light; weight leads to neck strain and poor hang.
- Unknown metal components: Stick to known, labeled metals and reputable suppliers.
- Color rub-off: Test and seal paper or wood; avoid low-quality painted beads that flake.
- Over-tight fits: Always leave a finger’s width under bracelets and keep necklaces adjustable.
Ethical and Cultural Considerations
Jewelry often carries cultural meaning. When drawing inspiration from traditional designs, introduce the story respectfully and credit its origins. Invite children to share family patterns or colors. This teaches empathy and curiosity while encouraging a personal connection to craft. Consider accessibility, too—magnetic closures are convenient but can be dangerous if detached and swallowed, so favor breakaway plastic clasps for children and avoid small magnets entirely.
Extending Skills for Older Kids
- Crimping 101: Use nylon-coated beading wire with safety glasses; learn to secure crimps and add soft covers.
- Wire loops: Practice with dead-soft copper wire and flush cutters under adult supervision; file ends smooth.
- Stamping: Use soft metals like aluminum blanks on a sandbag to reduce bounce. Ear protection helps with noise. Keep designs to tags for backpacks or keychains rather than wearable necklaces for younger siblings’ safety.
- Macramé: Teach square knots and half-hitches to create adjustable closures and flat bands.
Checklists You Can Use
Quick Pre-Project Safety Check
- Are all beads large enough for the age group?
- Are materials labeled as child-safe or intended for children’s crafts?
- Are closures breakaway or adjustable as appropriate?
- Are tools blunt-tipped and within reach, with a stable work surface?
- Is there a plan for swift cleanup and safe storage?
Quality and Wearability Check
- Run the bracelet or necklace across your wrist: any scratchy edges?
- Gently tug the closure: does it release or hold as intended?
- Twist and flex elastic: any white stress lines or immediate loosening? Rethread if so.
- Wipe with damp cloth: any color transfer? Seal or replace beads.
A Note on Sourcing and Transparency
Trustworthy suppliers freely share information about composition and intended use. Look for product listings that mention compliance for children’s crafts, and keep receipts or packaging for reference. Small artisans who make wooden beads or fiber components often publish finish details; ask questions about sealants and dyes. Aligning with recognized product expectations is a practical way to honor standards even at home.
Comfort and Adjustments
Small tweaks can transform a piece from “cute” to truly wearable. Slightly rounding knot ends, hiding joins inside larger beads, and choosing soft cords eliminate prickly spots. Weight balance keeps necklaces from swinging face-down during play. Rotating a bracelet’s focal point to the top prevents charms from knocking against school desks. These details contribute to long-term comfort and better ergonomics.
Care Habits Kids Can Learn
- Remove jewelry before sports, showering, or sleep.
- Store pieces in a small pouch or labeled cup out of reach of very young siblings.
- Wipe with a soft cloth after wearing, especially in hot weather.
- Tell an adult if a knot loosens or a clasp behaves differently; repairs are part of the process.
Celebrating the Results
Handmade jewelry captures a moment: the pattern a child chose, the joke told while stringing, the first carefully tied knot. Take photos on a neutral background and write the maker’s name and date on a small card. Gifts can include a brief care note and a reminder about breakaway clasps. This thoughtful documentation helps children see their growth in skill and taste over time, and it invites them to revisit favorite techniques.
Putting It All Together
Making children’s jewelry that’s safe and fun is a matter of good choices and a steady pace. Favor soft cords and light beads; keep parts large and edges rounded; use closures that release when tugged. Prioritize safety and material standards, and teach kids to check their work the way a craftsperson would. With an eye on durability, respect for hygiene, and a commitment to sustainability, you’ll set up a making space where creativity thrives. The result is more than a bracelet or necklace—it’s a shared experience in thoughtful design, careful making, and proud wearing that children will remember.