Plastic bottles, food containers, and blister packs often arrive in our homes as single-use packaging, but in a maker’s hands they can be reborn as luminous earrings, sculptural cuffs, or playful statement necklaces. Handmade jewelry from reclaimed plastic unites ecological purpose with studio practice, turning waste into wearable art without sacrificing comfort or polish. This is an approach that rewards patient experimentation, respects material limits, and celebrates the poetics of color, light, and form—an accessible gateway for beginners and a rich research field for seasoned artisans. At its heart, this craft champions sustainability and upcycling while honoring the quiet joys of craftsmanship and creativity.
Why Recycled Plastic Belongs in Handicraft
Handicraft thrives where ingenuity meets resourcefulness. Working with post-consumer plastic embodies that spirit. It repositions everyday detritus as a source of value, re-framing how we read material histories and how we assign beauty. A shampoo bottle’s curved wall has already been engineered for strength and translucency; a PET soda bottle’s resilience becomes a natural candidate for delicate petals; a milk jug’s matte opalescence asks for structural forms. Far from a compromise, it is a palette rich with nuanced color and weightless strength that would be costly to emulate with virgin materials.
Plastic also encourages modular thinking. Surfaces can be cut into tiles, strips, or sequins, exactingly repeated or joyfully improvised. Elements are easy to drill, join, and reconfigure—ideal for wearable pieces that demand balance and comfort. The range of translucent and opaque finishes suggests stained-glass effects, enamel-like fields, terrazzo flecks, or frosted sea-glass textures. For small studios and workshops, the low cost of entry—saving household plastics, a craft knife, sandpaper, and a heat source—keeps exploration open-ended and inclusive.
Beyond aesthetics, reclaimed-plastic jewelry can teach practical lessons in design for disassembly. Cold connections, simple hinges, and reversible joints ensure maintenance, repair, and future re-use. This is slow making: an ethic of attention to edges, fit, and skin contact that prizes durability and kindness to the wearer. It’s also public pedagogy—every time someone asks what the piece is made of, a conversation about materials, value, and waste begins.
Understanding Plastics for Jewelry
Not all plastics behave the same. Knowing basic types—and how they respond to heat, cutting, or glue—lets you plan confidently.
- PET or PETE (#1): Clear, glossy, used for drink bottles. Cuts cleanly, heat-forms at relatively low temperatures, holds curves, and can produce crisp, glass-like petals or geometric forms. Accepts some paints when lightly abraded.
- HDPE (#2): Opaque, waxy, common in milk jugs and shampoo bottles. Tough, great for bold shapes and cuffs. It resists many glues, so rely on mechanical joins or specialized adhesives.
- LDPE (#4): Soft film used in shopping bags. Layers can be fused under an iron (between baking parchment) to create durable sheets with mesmerizing marbled patterns.
- PP (#5): Slightly flexible, found in yogurt cups and lids. Excellent for lightweight components and hinges; like HDPE, it can be challenging to bond chemically.
- PS (#6): Can appear as rigid clear containers or thin deli clamshells. It shrinks and thickens under heat—a property that can be exploited for charms if ventilated carefully. Avoid foamed PS (styrofoam) for wearable work.
- PLA and bioplastics: Increasingly common; test carefully, as they soften at comparatively low temperatures and can warp.
Identification tips:
- Look for resin codes (the triangle with a number). If absent, test a small offcut: observe flexibility, how it sands, and its behavior near heat. Never inhale fumes; work with ventilation and use a heat source you can control precisely.
- Feel and sound: PET is crisp and springy; HDPE feels waxy and dull; PP has a snappy flex; LDPE is soft and film-like.
- Surface: Gloss suggests glassy effects; matte invites soft diffusion and pastel-like finishes.
These profiles help you match the right technique to the plastic on your bench. When you know how a material wants to move, it stops being trash and starts being possibility.
Preparing and Safe Working Practices
Good outcomes start with clean, properly prepped stock. Rinse containers, remove labels and adhesives (citrus-based removers and warm water work well), and dry thoroughly. Flatten curved surfaces by making a relief cut and gently warming them between parchment under a dedicated iron or in a craft-only toaster oven with low, even heat. Keep your household kitchen separate from your studio; designate tools for craft use only.
Ventilation is key when applying heat, sanding, or using adhesives. Work near a window or use a small fume extractor. Thin nitrile gloves protect against cuts from sharp edges; safety glasses shield your eyes while drilling or cutting. A simple first-aid kit nearby is a sign of respect for your process. These are foundations of shop safety, not afterthoughts.
Essential toolkit for recycled-plastic jewelry:
- Cutting: Sharp craft knife, heavy-duty scissors, micro-shears, and a small saw or jeweler’s saw for thicker stock.
- Shaping and finishing: Sandpaper (320 to 2000 grit), needle files, a deburring tool, and a rotary tool with polishing wheels.
- Heat forming: Heat gun with adjustable settings, a craft-only toaster oven, and an iron for fusing films. Silicone mats and wooden dowels help create curves.
- Joining: Pin vise or rotary tool with small drill bits; pop rivets, micro screws, wire, jump rings, and eyelets for cold connections; adhesives like two-part epoxy, cyanoacrylate, or specialized plastic glues where appropriate.
- Metal findings: Earring hooks, posts, clasps, and chain. Choose hypoallergenic options (titanium, niobium, surgical steel) for comfort.
- Marking and layout: Fine-tip permanent markers, masking tape, paper templates, and calipers for repeatability.
Plan for offcuts: keep a small bin for trimmings sorted by color or type. These become inlays, confetti, or texture-makers later. Build a habit of a zero-waste bench.
Core Techniques for Form and Finish
Mastering a few techniques opens a huge library of forms. The interplay of edge, light, and layer brings plastic’s unique voice to the forefront.
- Cutting and scoring: Use a sharp blade to score straight lines on PET, then snap cleanly along the score. For curves, turn the material—not your wrist—so the blade maintains a steady angle. Micro-shears are excellent for tiny arcs.
- Heat shaping: Warm PET or PP gently with a heat gun; when it softens, wrap it around a dowel or press into a wooden mold. Reheat in small bursts to refine. For domes, press warmed pieces over a spoon back. Always keep the tool moving to avoid scorch marks.
- Fusing film: Layer LDPE bags between parchment, setting the iron to medium. Press and lift, never slide, to fuse layers without buckling. Trap confetti-like snippets between translucent films for terrazzo effects.
- Texturing: Lightly sand with fine grits for a frosted look. Emboss with a heated metal stamp for shallow patterns. Create hammered-glass illusions by tapping the surface with a rounded tool while warm.
- Drilling and piercing: Use a pin vise for precision. Back the work with scrap wood, start small, and step up bit sizes. Deburr holes gently to protect skin and prevent fraying of cords.
- Edge finishing: Progress through grits, then polish with a plastic compound for a glassy edge. A quick pass near—not in—the flame can round micro-burrs on PET; practice on scrap to avoid clouding.
- Cold connections: Rivets, eyelets, and miniature bolts create reliable joints without glue, ideal for HDPE and PP. Wire wrapping doubles as a decorative element and hinge mechanism.
- Surface color: Alcohol inks stain PET vibrantly. Acrylic paints adhere better on abraded surfaces; seal with a compatible clear coat. Masking and stencils allow crisp motifs.
Each process contributes to tactile texture and crisp geometry. Keep notes on temperatures, timings, and outcomes; your bench log becomes a personal encyclopedia.
Step-by-Step Projects to Build Skill
1. PET Blossom Drop Earrings
- Source: Clear PET bottle.
- Template: Draw three petal sizes on paper; trace onto flattened PET with a fine marker.
- Cut and shape: Cut petals; lightly heat and press tips over a dowel to create gentle curls. Stack small over medium over large.
- Drill: Make a tiny hole at the base of each petal; stack on a headpin with a tiny spacer bead between layers for articulation.
- Finish: Form a loop, attach to earring hooks. Polish edges for sparkle. The result is featherlight, crystalline movement that catches light like glass.
2. HDPE Geometric Cuff
- Source: Opaque shampoo bottle or detergent jug.
- Blank: Cut a rectangle long enough to wrap the wrist, with a gentle taper. Round corners.
- Heat form: Warm evenly and press around a cylindrical form (a rolling pin works), holding until set.
- Detail: Add perforated patterns with a pin vise for breathability and visual rhythm. Consider insetting small PET windows for contrast.
- Finish: Sand to satin. Line the inner edge with a soft wax for skin comfort.
3. Fused-Bag Terrazzo Pendant
- Source: Assorted LDPE bags in complementary colors.
- Layer: Arrange colored snippets on a neutral bag; top with another translucent layer. Sandwich in parchment.
- Fuse: Iron in short presses until layers unify. Cool under a flat weight.
- Cut: Use a template (circle or arch) to trace and cut the pendant shape. Drill a centered top hole.
- Mount: Add a large jump ring and slide onto a cord or chain. The terrazzo flecks radiate playful complexity.
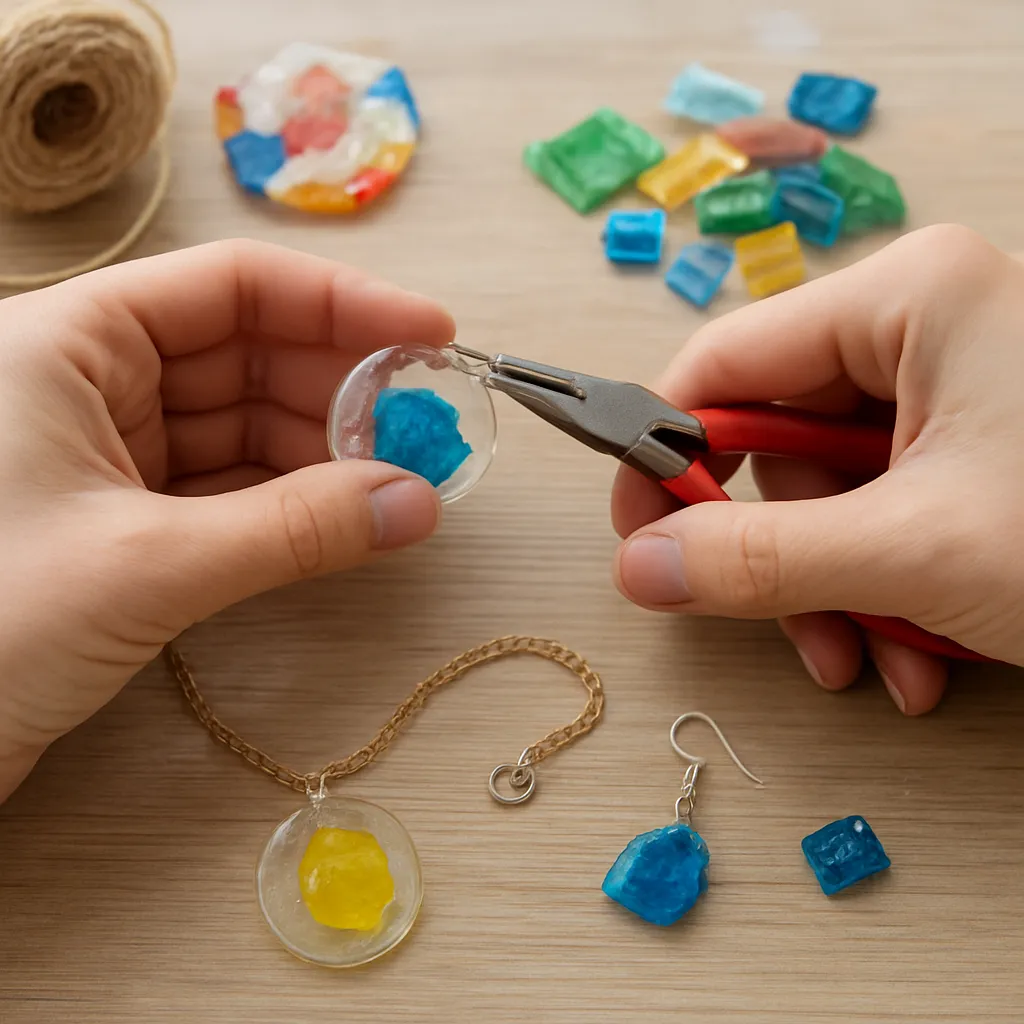
4. Bottle-Cap Mechanically Set Ring
- Source: Metal bottle cap and small inlay chips from plastic offcuts.
- Fill: Arrange chips inside the cap. Create a shallow dome of clear UV resin to bind, or set a thin fused-plastic disc in place.
- Shank: Rivet the cap onto a pre-made adjustable ring blank or fabricate a wire shank with two riveted tabs.
- Edge: File any sharp serrations. The mechanical connection avoids unreliable gluing to tricky plastics.
5. Shrink-Form Charms from Rigid PS
- Source: #6 clear deli clamshells (non-foamed).
- Draw: Sand lightly; draw motifs with permanent markers. Punch a hole before shrinking.
- Heat: Place on parchment in a craft-only toaster oven; pieces curl and then flatten as they shrink and thicken. Remove once flat; press between tiles to keep planar.
- Assemble: Add to bracelets or earrings. Colors intensify; size reduces by roughly two-thirds depending on stock.
6. Layered Kaleidoscope Brooch
- Source: PET in complementary colors and clear layers.
- Pattern: Cut concentric rings and radial spokes; stack with slight rotations to create moiré effects.
- Join: Use a central micro bolt and nut as both pivot and accent. Allow slight movement to change the pattern as you wear it.
- Back: Epoxy a brooch pin to a small HDPE pad, then rivet the pad to the main assembly for strength.
Design Principles for Comfort and Poise
Even the most striking concept must sit comfortably on the body. Consider the piece in motion: earrings should swing without snagging hair; necklaces should balance across the collarbones rather than sliding to one side; bracelets must clear the wrist bone and not bite when flexing hands.
- Weight and scale: Plastic’s lightness invites large forms; counterbalance that with negative space and tapered thicknesses so the piece feels airy, not bulky.
- Edges and touch: Every edge should be finished. Run the piece along the inside of your wrist; if you feel a catch, refine further.
- Proportions: Use the rule of thirds or the golden ratio to organize components. Repetition with variation guides the eye.
- Transparency and layering: Stack translucent over opaque to create depth. Sandwiching printed motifs between clear layers preserves them from wear.
- Hardware harmony: Choose findings that echo the piece—industrial rivets for geometric work; warm brass for organic shapes; matte black for modern minimalism.
- Color story: Build a palette from what you can source. Harmonize brights with a neutral anchor (smoky grey PET, milky HDPE), or lean into monochrome, using finish (gloss vs. satin) to add interest.
- Skin kindness: Prioritize hypoallergenic metals and smooth contact areas. Test closures by wearing the prototype for a day at home.
The plastic’s inner life—its translucency, gloss, and response to light—becomes a partner in composition. Let those intrinsic qualities lead while you assert form and rhythm.
Beyond Plastic: Pairing with Other Materials
Hybrid pieces amplify contrast and narrative. Felt softens and warms stark geometry; reclaimed wood grounds glossy planes; hand-hammered metal frames plastic like a gemstone. Textiles (braided cords or stitched bands) add flexibility and a humane counterpoint to technical surfaces. Glass seed beads can bridge scale transitions and articulate edges. When pairing, consider thermal expansion and long-term wear: cold connections and floating settings accommodate differences gracefully.
Care, Repair, and Longevity
Recycled-plastic jewelry rewards gentle care. Wipe with a soft damp cloth and mild soap; avoid harsh solvents that can craze surfaces. Store flat or suspended to prevent bends; keep away from direct, prolonged sunlight that may fade dyes or embrittle certain plastics over many years. Buff out light abrasions with progressive grits then polish; for deeper scars, re-sculpt edges or embrace the mark as patina.
Repairs are part of the craft’s living cycle. Loose rivet? Upsize by a fraction or add a tiny washer. Clouded surface? Wet-sand and reseal. Chipped component? Trace, recut, and swap—modularity is your ally. Planning for maintenance respects both the wearer and the material’s long-term durability.
From Bench to Boutique: Sharing and Selling
A compelling origin story is embedded in every reclaimed piece. When presenting your work online or at markets, tell that story succinctly: where the material came from, what techniques you used, why the design matters on a human scale. Photograph with directional light to reveal edges and layers; include images on the body to convey proportion. Package with minimal, recyclable materials: a stamped card, a reusable pouch, a care note.
Pricing should honor time, tooling, and design intelligence—not just material cost. Track minutes spent and iterations made; mastery includes knowing your value. Offer limited series tied to specific rescued materials (a café’s soda bottles, a neighborhood cleanup), letting scarcity support small editions. Teaching workshops extends impact, transforming audiences into collaborators.
Troubleshooting: Common Issues and Fixes
- Ragged edges after cutting: Your blade is dull. Replace it and make multiple light passes. Finish with 600–1000 grit sanding.
- Clouding or white stress marks: You may be overheating or bending sharply when cool. Warm gradually and form over supportive curves.
- Adhesive failure on HDPE/PP: Switch to mechanical joins or roughen surfaces, flame-treat briefly to raise surface energy (practice on scrap), then use a two-part epoxy designed for low-energy plastics.
- Bubbles in fused film: Use lower heat, shorter presses, and ensure layers are dust-free. Cool under weight to keep sheets flat.
- Drill cracks near edges: Start holes farther from edges or add a reinforcing washer. Step up bit sizes gradually and support the back.
- Paint peeling: Sand lightly before painting; seal with a compatible topcoat. Consider dyes or inks that bond within the surface rather than forming a brittle film.
- Uneven curves: Create templates and jigs so forms match from left to right; reheat gently to coax symmetry.
Studio Ecology and Sourcing Strategies
Consistent sourcing strengthens a collection’s cohesion. Build partnerships: ask cafés to save clear bottles; coordinate with neighbors; salvage clean packaging from your own routines. Sort by hue and translucency; keep a swatch library of samples labeled by resin code, source, and notes on heat response. Offcuts become mosaic inlays; the smallest crumbs serve as confetti in fused sheets. Adopt a weekly ritual of processing new material—washing, flattening, and cataloging—so creative sessions stay focused on design, not logistics.
Set up a benign finishing workflow: capture dust with a damp towel under your sanding area; sweep shavings into clearly labeled bins; donate viable offcuts to schools or makerspaces. The craft’s quiet logistics are part of its ethical backbone, a steady expression of practiced technique and care.
A Palette of Light: Working with Hue and Transparency
Color in plastic is not only surface—it is body. Opaque HDPE reads as velvet. Clear PET throws prismatic edges when cut to facets. Frosted finishes swallow light and return it as a soft glow. Lean into these behaviors:
- Backlighting tests: Hold samples against a window to study luminosity; record which tones glow versus sit flat.
- Duotone stacks: Layer a tinted clear over a neutral base to make new hues without paint.
- Edge color: Sanded edges act like capillaries for light; polishing sharpens the linework of your silhouette.
- Contrast maps: Pair saturated brights with a ground of muted milk-jug white or smoky grey to avoid visual fatigue.
These moves are simple yet precise—small shifts that add sophistication without clutter. Over time, your body of work will develop a recognizable chromatic signature.
Ergonomics and Mechanisms
A successful clasp or hinge disappears in use yet delights on inspection. Consider:
- Hidden magnets: Encapsulate small neodymium magnets between fused plastic layers for seamless closures—test pull strength against garment weight.
- Sliding knots and toggles: For corded neckpieces, adjustable length supports different necklines and wearers.
- Swivels: Add a micro swivel between pendant and chain to prevent twisting. This small decision extends the life of your piece.
- Spring tension: Build gentle flex into cuffs with living hinges cut from PP, or stagger slits that allow expansion without stress fractures.
Mechanisms are choreography in miniature. Refine them to turn function into quiet poetry.
Teaching, Community, and Circular Practice
Recycled-plastic jewelry is a natural framework for community workshops. Participants arrive with household material and leave with a finished piece, plus core skills they can continue at home. Emphasize tool-sharing, clear safety habits, and thoughtful design: a small kit—a craft knife, sanding sticks, and a pin vise—can ignite lasting practice. Public exhibitions that trace an object’s origin elevate the narrative beyond trend, demonstrating the versatility of the medium in fashion, education, and local culture.
Advanced Explorations for Experienced Makers
- Laminated composites: Alternate layers of PET and thin fabric to create resilient, textile-reinforced sheets that drape yet hold a crease.
- Press molds: Carve simple hardwood dies; warm plastic and press to create repeatable domes, facets, or flutes. Combine with indexing marks for precise assemblies.
- Optical elements: Cut micro-prisms or grooves into clear stock to bend light across the piece—wearable optics.
- Kinetic structures: Use pivots and counterweights for pieces that change silhouette as the body moves.
- Pattern libraries: Develop parametric templates (arches, crescents, ellipses) you can scale and tile, ensuring parts mix-and-match across collections.
These pathways reward patience and method. Complex results arise from steady iterations and careful note-taking, the essence of studio craftsmanship.
Ethics and Aesthetics: Making Meaning
Working with waste is not just a material choice—it is an aesthetic position. It asks you to see value where it is overlooked, and to stage a transformation that remains legible enough for others to notice. The goal is not to erase the material’s past but to elevate it: a seam line becomes a design line; a molded radius suggests a new curve; brand colors are reinterpreted as abstract fields. Such choices create objects that wear well on the body and carry stories—intimate, resilient, and timely.
A Craft That Keeps Evolving
The beauty of jewelry from reclaimed plastic is its openness. There is always a new bottle with a novel tint, a different wall thickness, a better jig to build, a surprising bend radius to discover. As you refine your eye and hand, the work becomes less about substitution and more about a distinct language: light caught at an edge, motion translated into arcs, everyday matter turned into talisman. Anchored in sustainability, led by creativity, disciplined by technique, and safeguarded by safety, this practice proves that elegant design can be both responsible and radiant. In doing so, it offers a grounded path for makers who want their aesthetics and ethics to meet—confidently and beautifully—at the scale of the hand.