Geometric motifs have always offered makers a direct path from idea to object: clean edges, repeatable angles, and modular forms that can be scaled from delicate studs to bold statement necklaces. Handcrafting these shapes turns abstract lines and points into tactile pieces that catch the light and create wearable architecture. This guide brings together design thinking, tool setup, and workshop techniques so you can translate sketches into crisp metal, clay, wood, resin, or hybrid constructions—without relying on digital fabrication. You will learn how to plan angles, build reliable forms, and apply surface treatments that honor both simplicity and craft.
Design Principles That Make Geometric Jewelry Sing
Before bending the first wire or sawing the first sheet, ground your ideas in a few durable principles. Geometric jewelry rewards clarity. Each angle, curve, and face should be purposeful, with negative space considered as carefully as mass. Intentionally contrast smooth planes with textured fields, or polished edges with matte interiors, to give visual rhythm. Decide if your goal is quiet minimalism or kinetic play, then let that decision guide proportions, line weight, and repetition.
Scale matters. A 12 mm equilateral triangle feels understated as a stud but reads assertive at 30 mm dangling from the lobe. Notice how line thickness affects perception: a thin wire octagon appears airy and elegant, while a 3 mm-wide strip octagon signals strength. Experiment with nested shapes—circle in square, hexagon within hexagon—to build subtle depth while maintaining graphic clarity. When in doubt, return to the sketchbook and reduce. Ask: which single move makes this design necessary?
Above all, embrace geometry as your partner. It gives you rules—60°, 90°, 120°—that paradoxically set you free. Constraints create coherence, and coherence becomes your visual signature across a collection.
Essential Tools and Materials for Handcraft Accuracy
Even for the most minimal earrings, consistent setup pays dividends in repeatability and comfort. Organize a compact bench kit that favors comfort, safety, and maintenance. Start with a small but heavy bench block and a soft-faced mallet, add a robust measuring system, and build outward from there.
Measuring and Marking
- Steel ruler with metric and imperial scales and a scribed zero edge
- Dividers for transferring lengths and stepping off equal segments
- Engineer’s square and 60°/45° drafting triangles for reliable angles
- Fine-tip permanent marker, soapstone, or scribe for clear layout lines
Forming and Holding
- Flat-nose, chain-nose, and round-nose pliers with polished jaws
- Nylon-jaw pliers to prevent marring
- Wood or acrylic forming blocks and mandrels (round, square, hex)
- Bench block and rawhide or nylon mallet for planishing
- Third-hand clamps and cross-lock tweezers
Cutting and Joining
- Jeweler’s saw with 2/0–6/0 blades for sheet piercing
- Flush cutters designated for precious vs. base metals
- Needle files and sanding sticks from 220 to 2000 grit
- Low-temperature and silver hard/medium/easy solder for staged joins
- Paste flux, liquid flux, and a small butane/propane torch
Finishing and Surface
- Scotch-Brite pads, steel wool, and polishing compounds
- Rotary tool with bristle wheels and felt bobs
- Pickle solution and neutralizer bath
- Microcrystalline wax or lacquer for protective coats
Safe practices are non-negotiable: eye protection, ventilation, and a dedicated fire-resistant surface. Set clear zones for hot work, chemicals, and clean assembly to prevent cross-contamination and accidental burns.
Accuracy Without Machines: Angles, Layout, and Repeatability
Handmade does not mean inconsistent. Systematically control accuracy through smart layout, consistent bending points, and fixtures. Keep a master set of reference samples—one perfect triangle, one square, one hexagon—in your favorite sizes. When you start a new batch, compare the first new piece to the master to keep drift in check.
Adopt simple shop fixtures. A hardwood board with small brad nails set to key vertices can function as an instant wire-bending jig. Create spacers from sheet metal for equal arm lengths. Stencil angles onto a scrap of acrylic with a protractor, then cut tiny V-notches where wire should nest during bends. Label every fixture and store it with notes so you can reproduce the same look months later.
Be explicit about limits. Define your acceptable tolerance for lengths, angles, and ring diameters. For example, allow ±0.2 mm on segment length and ±1° on corner angles for ear studs; rings may accept tighter controls in inner diameter. Writing these down keeps you consistent even when your hands are tired or your eye is deceived by optical illusions created by shiny surfaces.
Wire Geometry: Triangles, Squares, Hexagons, and Polyhedra
Wire excels at outlining form with minimal weight. Choose a metal suited to your technique: sterling silver (pliable but work-hardens nicely), brass (crisp bends, economical), or gold-fill for warm tones. A 0.8–1.2 mm (20–18 ga) wire balances strength and delicacy for earrings and pendants.
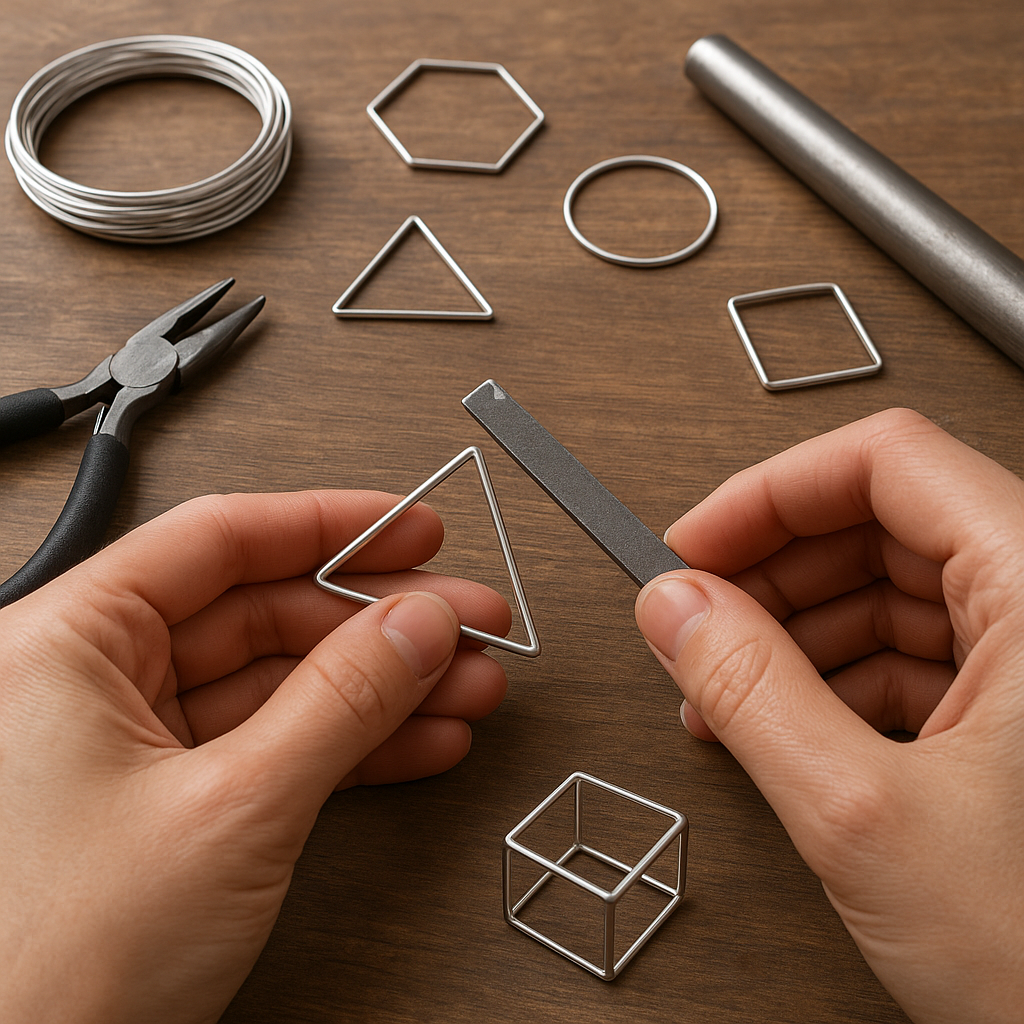
Equilateral Triangle from a Single Wire
- Measure and mark the wire into three equal segments plus 6–8 mm for overlap.
- At each mark, create a sharp 60° bend using a 60° template or a marked plier jaw. Lightly planish the bend on a bench block to crisp the corner without thinning.
- Wrap the overlap neatly where the final joint meets. For an open joint aesthetic, snip flush and file both ends to meet seamlessly.
- If joining, use a tiny chip of easy soldering alloy with paste flux. Heat evenly so solder flows into the joint without flooding the corner details.
- Quench, pickle, neutralize, then refine the corners with a flat needle file. Preserve sharpness, but break only the microscopic burr for comfort.
Square and Hexagon Bending Tricks
For a square, bend at 90° increments and ensure opposite sides match exactly; for hexagons, use consistent 120° bends. A simple way to maintain length parity is to set calipers to the target side and check as you go. Lay the shape on graph paper to spot drift quickly. Rotate the shape against a small mandrel to equalize bends without flattening the wire’s cross-section.
3D Forms: Wire Tetrahedra and Octahedra
- Create multiple identical triangles (for tetrahedron) or squares/triangles (for octahedron) with small solderable tabs.
- Tack-join at vertices using heat sinks (damp cloth or copper clip) to protect completed joints while you close the next one.
- Build from a base outward; verify face-to-face alignment at each step to prevent compounding error.
- Finish with a minimal chain connection that preserves the floating geometry and avoids twisting during wear.
Remember to stress-relieve wire. After multiple bends, the metal work-hardens. A brief annealing cycle—heating until a dull red and allowing to air-cool or quench depending on alloy—restores ductility and helps corners hold form without spring-back.
Sheet Metal Shapes: Crisp Edges, Negative Space, Bold Silhouettes
Sheet adds surface and shadow. Start with 0.5–0.8 mm thickness for earrings and pendants, thicker for cuffs. Transfer designs using spray adhesive and paper templates or by scribing through a stencil.
Precision Piercing
- Drill starter holes for interior cutouts with a #68–#74 bit, then thread your saw blade through.
- Keep elbows anchored and feed with the shoulder for straight lines; let the blade cut without sideways pressure.
- For angles, saw just shy of the corner, rotate the sheet in place while lightly stroking the blade to square the vertex.
- Deburr with triangular and barrette files, then sand through grits to a uniform surface.
Cold Connections for Modular Builds
- Rivets: use 0.8–1.2 mm wire; countersink slightly for a flush finish that won’t snag on fabrics.
- Tabs: integrate bendable tabs in your pattern to lock plates together without heat.
- Micro-screws: excellent for mixed materials or when you need reversible assemblies.
Fold-forming, while organic in feel, can be harnessed for geometric creases. Score with a dull blade, fold, hammer along a ruler edge, then open to reveal a sharp ridge that interacts elegantly with flat planes.
Joining with Confidence: Heat Control and Clean Joints
Successful metal joining is predictable and clean. Stage your joins from highest to lowest melting ranges: hard, then medium, then easy. Control oxidation with flux and mindful flame size. Keep the torch in motion, warming the mass evenly so solder chases the joint, not the flame.
Workflow
- Fit is king: a joint that mates perfectly needs a speck of solder, not a puddle.
- Flux sparingly; too much can bubble and shift your parts.
- Heat broadly first, then focus on the joint; remove heat the moment solder runs.
- Pickle immediately to remove oxides; neutralize and inspect under magnification.
Mastering small torch work improves both speed and finish quality. Keep a charcoal block for localized heat reflection, and a ceramic board for broader assemblies. Always respect the thermal history of your piece—multiple heating cycles can soften the structure or release earlier joins if you rush. Develop a feel for the metal’s color, the whisper of flux as it activates, and the way solder flashes when it flows. Over time this becomes a craft intuition equal to a ruler’s authority.
Alternative Media for Geometric Expression
Metal is not the only path. Consider mixed media to expand weight, texture, and color possibilities:
- Polymer clay: roll precise slabs with thickness guides, cut with geometric dies, bake flat between tiles to avoid warping, then sand to a satin edge.
- Resin: pour into silicone molds for perfect prisms and facets; add metallic leaf or pigments to catch light without heaviness.
- Wood: laser-free handcraft using a fine pull saw, chisels, and micro-rasps. Seal with oil or wax for a warm counterpoint to cool metals.
- Paper and fiber: Japanese unit origami modules joined into lightweight polyhedra, then sealed with archival varnish and paired with metal findings for durability.
Use cold connections to respect the nature of each material. For example, pin-set a resin hexagon into a brass frame, or rivet thin maple triangles onto a steel backing that provides structure without bulk.
Surface Language: Texture, Reflectivity, and Color
Surface transforms line drawings into experiences. A mirror edge beside a brushed field can look razor-sharp, while bead-blast adjacent to high polish softens contrast. Develop a set of finishing swatches as your vocabulary: 400-grit satin, cross-hatched matte, stone-tumbled micro-peen, and blackened recesses.
Texturing Techniques
- Stippling with a rounded punch for even micro-dimples
- Engine-turned swirls using small felt bobs on a rotary tool
- Roll-printing textures using fabric or paper under pressure
- Directional satin with progressive grit sanding sticks
Coloration through oxides and dyes expands options. Sulfide solutions create a controlled black patina on silver and copper alloys; heat coloring can coax straw to blue on steel. Stabilize reactive surfaces with wax or lacquer and note that high spots will brighten with wear—an effect you can plan for.
Close every build with meticulous finishing. Remove sharp edges inside earrings and along pendant backs. Clean crevices thoroughly; polish only the surfaces that should shine, masking matte areas with tape or lacquer resist to preserve contrast.
Mathematical Patterns and Practical Templates
Geometry rewards preparation. Construct templates with a compass and straightedge to internalize fundamentals:
- Equilateral triangulation: step off six equal arcs around a circle to form a hexagon; connect alternating vertices for equilateral triangles.
- Golden rectangles: lay out 1:1.618 ratios for pleasing earring plate proportions.
- Pentagons: create from intersecting chords; star polygons become instant statement motifs.
Once perfected, transfer these to thin brass or acrylic sheets and label sizes. A rigid template makes batch cutting faster and more consistent than tracing from paper. Keep a logbook with each template’s intended wire gauge or sheet thickness so proportions remain intentional across variants.
Comfort, Balance, and Wearability
Elegant shapes must also feel good. Weight distribution prevents rotation on the ear or chest; a heavy pendant needs a chain attachment point near its visual center of gravity. Edges should be micro-chamfered to avoid skin irritation, and ear wires tuned to hold securely without pressure points.
Study ergonomics for movement-specific jewelry: wrist pieces must clear knuckles and rest bones, collar pieces should accommodate neck tilt, and ring silhouettes must avoid neighboring fingers. Test prototypes in daily wear, not just at the bench, to reveal snag points, noise, or imbalance that sketches can’t predict.
Step-by-Step Projects: From Flat to Dimensional
Nested Hexagon Earrings in Brass
- Cut two outer hexagons from 0.6 mm sheet (24–28 mm across flats) and two inner hexagons at 60–70% of that size.
- Pierce the inner hexagon openings from the larger plates, keeping a consistent 2–3 mm wall thickness for strength.
- File and sand both parts to a satin 800-grit finish; keep edges square and crisp.
- Create two 3 mm long micro-tube rivets from 1.5 mm OD tubing.
- Overlap inner to outer hexagon with corners aligned; drill rivet holes; rivet flush on a polished stake.
- Apply directional brushing on one plate and leave the other plate semi-polished for layered reflection.
- Attach ear wires at the top corner, verifying fall and face-forward orientation in a mirror.
Open-Wire Square Pendant with Off-Center Circle
- Bend a 22 mm square from 1.0 mm silver wire with seamless corner angles.
- Solder closed; pickle and planish lightly to sharpen corners.
- Form a 10 mm circle from 0.8 mm wire; solder closed and fixture it off-center within the square with a tiny spacer to avoid double marks.
- Solder at two tangent points; quench, pickle, and refine.
- Oxidize lightly, then brighten the highest edges to a reflectivity line that animates as the pendant moves.
Minimal Tetrahedron Drop
- Create four identical 12 mm equilateral wire triangles.
- Lightly file each triangle’s ends so vertices mate perfectly.
- Solder three together to form a trihedral corner; add the fourth as the base, ensuring symmetry.
- Attach a small jump ring to the apex opposite the base; suspend from a fine chain to emphasize negative space.
Quality Control and Troubleshooting
Commit to a checklist even when you feel confident. Look for micro-gaps at joints, wobble on flat surfaces, inconsistent edge radii, or surface contamination telegraphing through polishing. Evaluate pairs under the same light from multiple angles to confirm they mirror each other in angle and length.
- If corners round during filing: switch to a safe-edged file and guide with a machinist’s square.
- If shapes distort during heating: wire-bind assemblies, use investment slurry as a temporary support, or reduce torch tip size.
- If finishes look blotchy: degrease thoroughly before final polish; fingerprints can repel compounds unevenly.
- If a joint refuses to flow: revisit fit; add a sliver of higher-melt solder underneath to draw new solder through the gap via capillary action.
Record fixes and causes in a bench notebook. Over time, your process stabilizes, and repeating errors become rare.
Ethics, Sustainability, and Material Choices
Responsible craft widens the beauty of the object. Source recycled precious metals where possible and trace stones to ethical suppliers. Reuse offcuts: small triangles from the corners of a sheet become inlay, mosaic studs, or texture test coupons. Wet-sand to capture dust; dispose of chemicals per local guidelines; and gather metal filings for refining. A studio that respects material cycles gives extra meaning to a perfect hexagon or a crisp line of light on a pendant’s edge.
Photography, Presentation, and Narrative
Geometric jewelry thrives in clear, shadow-rich photos. Use a soft light from one side to model angles, and a small white card to bounce light into shadows without flattening form. Choose backgrounds that echo your forms—graph paper for process shots, smooth slate for finished pieces—and keep scale references consistent across a collection.
Packaging can echo patterns: a small printed motif from your templates, or a die-cut insert with a hexagonal window. Share the story of your process—hand files, careful angles, and the quiet satisfaction that comes from aligning edges until they read as one.
Advanced Explorations: Modularity, Kinetics, and Space
Once fundamentals settle into muscle memory, push further. Modular units that snap or rivet into different arrangements invite collectors to participate in design. Kinetic elements—a nested square swiveling on a concealed pin, or a triangular frame that tilts on a fine axis—add life to the line’s elegance. Translate plane into space with tensegrity elements: thin wires’ compression balanced by nylon filament tension to hold a floating form, surprisingly sturdy on the ear or as a pendant focal.
Chain structures offer another geometric playground. Weaves like Box, Byzantine, or Half Persian can be scaled, segmented, or interrupted with rigid shapes to produce rhythm and contrast. Use soldered geometric links as punctuation marks within a supple chain to keep the eye moving.
Practice Routines and Skill Maintenance
Devote short sessions to fundamentals the same way musicians run scales. Ten minutes of angle repetition on scrap wire, five precise piercings on a sample plate, and a single perfect solder seam build confidence for complex pieces. Keep a reference board of completed exercises—triangles at three scales, nested squares, a cleanly riveted tab—so your hands remember successes as clearly as your mind does.
Sharpen tools regularly. A dull blade, a nicked plier jaw, or a loaded polishing wheel can undo hours of careful layout. Keep consumables organized: label grits, retire bent saw blades promptly, and replace brush heads before they streak finishes. This quiet discipline is the unseen structure beneath clean geometry.
From Prototype to Collection
Transforming a single pendant into a family of pieces creates coherence and depth. Derive studs, drops, bracelets, and rings from the same proportion system. Repeat a corner detail, echo a negative-space window, or scale a motif to transition from delicate to bold while preserving identity. Mix metal tones thoughtfully—steel with gold, silver with brass—to frame shapes rather than distract from them. As you iterate, measure consistently, document every variation, and refine based on comfort and feedback.
Each collection becomes a study in controlled variety: a set of rules and a few well-placed exceptions. The result is a wearable essay on line, angle, and light.
Safety and Studio Flow
Clarity in process is also safety. Separate hot work from chemical stations and finishing areas; store fluxes and acids in labeled containers; keep baking soda on hand to neutralize spills. Ventilate when heating or polishing. Train your reflexes: always assume metal is hot, always set tools back in the same place, and always steady your workpiece before applying force. This calm order lets you focus on line and form without distraction.
Closing Perspective: Geometry as Craft Companion
Handmade geometric jewelry distills making to pure decisions: where to put a point, how to join two lines, which plane to brighten and which to hush. The craft’s quiet rigor—clean bends, precise fits, calm heat—brings shape to intention. With a small bench kit, an eye for symmetry, and a respect for precision, you can build forms that read clearly across a room and reward inspection up close. Let annealing restore ductility when the metal tires; let careful soldering seal joints that vanish; trust measured tolerance and a faithful jig to keep repetition honest; explore surface through patina and attentive finishing; and honor ergonomics so pieces live well on the body. The promise of a good geometric piece is simple and demanding: nothing extra, nothing missing, only the line, the angle, and the light that finds them.