Color that seems to float inside glassy domes, swirling patterns that mimic marble and geodes, and the thrill of watching dye bloom into organic shapes—these are the hallmarks of jewelry made with alcohol inks. This craft marries painterly spontaneity with the permanence of wearable art, inviting makers to blend art, chemistry, and metalwork into small, collectible treasures. Whether you’re crafting pendants for a market stall or curating a limited series for a boutique line, alcohol-ink jewelry rewards curiosity, patience, and a willingness to experiment.
What Makes Alcohol-Ink Jewelry Unique
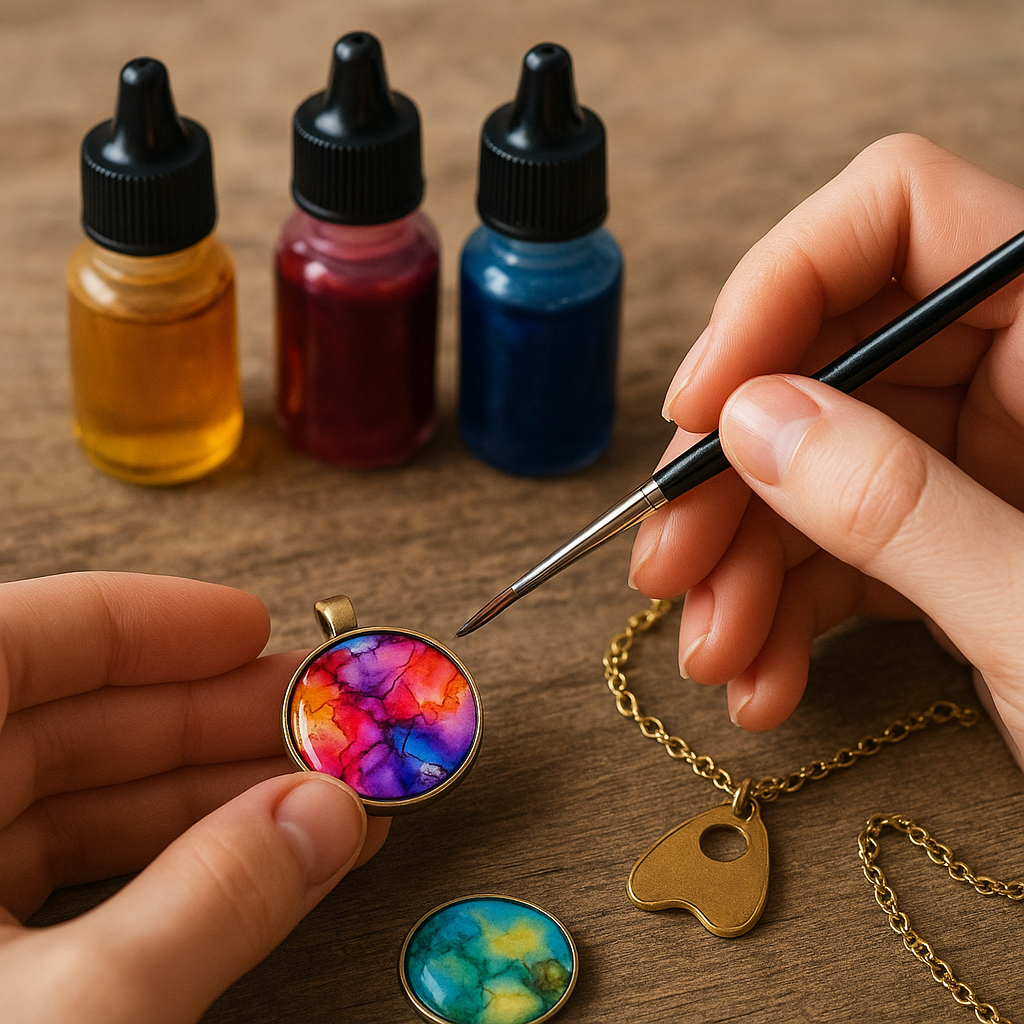
Alcohol inks are dye-based, quick-evaporating colors that dance across non-porous surfaces. When a drop lands on a slick substrate, the carrier evaporates quickly, leaving a vivid, often translucent stain. Add a touch of isopropyl alcohol or blending solution, and the dye reanimates—pushing, diluting, and layering in luminous formations. These dynamics allow jewelry artists to orchestrate movement and texture that are difficult to achieve with traditional paints. Transferring miniature paintings into pendants or earrings compresses a universe of color into a palm-sized spectacle.
At the heart of this craft is control through intentional loss of control. Rather than brush strokes, we shape fields of color through airflow, droppers, and timing. By setting those fields beneath a protective dome of clear resin, we transform ephemeral patterns into heirloom objects that stand up to everyday wear.
Essential Materials and Tools
Alcohol-ink jewelry relies on both art supplies and jewelry findings. Selecting high-quality materials ensures consistent results and reduces failure points down the line.
- Alcohol inks: Choose dye-based inks known for rich saturation. Metallic mixatives add shimmer; pearlized inks create soft, diffused shine.
- Solvents: Isopropyl alcohol at 91–99% for diluting and reactivating; a proprietary blending solution can soften edges and slow evaporation.
- Non-porous substrates: Yupo or other synthetic papers, primed metal discs, sealed polymer clay, glazed ceramic tiles for practice, or glass cabochon backs.
- Jewelry bases: Open bezels, deep-walled bezels, and channel pendants; post settings for studs; cufflink blanks; adjustable ring bases.
- Application tools: Pipettes, fine-tip bottles, silicone brushes, micro brushes, felt pads, cotton swabs, toothpicks, straw or low-pressure air blower, and tweezers.
- Cutting and shaping: Craft knife, precision punch for circles, micro-scissors, and circle dies if you own a manual press.
- Adhesives and sealers: Acid-free adhesive for mounting paper pieces; non-reactive spray fixative; UV-protective clear coat; two-part epoxy or UV-cure doming resin.
- Resin aids: Silicone mat, level surface, mixing cups, wooden sticks or silicone stirrers, disposable syringes, and a dust cover.
- Jewelry findings: Jump rings, chains, ear wires, bails, lobster clasps, crimp beads, and wire (copper, brass, or silver).
- Safety gear: Nitrile gloves, protective glasses, and a respirator suitable for organic vapors when spraying or working with resin; ensure excellent ventilation.
Color Strategy: From Intent to Miniature Masterpiece
Planning color is the difference between a pretty pendant and a piece that holds attention. Because alcohol inks are inherently translucent, they layer like stained glass. Embrace this transparency with a deliberate palette and value structure.
- Limit your palette: Choose two main hues and one accent. Too many dyes can muddy results as complementary colors overlap.
- Value planning: Preserve highlights as un-inked or lightly inked areas. Darken selectively to create focal points.
- Contrast and edge: Hard, crisp edges next to soft fades guide the eye. Airflow can carve sharp borders; blending solution softens them.
- Metallics: A whisper of metallic adds specular gleam. Use sparingly; too much interferes with clarity and can disrupt surface tension under resin.
- Pattern archetypes: Geode rings (concentric color bands and metallic veins), nebulae (soft blooms, starry spatters), florals (petal-like wisps shaped with airflow), and marbling (gentle interleaving veils).
Substrates and Surface Preparation
Stable foundations prevent warping, delamination, and dye migration. Each substrate has quirks worth mastering.
Yupo and Synthetic Papers in Bezels
Many artists work on Yupo sheets, then punch discs that fit snugly into bezels. Lightly scuff the bezel interior with fine sandpaper and degrease with alcohol to improve adhesion. After painting and sealing your disc (details below), bond it with an acid-free, strong adhesive. Let the bond fully cure before doming to avoid outgassing bubbles.
Painting on Metal Discs
Metal takes ink beautifully if properly primed. Clean with alcohol, then apply a thin, non-porous primer or clear coat. Once dry, paint directly on the disc. This method yields flush edges with no paper layer, but ensure any primer is compatible with inks and your final topcoat.
Polymer Clay Bases
Polymer clay allows sculpted bezels and organic shapes. Bake per manufacturer instructions, sand smooth, then seal with a non-reactive barrier so dyes do not sink into the clay’s plasticizers. Ink on the sealed surface, fix, then topcoat. Polymer components keep weight low while offering custom silhouettes.
Glass Cabochons
Painting the flat backside of a glass dome magnifies the image. Work in thin layers and seal before gluing the cab to a backing. Use adhesives that won’t cloud over time. This approach creates pleasing optical depth with minimal resin work, though direct doming still offers the most durable finish.
Core Techniques With Alcohol Inks
Drip, Bloom, and Move
Place a small drop of ink onto the surface. Chase it with a drop of isopropyl to open the bloom. Nudge edges with a straw, handheld blower, or a low-pressure airbrush. Work in quick passes; overworking turns fields into mud. Build layers only after the previous one sets to avoid creating a uniform wash.
Controlled Lifts and Negative Space
To carve highlights, touch a micro brush loaded with alcohol to the area and lift. For crisp shapes, pre-mask using low-tack frisket or cut stencils from repositionable vinyl. Remove masks after sealing the ink to keep edges intact.
Metallic Veining
Drop metallic mixative sparingly along a boundary and feather with air. For geode effects, alternate narrow rings of color and metallics; use a fine-point tool to drag delicate fissures. A final dusting of chased metallic after sealing (with a compatible paint pen) can repair areas dulled by topcoats.
Micro-Detailing
After sealing the inks, add line art with archival paint pens or fine-tipped markers. Because unsealed dyes reactivate easily, never draw on raw ink if your pen is solvent-based. Micro-details like constellations, petal veins, or fractal branches amplify the illusion of depth in small formats.
Sealing, UV Protection, and Doming
Alcohol inks are re-soluble, so direct liquid varnishes often smear them. The gold standard is a two-stage spray approach before encapsulating with resin.
- Initial lock: Apply several mist-light passes of a non-reactive artist’s fixative. Let each pass flash off completely to avoid blooming or runs. This first layer creates an archival barrier that resists reactivation.
- UV shield: Add 2–3 coats of UV-protective clear acrylic to mitigate fading. Dry thoroughly between coats; a gentle warm environment speeds curing but avoid heat that could warp substrates.
- Final encapsulation: Use a jewelry-grade epoxy or UV-curing formula for doming. Mix slowly to avoid bubbles, pour in a controlled bead, and coax the surface to a convex curve that stops just shy of the bezel rim.
Key doming tips:
- Level the work. An unlevel surface creates sloped domes and thin edges.
- Dust control. Cover pieces with a clean box while curing; a single fiber can mar the finish.
- Bubble management. Warm resin parts slightly, mix gently, and exhale (carbon dioxide helps pop bubbles) or use a quick pass of a flame tool if the resin manufacturer allows it. Avoid excessive heat near dyes and substrates.
- Cure times. Respect full cure before handling, even if the surface seems firm. Incomplete curing leads to fingerprints, haze, or premature yellowing.
Hardware Choices and Assembly
Finishing hardware elevates your miniature paintings into wearable objects that last. Choose findings that match your brand aesthetic and customer sensitivities.
- Metals: Brass and copper develop patina; stainless resists tarnish; sterling offers classic luster; plated components are economical but need careful handling to avoid premature wear.
- Ear wires and posts: Opt for hypoallergenic options for sensitive skin—titanium, niobium, or high-quality stainless.
- Joinery: Use well-fitted jump rings (closed and soldered if possible) and consider split rings for high-stress points like keychains.
- Adhesives: Two-part epoxies provide strong bonds. Clean mating surfaces with alcohol before gluing; clamping pressure improves contact but avoid squeeze-out onto finished surfaces.
Project Recipes to Practice and Master
Cosmic Nebula Pendant
- Punch a Yupo disc to fit a 25 mm bezel. Degrease the bezel interior.
- Drop a deep blue pool in the center; ring it with violet. Touch edges with clear alcohol to open clouds. Flick white ink or watered acrylic with a stiff brush for stars.
- Seal with fixative, then UV-clear coats. Mount into the bezel and dome with epoxy for magnifying depth.
Geode Slice Earrings
- Prime two small metal discs. Create concentric rings of teal and umber. Trace a thin metallic vein and fracture sparks using a needle tool.
- Lock, UV-coat, then add a razor-thin clear bead of resin; let settle. Sand any drips after full cure; polish edges to a glassy finish.
- Attach matching ear wires and a tiny gemstone charm that echoes the central color.
Botanical Leaf Cufflinks
- Ink a pale green field and blow out petal-like wisps. Once sealed, add vein lines with a fine pen to suggest leaves.
- Fix, UV-coat, cut to fit, and set into cufflink blanks. Dome with care to keep the surface perfectly level for a professional look.
Troubleshooting Common Issues
- Ink bleeding into resin: The pre-seal wasn’t sufficient or dried too little. Reapply multiple micro-thin fixative passes and allow thorough off-gassing before topcoating.
- Fish-eyes on the dome: Surface contamination (oil, silicone) repels resin. Clean with alcohol, avoid silicone tools for the final pour, or use a fresh disposable mat.
- Persistent bubbles: Overmixing or cold resin. Warm components, stir gently, and let the mix rest before pouring.
- Yellowing over time: Choose high-quality, UV-stabilized resins and add an extra UV-clearing layer beneath the dome. Store blanks away from sunlight prior to sale.
- Delamination: Poor adhesion between layers or substrate. Scuff and degrease surfaces; use adhesives rated for metal and sealed papers.
- Muddy colors: Overlapping complements too extensively. Return to a limited palette or insert a neutral buffer layer between antagonistic colors.
Safety, Studio Setup, and Responsible Craft
Working cleanly keeps pieces pristine and you healthy. Set up a dedicated area with a silicone mat, organized trays, and a leveled shelf for curing. Maintain cross-ventilation and use local exhaust when spraying or mixing. Alcohol inks and solvents are flammable; no open flames or hot tools near wet work. Collect solvent-soaked wipes in a sealed metal container and follow local disposal guidelines. Wear gloves to prevent dye stains and skin exposure, and a proper respirator when atomizing products or working long sessions.
Fading, Care, and Client Education
Dye-based media are more vulnerable to UV than pigments, so proactive steps extend life. Combine a UV clear coat with a domed encapsulation and advise customers to store pieces out of direct sun. Emphasize that perfume, hairspray, and cleaning agents should be kept away from the jewelry surface. Supply a soft pouch and a microfiber cloth, along with a concise care card. These habits enhance lightfastness performance in real-world use and contribute to long-term durability.
Design Depth: Layering for Dimension
To amplify sense of depth, build more than one visual plane. For example, create a base layer with soft blooms, seal it, add fine line work on top, seal again, then pour a thin resin coat. After curing, add another micro-illustration and a second pour. Each transparent stratum encloses a distinct layer, producing a parallax effect when viewed from different angles—like a tiny diorama inside glass.
Advanced Variations and Mixed-Media Accents
- Foil and leaf: Apply adhesive size in thin strokes and press metal leaf onto sealed ink panels. Seal again before doming to prevent tarnish transfer.
- Crushed mineral accents: Tuck small chips of mica or faux druzy into channels created by cured resin ridges; secure with a second pour for tactile sparkle.
- Etched metal backplates: Chemically etch copper or brass with patterns, patinate, then mount a floating ink cab on top. The metal pattern glows behind translucent color.
- Text overlays: After the first seal, add a single word or date with an oil-based paint pen; lock and dome to memorialize events or coordinates.
From Hobby to Microbrand
Handmade jewelry thrives on narrative. Develop a consistent aesthetic—palette, metal tone, and packaging—that customers associate with your name. Photograph pieces on neutral backgrounds with diffused light to showcase gloss and depth. Price using a formula that accounts for materials, time (including curing), overhead, and a profit margin that sustains growth. Offer limited editions to create urgency and custom commissions for milestones like anniversaries or births. Be mindful of regulations: nickel-release limits in earrings, lead content in solders, and accurate metal labeling. Clear care instruction cards reduce returns and encourage referrals.
Process Discipline: Repeatability Without Losing Magic
Because alcohol-ink art is inherently fluid, systemize what you can: keep a swatch library of color interactions, log ambient temperature and humidity, and standardize your sealing stack (number of fixative passes, UV coats, timings). This discipline supports consistent small-batch production while preserving the spontaneity that makes every miniature painting unique.
Environmental Considerations
Reduce waste by decanting small solvent amounts, reusing silicone tools, and curing leftover resin in thin sheets for later use as decorative shards. Choose recyclable packaging and include a brief note about responsible disposal of silica gel and polishing cloths. Small shifts in process ripple outward when you move from one-off gifts to steady production.
Closing Thoughts
Creating jewelry with alcohol inks is a dialogue between flow and form. You choreograph color with breath and timing, then lock it forever under a clear, protective dome. The result is intimate art—small enough to wear, bold enough to start conversations. With thoughtful material choices, meticulous sealing, and attention to craft, your pieces will carry their luminous stories for years to come—pocket universes of motion, distilled and made wearable.