Nothing elevates a handmade bracelet like the graceful order of multiple strands that lie flat, glide as one, and never corkscrew around your wrist. The secret is not magic but method: choosing the right materials, building structure into your design, and managing small details from the first bead to the final clasp. This guide gathers workshop-proven strategies, design math, and finishing techniques so your multi-strand creations stay flat and elegant—day after day, wear after wear.
Why Multi-Strands Twist: What’s Really Happening
When a multi-strand bracelet twists, it is responding to imbalances within the system. Imagine each strand as its own path with a specific length, weight distribution, flexibility, and friction against neighboring strands. If these variables differ too much, a spiral forms as the bracelet seeks a new equilibrium.
- Unequal strand lengths: If outer strands are shorter than inner ones (or vice versa), the assembly fights itself and rotates.
- Weight and bead density differences: Heavy beads on one strand and airy beads on another add rotational bias.
- Inconsistent tension: Pulling hard on one strand during stringing and softly on another bakes in twist you only see after closing the clasp.
- Hardware mismatch: End components that don’t keep strands parallel introduce crossing and torque.
- Friction and stiffness: Stiff wire with no allowances will impose a curve that lighter strands must orbit.
Think of twist as invisible torque that lives in the piece until it has space to show itself. Your job, as the maker, is to design out that torque: equalize, counterbalance, and lock orientation points so the bracelet returns to a flat state when relaxed.
Materials and Tools That Prevent Twist
Material choice sets your baseline behavior. Before stringing, audition candidates on your work mat and perform small swatch tests.
- Bead stringing wire: 7-strand, 19-strand, and 49-strand stainless steel with nylon coating. The higher the strand count, the more supple and kink-resistant. For multi-strands, 19- or 49-strand (0.014–0.018 in / 0.36–0.46 mm) usually drapes best.
- Beading thread and cord: Nylon (Nymo, S-Lon), polyester, and bonded nylon resist fraying; silk offers beautiful drape but stretches. Condition thread for smoother passes and less fuzz.
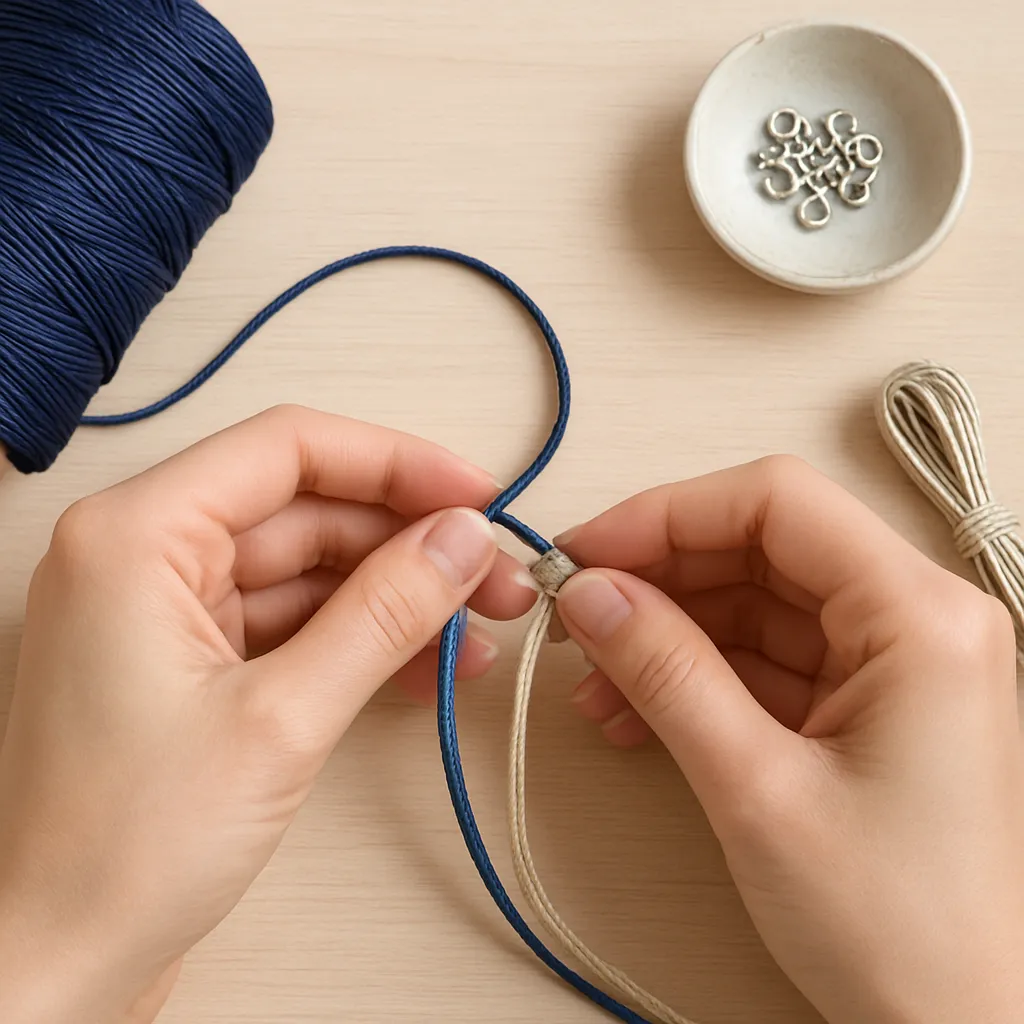
- Leather, cotton, and waxed cords: Great for clean lines. Use parallel-hole connectors and multi-loop clasps to keep a flat profile.
- Spacer bars and multi-hole components: Parallelize strands and prevent migration. Look for smooth channels, consistent hole sizing, and finishes that won’t abrade.
- Crimp tubes and beads: Tubes grip more evenly than round crimps. Pair size to wire for secure, non-slip connections.
- End tips and wire guardians: Reduce metal-on-metal wear, keep loops sized consistently, and present a uniform exit angle.
- Beading board with channels: Plan, measure, and mirror your strands without guesswork.
- Soft jaw pliers and micro-crimpers: Preserve coatings, form compact crimps, and avoid weak kinks.
A quick word on beads: cut quality, hole smoothness, and weight matter. Faceted gemstones with sharp edges can saw through cord unless you buffer them with seed beads, grommet beads, or knots. Wood and polymer are light and need fewer support structures. Glass ranges by brand—test hole consistency so strands don’t fall out of step.
Planning: Mapping Strands Before You String
Multi-strand success begins on paper or your beading board. Sketch the strands as parallel lines from left end to right end, labeling the inside (closest to the wrist) through outermost strand. Note bead families and any transitions. Mark where spacers or multi-hole components will sit, and where any intentional crossovers (if any) occur.
- Strand order: Decide inner to outer sequence and maintain it throughout. Write it down. Take a phone photo to remember orientation.
- Length strategy: For supple wire with spacer bars, equal lengths often work if you allow micro-slack at the ends. For stiffer paths (thicker wire, heavy beads), give outer strands a whisper more length so they can take the longer arc comfortably.
- Weight balancing: Distribute heavy beads across the central plane. If one strand carries a chunky focal, consider counterweight beads on flanking strands to re-center mass.
- Mirror symmetry: Mirrored left-right sequences naturally resist twist because the layout balances forces across the midpoint.
- Consistent units: Keep bead counts consistent across strands when using same bead sizes; if using varied sizes, equalize the total linear length, not the count.
Make a “strand legend” with exact recipes: bead order, count, and interspersed spacers, plus anticipated finished length (including clasp). This becomes your production checklist, eliminating guesswork that causes lopsided results.
Core Techniques to Keep Strands Flat
These are your anti-twist building blocks, applicable across styles and materials.
1) Use Parallel Hardware
Choose end findings that enforce parallel exits. Multi-strand box clasps, slide clasps, and ribbon crimps with multiple loops keep each strand in its lane. Between ends, add spacer bars every 2–4 cm, especially with round components that like to nest. A well-chosen spacer bar acts like a bridge truss: it stops migration and cues the eye to orderly lines.
2) Control Entry and Exit Angles
Strands should approach end components straight, not splaying outward or crisscrossing. Use wire guardians to define a consistent loop radius; they also reduce friction. Avoid jump rings that can rotate freely unless they’re part of a keyed system that can’t spin.
3) Balance Slack and Pre-Load
During assembly, keep each strand equally snug. Work on a bead board, clip your first end, and temporarily pin the far end with binder clips or bead stoppers. Compare drape by gently curving the band into a bracelet arc while uncrimped—adjust bead counts or micro-slack until all strands curve together without buckling.
4) Lock Orientation Points
Spacer bars, multi-hole beads, or stitched ladders are “orientation anchors.” Install them at intervals so the piece returns to a flat state after movement. Even two anchors—one near each end—dramatically reduce twist. Add a decorative center anchor (e.g., a three-hole focal) to divide the distance.
5) Harmonize Strand Flexibility
Mixing a very stiff strand with a slinky one is an invitation to spiral. Match wire gauges and cord types across strands, or intentionally grade them and compensate with more frequent orientation anchors. If using a center strand of rigid tube beads, put similar-length straight runs on adjacent strands to equalize behavior.
6) Think in Cross-Section
Picture the bracelet cut in half: where are the heaviest beads? Keep mass near the midline. Big beads on the outermost strand shift the center of gravity and encourage rotation. Save the heaviest beads for the middle, and use medium-light beads outside.
Stringing Methods That Resist Twist
Here are reliable constructions for different materials and aesthetics.
Beading Wire, 3–6 Strands
- Components: 49-strand coated wire, crimp tubes, wire guardians, multi-strand slide clasp, spacer bars with smooth holes.
- Process: Cut all wires 10–15 cm longer than needed. Attach wires to the clasp using guardians and temporarily crimp with light pressure so you can adjust. String beads per your legend. Add spacer bars every 2–3 cm (closer if beads tend to nest). Curve into bracelet shape, compare drape across strands, tweak counts, then complete final, firm crimps.
- Note: Always size crimp tubes to your wire—too big slips; too small crushes. A perfect crimp is compact, smooth, and immovable.
Threaded and Knotted Strands
- Components: Bonded nylon or silk, bead tips (clamshells) or guardians, French wire (bullion), multi-loop clasps, spacer bars with seed bead buffers.
- Process: Condition thread with wax to reduce fray. For pearls or gemstones, knot between beads for even spacing and anti-chafe action. Use bead tips to end neatly and keep exit angles consistent. Incorporate spacer bars to align knots across strands; this adds structure and visual rhythm.
- Tip: If silk is chosen, pre-stretch or live with slight initial lengthening; build adjustability into the closing chain.
Corded and Leather Builds
- Components: 1–2 mm cords, multi-slot ribbon clamps or tube ends, bar spacers with wide channels, adhesive rated for leather, stitched wraps.
- Process: Cut cords with incremental length increases for outer strands (1–3 mm), test-wrap around a bracelet mandrel, then secure ends uniformly. Use flat bar spacers to keep cords parallel; stitch or wrap at intervals to prevent migration.
- Finish: Line ribbon clamps with thin suede for grip and to avoid crushing.
Stitched Ladders and Loomed Bands
- Components: Beading thread, two parallel warp cords or leather strips, beads forming ladder rungs (e.g., 11/0 seed beads), spacer focal with three holes.
- Benefit: The ladder structure itself enforces alignment. Multiple beaded lanes share the same rails, so they cannot twist independently.
- Variation: Right-angle weave “rails” with multi-lane insets act like a fabric—flat, flexible, and orientation-safe.
Wrapped Link (Rosary) Multi-Strands
- Components: Wire for wrapped loops, small chain sections, multi-loop connector bars, jump rings (soldered preferred).
- Approach: Build equal-length beaded link chains, connect to multi-loop connectors, and test drape. The rotational rigidity of wrapped links resists twist, especially if connectors hold lanes in parallel.
Closures That Lock Orientation
The right closure transforms a good build into a great, twist-free bracelet.
- Slide clasps: Linear, sleek, and designed for parallel lanes. Excellent for 3–6 strands. Choose a length that matches the band width.
- Box clasps with multiple loops: Elegant and secure, often available in two to five loops. The loop geometry prevents splaying.
- Magnetic multi-row clasps: Convenient, but choose high-strength magnets and add a safety chain for heavy designs.
- Ribbon crimps with multi-loops: Ideal for cords, flat braids, or seed-bead fabrics. Ensure the crimp face is textured for grip.
Whichever you pick, keep all loop sizes consistent at both ends. A mismatched loop on one side can permit micro-rotation that grows over time. A high-quality clasp is not an afterthought—it’s a structural component.
Measurements, Fit, and Drape
Twist often reveals itself when the bracelet bends into a circle. The outer arc is longer than the inner arc. If your strands are identical and very stiff, the outer lanes will fight for length. Here are practical rules.
- For supple beading wire with spacer bars: Strand lengths can be equal. Build in tiny slack at the ends: when the bracelet is flat on the board, you should be able to wiggle 1–2 beads gently on each strand.
- For stiffer paths or large bead diameters: Give the outermost strand an extra 2–4 mm, the next outer 1–2 mm, and keep the inner as your baseline. Adjust after a curved test-fit on a mandrel.
- Curvature math (rule of thumb): Extra length per strand ≈ 2π × Δr, where Δr is the radial offset from the middle lane. For most bracelets, Δr per lane is roughly the bead radius plus the gap enforced by spacers.
- Wrist sizing: Aim for 1.3–1.9 cm (0.5–0.75 in) over snug wrist circumference for comfort, adjusting for clasp type and bead bulk.
Step-by-Step: A Flat Three-Strand Beaded Bracelet
This staple project demonstrates the principles in a versatile format.
- Materials:
- 49-strand beading wire, 0.46 mm (0.018 in), three lengths at 30 cm.
- Crimp tubes, size 2, six pieces.
- Wire guardians, six pieces.
- Slide clasp with three loops, 25–30 mm long.
- Spacer bars with three holes, five pieces, hole ID slightly larger than bead wire.
- Beads: three families, roughly 4–6 mm; ensure similar hole sizes.
- Seed beads (11/0) for buffering if needed.
- Plan: Assign inner strand to the heaviest or densest beads, outer strands to lighter beads. Design a mirrored pattern left-to-right.
- Attach first end: Thread each wire through a guardian and the corresponding clasp loop. Add a crimp tube, snug but not overtight, and pre-crimp lightly on each wire so the loop size matches across all three.
- Stringing: Build each strand following the legend. Insert a spacer bar every 2.5–3 cm. Keep bead counts equal where sizes match; otherwise equalize linear length.
- Test-drape: Curve the bracelet into a circle on a mandrel or around a can. If an outer strand buckles, add one small seed bead or equivalent length. If the inner strand bows out, remove one small unit.
- Final end: Feed all wires through the opposite guardians and clasp loops, then through their crimp tubes. Adjust micro-slack so all three strands lie flat in a curve. Firmly crimp with a micro-crimper, forming a neat, secure fold. Trim tails, burying them back through the last 2–3 beads.
- Quality check: Hold the bracelet by one end; it should hang straight with no spiraling. Lay it flat; strands should lie parallel between spacers.
Alternative Build: Three-Cord Leather with Bar Spacers
For a modern, clean look without beads:
- Cut three cords: inner 15.5 cm, middle 15.6 cm, outer 15.7 cm (adjust to wrist). These micro-increments help the outer arc.
- Slide on three to five flat bar spacers with channels wide enough for cords. Space them evenly.
- Glue-tack cords at ends in position, then capture them inside ribbon clamps lined with thin suede. Add a multi-loop slide clasp.
- Press clamps evenly so cords exit straight; test that spacers can move slightly but don’t permit crossing.
Advanced Strategies: Designing Out Rotation
- Counterweighting: If one strand has a heavy central focal, add smaller metal accents on the adjacent strands near the center to re-center mass.
- Indexing elements: Use occasional three-hole beads that key the lanes together. These provide mechanical indexing against rotation.
- Graded stiffness: Subtly stiffer center lane with slightly softer outers can keep the band planar; avoid extreme differences.
- Anti-nesting buffers: Insert tiny seed beads between larger rounds to reduce interlocking that forces spiral when bent.
- Flow testing: Before final crimps, twirl the piece gently; if it seeks to spin, you have residual stored energy. Adjust slack and spacer placement until the piece relaxes flat.
Common Mistakes and How to Fix Them
- Mistake: Over-crimping, crushing wire, and locking in a kink. Fix: Replace the crushed section, use proper tube size and a micro-crimper; practice on scrap first.
- Mistake: Random spacer intervals. Fix: Space them rhythmically; consistency prevents local bulges that trigger twist.
- Mistake: Mismatched loop sizes at ends. Fix: Use guardians and measure loop lengths; small loop discrepancies translate into visible rotation.
- Mistake: Unequal bead hole sizes causing one strand to compact more. Fix: Pre-sort beads for hole consistency; use seed bead buffers when holes are large.
- Mistake: Heavy charms hanging from a single outer lane. Fix: Hang from the central lane or split charm load between two inner lanes.
Testing Protocols Before You Gift or Sell
- Hang test: Suspend from one end; it should hang like a ladder, lanes parallel.
- Rotation test: Close the clasp, lay on a flat surface, and gently nudge the bracelet to curve; it should not corkscrew.
- Mandrel roll: On a bracelet mandrel, roll a half-turn. Look for buckling or gaps; adjust slack or bead counts.
- Wear simulation: Flex the piece repeatedly in your hands. Quality wire and crimps should show no kinks or memory.
Finishing Finesse: Details That Matter
- Wire tails: Thread at least 2–3 beads past the crimp to hide tails and reduce snag risk.
- Protective components: Use wire guardians or French wire to protect thread exits from metal loops.
- Neat crimps: A well-executed crimp is a structural hinge. Practice forming a clean, compact fold; consider a bead cover if aesthetics demand it.
- End symmetry: Keep the sequence of loops (top to bottom) identical on both ends so the piece isn’t forced to rotate at closure.
Design Variations That Naturally Resist Twist
- Rail-and-lane builds: Stitch or string two “rails” that hold multiple beaded lanes between them—like a ladder track.
- Mesh cuffs: Convert three or more strands into a beaded fabric using ladder or square stitch; add a slide clasp.
- Segmented panels: Divide the bracelet into rigid panels linked by short connector chains; the panels don’t twist, and the connectors articulate.
- Mixed media with bar anchors: Pair chain, cord, and beads but reunite all lanes at regular three-hole bars.
Care, Storage, and Longevity
A well-constructed bracelet will last, but maintenance helps preserve structure.
- Storage: Lay flat or curve gently around a soft form; avoid tight coils that imprint memory into wire.
- Chemicals: Keep away from perfumes and hairsprays; coatings and cords degrade over time with exposure.
- Cleaning: Wipe with a soft cloth; avoid aggressive polishing on plated spacers and clasps.
- Inspection: Periodically check crimps, spacer bars, and the clasp for loosening. Re-crimp at the first sign of slippage.
Professional Tips from the Bench
- Set up a “lane jig” by taping three or more parallel cocktail straws to your mat; feed strands between them while stringing to maintain separation.
- Use stop-beads at the far end while auditioning patterns; they let you adjust counts without a runaway spill.
- Keep a calibration card listing typical length deltas for your favorite bead sizes so you can quickly apply outer-strand micro-additions.
- Photograph every layout before final closing; these snapshots are lifesavers for repeat orders.
- Test with the intended clasp first; different closures alter loop geometry and perceived length.
Troubleshooting a Finished Bracelet That Twists
If you discover twist after completion, you can often rescue the piece:
- Isolate the bias: Close the bracelet and note which strand rides high or low in the curve.
- Open one end only: Remove the crimp cover if present, cut the crimp on the side with more apparent strain, and release that strand’s tension.
- Redistribute length: Add or remove a small bead (or two seed beads) from the offending strand, re-thread, and re-crimp while curved around a mandrel.
- Add an anchor: If migration persists, insert an extra spacer bar mid-span to freeze orientation.
- Rebalance weight: Move a heavy charm or focal to the center lane.
Going Beyond: A Two-Plane Approach
In demanding builds—large stones, asymmetrical composition—consider a hidden substructure: a thin stitched ladder or wire frame beneath the decorative strands. The visible strands attach at multiple points, gaining distributed support. This converts three independent strands into a unified assembly that naturally resists rotation through engineered stabilizers.
Ergonomics and Wearability
Flatness is only part of comfort. The bracelet should move with the wrist, not against it. Aim for gentle articulation at predictable intervals—spacer bars close enough to prevent billowing but far enough apart for a fluid bend. For heavy designs, a small safety chain not only secures the piece but subtly limits torque by sharing load during wrist rotation.
Quality Metrics for Repeatable Results
- Parallelism index: With the bracelet curved, gaps between lanes should be uniform within 0.5–1 mm.
- Return-to-flat behavior: After flexing, the piece should return to a flat, untwisted state without finger coaxing.
- Crimp integrity: Pull test each strand individually to verify no slippage and no coating damage.
- Loop consistency: End loop diameters should match within a fraction of a millimeter—use a dowel as a forming mandrel for repeatability.
Sustainability and Material Choices
Responsible making is good craft. Choose recycled metals when possible, source beads from ethical suppliers, and favor durable cords that extend product life. Better durability reduces rework and waste while preserving the wearer’s trust in your brand.
Putting It All Together
Keeping multi-strand bracelets from twisting is an orchestration of design foresight, measured construction, and disciplined finishing. You build in balance with mirrored patterns, reinforce order with parallel hardware, fine-tune with micro-length differences, and validate with systematic tests. When your piece lies flat and bends in a single, graceful arc, you’ve done more than assemble beads: you’ve engineered harmony.
Make yourself a short checklist for your bench: plan, match materials, anchor orientation, equalize mass, test while curved, and close with care. Each finished bracelet becomes a reference you can measure and repeat. Over time, you’ll develop your own internal calibration—that sixth sense that tells you exactly how many seed beads to add to an outer strand or where to place a spacer for perfect balance. With that habit of mind, your multi-strand work won’t just avoid twisting; it will record the quiet precision of a craftsperson in full command.