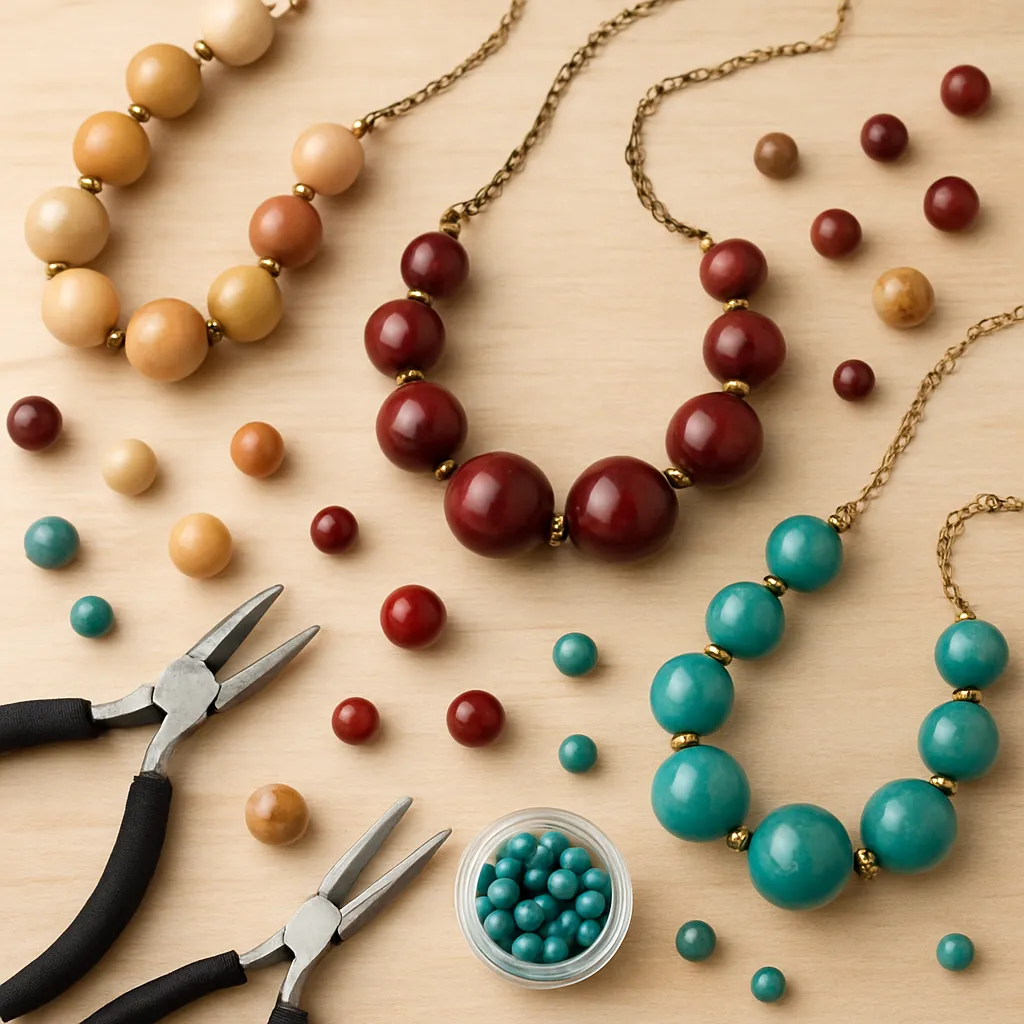
Big beads invite bold ideas. A statement necklace built from generous forms is more than ornament; it is rhythm, structure, and movement you can wear. In the quiet focus of handicraft, hands learn the weight of glass or wood, the cool glide of ceramic, the glow of resin that catches sunlight at the collarbone. With a few approachable techniques and a clear plan, you can transform scattered strands and salvaged finds into a piece that commands the room—one that feels as personal as a diary and as strong as sculpture.
Why Large-Bead Statement Necklaces Capture Attention
Scale changes everything. When bead diameters rise beyond 12–14 mm, the necklace takes on architectural qualities: the silhouette becomes readable across a room, the surface textures start to matter, and the negative space around the neck becomes an intentional part of the design. Large beads also compress decision-making. With fewer units per strand, each element needs a purpose—shape, finish, patterning, or memory. That focus leads to heightened composition and teaches restraint.
Another reason these pieces resonate is their tactile narrative. Hefty wood warms against the skin. Matte porcelain hushes the palette, while glossy Czech glass pops with saturated color. Facets flash in motion; patinated metal beads hint at history. Even sound becomes a design element: a muted clack from ceramic rounds or a rustle from multiple strands in a torsade can be delightful when worn.
Finally, large beads invite wearers to negotiate scale and presence. Some choose a single oversized focal bead on leather; others embrace a cascade of graduated spheres for dramatic lift. The craftsperson learns to balance visual mass with comfort, a lesson that travels into all jewelry making.
Choosing Materials: Beads, Cords, and Findings
Material choice sets the tone, longevity, and comfort of your necklace. Before purchasing or pulling from your stash, weigh three factors: aesthetics, structure, and skin-friendliness.
Beads by Material and Behavior
- Wood (acacia, bayong, ebony, olive): Light, warm, forgiving on the neck. Ideal for very large diameters (20–30 mm) without excessive weight. Accepts wax, oil, and stain. Beware of uneven holes; keep a bead reamer handy.
- Ceramic/Porcelain: Beautiful glaze options and earthy heft. Hard edges at the hole can cut thread; use wire guardians or bead caps and knotting. Some glazes are porous—keep away from perfume.
- Glass (Czech, lampwork, recycled): Vivid color and sparkle. Heavier than wood; plan for shorter lengths or blend with lighter beads. Inspect for sharp burrs inside holes.
- Resin/Acrylic: Statement scale with minimal weight. Good for dramatic volumes. Watch for surface scratching; store carefully. Modern resins can mimic horn or stone convincingly.
- Stone (howlite, jasper, agate): Polished gravitas. Consider neck comfort—stone gets heavy fast. Use at focal points or in graduated runs, and intersperse with lighter spacers.
- Metal (brass, copper, plated alloys): Adds sheen and structure. Choose lead- and nickel-safe options for sensitive skin. Seal raw brass if you want to slow patina.
- Polymer clay (handmade): Custom shapes, marbling, and textures without weight penalties. Bake thoroughly and sand/finish for a professional look.
Stringing Media
- Nylon-coated steel beading wire (0.018–0.024″): The workhorse for weighty designs. Pairs with crimps and wire guardians. Choose higher strand-count (49-strand) for drape.
- Waxed cotton/leather cord (1–2 mm): Great for a single focal or spaced beads. Tie-friendly, casual, and easy to size with sliding knots or cord ends.
- Silk/nylon thread (size E–FF): For knotting between beads, adding drape and protection. Double or triple strands for large holes; consider gimp/tubing at clasps.
- Memory wire (neck-size): Holds a round collar shape. Best for lighter beads. Ends must be looped or capped securely.
- Chain (stainless, brass, sterling): Hybrid designs that mix chain with focal beads reduce weight and add adjustability.
Findings and Tools
- Clasps: Lobster (secure, common), toggle (easy to fasten, decorative), magnetic (convenient, but avoid with pacemakers; use strong grade and safety chain).
- Crimps and covers: Micro-tubes or round crimps plus a matching cover for a clean finish.
- Jump rings/split rings: 18–16 gauge for heavy pieces; harden with a light hammer tap if needed.
- Wire guardians and clamshells: Reduce abrasion where wire meets clasp.
- Spacers and bead caps: Add rhythm, hide large holes, and shape transitions near the clasp.
- Essential tools: Chain-nose pliers, round-nose pliers, crimping pliers, flush cutters, bead board, soft tape measure, bead reamer, micro file, calipers.
Quality tools and findings are investments in durability. Cheaper wire or soft crimps may slip under load; “buy once, cry once” applies here.
Design Planning: From Sketch to String
Before touching the wire, plan on paper or a bead board. A clear plan reduces midstream frustration and protects your bead inventory from repeated stringing and unstringing.
Length and Drape
- Choker: 35–40 cm (14–16″). Tight fit; weight needs careful distribution to avoid rotation.
- Princess: 43–48 cm (17–19″). The most versatile range for big beads.
- Matinee: 50–61 cm (20–24″). Elegant line; allows heavier focal without strain.
- Opera: 71–91 cm (28–36″) and Rope: 91+ cm (36″+): Works with lighter beads or mixed media; consider knots as visual punctuation.
Visual Grammar for Bold Beads
- Scale and proportion: Use graduated sizes (e.g., 22–18–14 mm) to transition from center to clasp. Tiny spacers (2–4 mm) create breathing room.
- Balance vs. focal tension: Symmetric layouts are calming; asymmetry adds energy. Even asymmetric pieces need center-of-gravity awareness so they hang correctly.
- Composition lines: A single focal, a run of repeats, or a bib-style cluster—choose one primary idea and support it.
- Palette and color theory: Analogous schemes feel cohesive; complements spark drama. Neutrals (wood, bone, matte black) can anchor saturated beads.
- Texture: Mix matte and gloss, smooth and faceted, soft cord and hard metal for dynamism.
Measuring and Mockups
Use a bead board to lay out sequences. Mark the center. If working off the board, thread on scrap cotton first to test lengths. Try a mirror test: place the mockup at the intended height and move—turn your head, reach forward. Does the focal flip? Does the strand sit flat? Adjust spacing and weight distribution before committing.
Core Techniques for Secure, Professional Results
Crimping on Beading Wire
- Slide a crimp tube and a wire guardian onto the wire; loop around the clasp ring and back through the crimp.
- Remove slack but preserve a tiny hinge so the clasp can move freely.
- Use crimping pliers: first station to crease the crimp, second station to round it. Tug-test. Add a crimp cover for polish.
- Hide tail wire inside the first 2–3 beads if holes allow; otherwise trim flush.
Knotting Between Large Beads
- Thread doubled silk/nylon, attach to clasp with gimp (French wire) to protect from friction.
- After each bead, tie an overhand knot and seat it snug with tweezers or an awl at the bead’s base.
- For big holes, add a hidden seed bead or use two passes through each bead to center the knot.
Wire-Wrapped Loops for Heavy Focals
- Use 20–18 gauge wire for load-bearing loops. Create a simple loop, wrap 2–3 turns neatly, and trim/burnish the cut end.
- Connect to the main strand via a sturdy jump ring, closed with proper opposing-twist technique.
Finishing and Comfort
Edges and transitions matter. Place bead caps to soften steps from large beads to small. Use wire guardians to prevent sawing at the clasp. Add a 5–7 cm extender chain for adjustability; a small dangle at the end adds charm and counterweight. Little choices like these elevate craftsmanship and long-term wear.
Tip: Pre-stretch cords and test every crimp with a firm pull. Weak spots reveal themselves before you gift or sell.
Three Step-by-Step Projects
1) Graduated Wood Bead Power Choker
Statement without strain, warm in tone, and ready for any season.
- Materials: 22–14 mm round wood beads (varied species), 2–3 mm metal spacers, 0.019″ 49-strand beading wire, 2 crimp tubes, 2 crimp covers, wire guardians, 16–18″ toggle clasp, 5 cm extender chain (optional).
- Steps:
- Lay out a center-heavy gradient (22–20–18–16–14 mm) mirrored on both sides, interspersed with 2–3 mm spacers for articulation.
- String from center outward on the wire. Check fit at 40 cm on the board; add/remove spacers as needed.
- Attach the first clasp side with guardian and crimp; cover. Thread remaining beads, then finish the other end. Tug-test and burnish crimp covers.
- Oil the wood lightly (mineral oil), wipe dry. This deepens tone and protects from humidity.
2) Asymmetrical Ceramic + Brass Showcase
Leans into contrast and controlled imbalance while maintaining wearable balance.
- Materials: 3 large ceramic beads (20–24 mm), assorted 10–14 mm brass rounds and saucers, 6 seed beads for spacing, 0.024″ beading wire, wire guardians, crimps/covers, lobster clasp, 7 cm extender, 16 gauge jump rings.
- Steps:
- Sketch an off-center plan: two ceramics near center-left, one near center-right, buffered by brass and tiny seed beads to prevent clacking.
- String and repeatedly test on the neck to ensure the focal rests level. Shift a heavier brass bead opposite the ceramics to correct hang.
- Crimp and finish. Oxidize brass components if desired; seal with microcrystalline wax for skin-friendly wear.
3) Multi-Strand Glass Torsade
Lux volume without singularly heavy beads; twist locks strands into a sculptural rope.
- Materials: 5–7 strands of 8–12 mm glass rounds mixed with small spacers, bead tips or multi-strand cones, 0.018″ wire (one per strand), crimps, large toggle clasp, short safety chain.
- Steps:
- Design each strand with a slightly different repetition to create micro-variation.
- Secure all strands into a cone or multi-strand end with separate crimps for redundancy.
- Before attaching the second end, twist the bundle until it shortens by 2–3 cm and feels cohesive; hold the twist and crimp into the second cone.
- Add a robust toggle and a discreet safety chain for extra security.
Styling and Wearability
Match scale to neckline: a crew neck frames a bib beautifully; a V-neck echoes a pointed focal; off-shoulder tops let a choker dominate. For workwear, keep palette restrained but play with silhouette. Evening looks can host saturated hues and metallic drama. Think of the necklace as architecture for the outfit.
Mind ergonomics: set a comfortable weight limit. Many people enjoy up to 150–200 g for short lengths; beyond that, consider lighter materials or split volume across multiple tiers. If a necklace creeps backward, redistribute weight toward the clasp or add a small counterweight at the extender tip. For sensitive skin, choose stainless steel or titanium findings and seal porous beads.
Troubleshooting and Maker Pro Tips
- Bead holes abrade thread: Use bead caps, add a hidden seed bead as a bushing, or switch to coated wire with guardians.
- Strand kinks: Let beading wire relax off the spool, and choose higher strand-count for better drape.
- Beads spin and show holes: Insert tiny silicone or metal spacers; they add friction and visual polish.
- Crimps slip: Size crimp to wire precisely; too large is worse than too small. Practice with scrap.
- Uneven lay at the collarbone: Add micro-spacers near the high-curve area; this creates hinge points.
- Asymmetric piece tilts: Add mass opposite the heavy focal or move the clasp slightly off-center to counterbalance.
- Strand length shrinks after knotting: Pre-plan by adding 5–10 mm to your pre-knot layout, then measure again post-knot.
Diagnostic checklist: flat on a table, is the necklace perfectly mirrored (if symmetric)? On a bust, do beads bunch near the clasp? Under gentle tug, do crimps hold? If all yes, your finishing is sound.
Care, Storage, and Longevity
Wipe beads after wear with a soft cloth to remove oils. Keep metal components dry and store in anti-tarnish bags or with silica gel. Hang lighter necklaces or lay heavier ones flat to prevent string fatigue. Avoid perfume, hairspray, and lotions; these can cloud resin, etch glass finishes, and degrade silk. Periodically inspect knots and crimps; a five-minute maintenance session can prevent a mid-event failure.
For wooden beads, occasional oiling (walnut or mineral oil) preserves luster. For brass and copper, decide whether you love patina; if not, seal with a gentle wax. Ceramic and glass want only a damp cloth; no harsh cleaners needed.
Sustainable and Ethical Making
A bold necklace can be a bold statement about values. Thrift-store remixes, estate-sale harvests, and studio offcuts turn into modern heirlooms. Intentional upcycling keeps materials in motion, reduces extraction, and fuels creativity. Combine rescued glass with new nickel-free findings for skin-friendly wear and refined style. If purchasing new, look for fair-trade bead cooperatives and suppliers who publish environmental data.
Plan for sustainability at the design stage. Choose robust connections so the necklace lives for years, add extender chains to extend fit across body changes, and design for disassembly—future you (or a future owner) can reconfigure parts rather than discard them. Package with recycled paper, and print care instructions to prolong life.
Cultural Appreciation and Design Respect
Bold bead traditions flourish worldwide: East African colorwork, West African recycled glass Krobo beads, Naga and Konyak necklaces, Tibetan metal inlays, and so many more. When referencing these aesthetics, research origins, credit inspiration, and avoid sacred motifs reserved for specific communities. Source directly from artisan groups when possible; fair compensation strengthens the tradition you admire.
From Hobby to Microbusiness
If your friends keep asking for one of their own, test the waters of selling. Track material costs, time, overhead, and a profit margin that respects your labor. A simple formula: (materials + hourly rate × hours + overhead) × 2–2.5 for retail. Photograph on a neutral bust in diffuse daylight; show scale on a model and include a close-up of clasp and crimps to display craftsmanship.
- Listings: Include length, weight, materials, clasp type, and care. Note nickel-free status.
- Packaging: Recycled kraft box, anti-tarnish tab, and a small card with styling tips.
- Custom work: Offer palette options and an approval photo before final crimping. Use a 50% deposit for custom orders.
Advanced Ideas to Explore
- Polymer clay cane beads matched to fabric prints; sand to 2000 grit and buff to a glassy finish.
- Resin-cast giant cabochons with embedded botanicals; drill or bezel-set and suspend from leather cord.
- Macramé frames around oversized focal stones; waxed polyester cord provides grip and durability.
- Textile beads: wrap batting with silk scraps, finish with end caps for lightweight volume.
- Mixed-media bibs on perforated leather or metal mesh backings, riveted for strength.
Safety notes: Use ventilation for resin and patina chemicals. Magnets can affect medical devices. Keep small parts away from children. Consider hypoallergenic findings (stainless, titanium) for sensitive clients.
Frequently Asked Questions
How do I keep a heavy focal from flipping? Add a pair of smaller beads as outriggers immediately flanking the focal; they lower the center of gravity and stabilize. Slightly curve the focal’s attachment with a wire-wrapped bail that conforms to the strand’s arc.
What wire size should I use for big beads? For most large-bead strands, 0.019″ 49-strand wire balances strength and drape. Jump to 0.024″ for very heavy glass or stone and toggles; ensure crimps match diameter.
Is knotting practical for oversized beads? Yes. Use thicker silk/nylon (size FF) or double/triple thread. Consider adding seed beads inside the hole to center the knot. Knotting adds flexibility and protects finishes.
Can I make adjustable-length statements? Absolutely—use extender chains, sliding knots on leather, or add removable segments via sturdy lobster clasps and soldered jump rings.
How do I protect my neck from irritation? Choose hypoallergenic metals, seal raw brass, lightly sand rough bead holes, and keep the back-of-neck area smooth with smaller transition beads and capped crimps.
A Working Process You Can Trust
Here is a reliable flow to guide any project from concept to polished piece:
- Define purpose: everyday lift, event drama, or gallery piece.
- Set weight and length targets for comfort and versatility.
- Assemble a limited palette and 1–2 hero textures.
- Mock up on a board; test drape; refine proportion.
- Commit to strong connections: appropriate crimps, guardians, and a clasp that matches mass.
- Finish edges, add extender, and perform a robust pull-test.
- Photograph, document materials, and record measurements for future repeats or repairs.
The Joy of Making and Wearing
Large-bead statement necklaces are an education in restraint, engineering, and personal voice. They ask you to weigh each element—literally and figuratively—and reward you with clarity: what does this bead contribute? Why this finish, this spacing, this clasp? As your eye for composition sharpens, your hands find rhythms that turn small decisions into a cohesive whole. Along the way you cultivate craftsmanship, sensitivity to proportion and balance, and the quiet pride that comes from a reliable, beautiful finishing practice.
Whether your next piece is a sculptural wood choker, a glass torsade that twists like light, or a hybrid chain-and-ceramic collage, trust your instincts and test your structures. Design with durability and ergonomics in mind, leave room for future adjustments, and let curiosity lead. In a world of fast accessories, a hand-built necklace with honest materials and mindful sustainability carries its own resonance—close to the heart, and undeniably yours.
