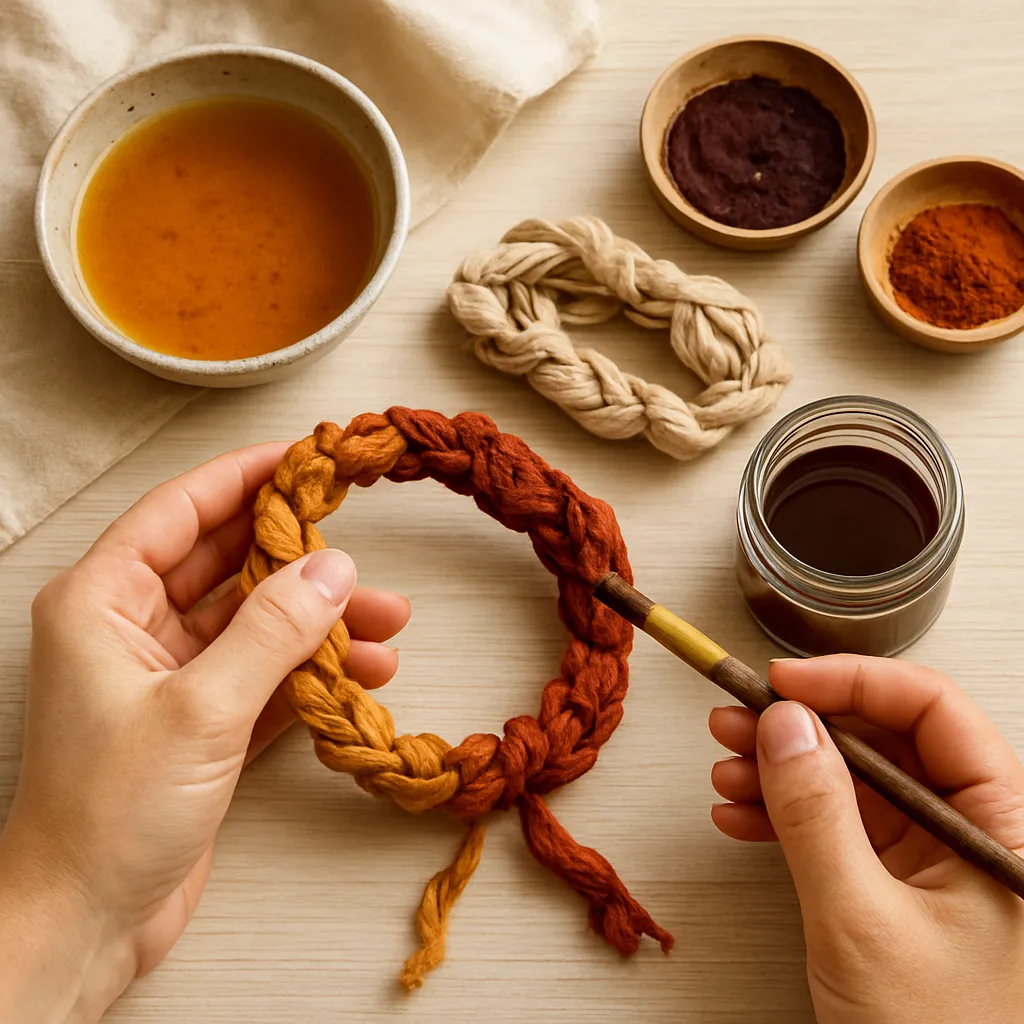
Plant color turns fabric jewelry into something alive, layered with memory, place, and season. A silk cord dipped in marigold summer, a cotton bead stained with walnut autumn, a linen cuff freckled by petals gathered on a morning walk—each piece becomes a wearable keepsake. This guide shows how to add natural dyes to fabric jewelry with studio-grade results, scaled for the small dimensions and structural needs of necklaces, earrings, bangles, brooches, and hairpieces. You will learn to prepare fibers, brew dye baths from kitchen scraps and classic dyestuffs, choose techniques that suit tiny components, and finish pieces so they endure daily wear without losing their handmade charm.
Choosing Fabrics, Colors, and Essential Tools
Best base fabrics for jewelry
Natural fibers carry plant color beautifully and withstand repeated handling. Favor smooth weaves for crisp detail and stronger fibers for durability.
- Silk (habotai, organza, crepe): extremely receptive, fine drape for cords and tassels, excellent luster for luminous colors.
- Cotton (poplin, lawn, sateen): affordable, easy to stiffen, great for wrapped bangles, stuffed beads, and covered buttons.
- Linen (lightweight plain weave): crisp hand adds body to cuffs and pendants, beautiful slubs add organic texture to dyes.
- Hemp and ramie: strong, slightly rustic look; good for braided cords and macramé chokers.
- Wool felt (thin): sculptural elements, cabochon-style pads for brooches; takes color richly.
Blends with a majority of natural fiber content can work, but synthetics shed most plant color. Avoid stretch knits when you need crisp edges or predictable patterning.
Color sources you can trust
Kitchen remnants and classic dye plants offer a wide palette. Aim for concentrated color because jewelry sits at conversation distance and must read clearly.
- Onion skins: golden amber to warm orange; robust and accessible.
- Avocado pits and skins: blush pinks to dusty rose; soft, romantic palette.
- Black tea: fawn to brown; excellent for pre-treating cellulose and subtle neutrals.
- Walnut hulls: deep brown; reliable depth and handsome woodlike tones.
- Madder root: brick to coral red; classic antiquity hues.
- Weld or broom: clear, lightfast yellow; a bright mixer.
- Cochineal: fuchsia to crimson; potent, richly saturated.
- Logwood: violet to near-black; dramatic cool depth.
- Marigold, coreopsis, cosmos: cheerful yellows and golds; perfect for speckles and prints.
- Eucalyptus leaves, pomegranate rinds, chestnut: earthy golds and olives.
Chemistry made friendly
Plant dyes bond to fibers with the help of mineral partners and plant astringents. You will encounter three recurring ideas. First, the fiber must be very clean so dye molecules can attach. Second, a single enabling salt often acts as a mordant. Third, certain plant compounds—especially tannins—aid adhesion on cellulose like cotton and linen.
- Alum (aluminum potassium sulfate) for protein fibers, and aluminum acetate for cellulose: dependable anchors for bright, clear colors.
- Plant astringents: gallnut extract, sumac, tea, or pomegranate rind help cellulose hold color before aluminum treatment.
- Iron (ferrous sulfate) as a post-dye modifier: darkens and cools hues. Use sparingly on silk and wool to avoid harshening the hand.
- Cream of tartar: smooths, brightens on protein fibers.
- pH shifters: vinegar or citric acid (more acidic), washing soda (more alkaline) to nudge colors warmer/cooler.
- Thickeners (gum arabic, guar, sodium alginate) for precise painting and stamping.
One more concept—people often ask whether table salt works as a dye fixative. With plant dyes it rarely helps; focus instead on proper fiber preparation, suitable helpers, and patient curing.
Safe, dedicated tools
- Non-reactive pots (stainless steel or enamel). Reserve for dye work only.
- Heat source you can control steadily; a kitchen hotplate is fine.
- Accurate scale (grams) and measuring spoons; small batch precision matters for jewelry.
- Sieve, muslin bag, or fine strainer for clean dye liquor.
- Jars with lids for modifiers and sample storage; label everything.
- Gloves, apron, and a mask when handling fine powders like alum or iron.
- Thermometer; plant colors respond to gentle heat, not hard boils.
Preparing Fibers and Extracting Color
Scouring: the quiet foundation
Scouring removes sizing, oils, and dirt so molecules of color can nestle into the fiber. For cellulose (cotton, linen, hemp), simmer pieces 30–60 minutes in water with a teaspoon of pH-neutral soap and a teaspoon of washing soda per liter, then rinse until the water runs clear. For silk and wool, keep water below a simmer with just a mild soap—no washing soda—so the fiber stays supple and does not lose luster.
Helping cellulose hold dye
Cellulose benefits from a gentle astringent bath. Make a strong brew of black tea or gallnut extract (5–10% weight-of-fiber), soak the clean fabric 1–2 hours, then rinse lightly. This prepares the surface for aluminum acetate so colors sit bright rather than chalky. An alternative, traditional approach is soymilk pre-sizing: whisk unsweetened soy milk with water (1:5 to 1:10), soak fabric, squeeze out, dry, and repeat once. The finish adds body to jewelry components and helps dyes bite, particularly with painting and printing.
Setting the stage with aluminum
For silk and wool, dissolve alum at 10–15% weight-of-fiber with optional cream of tartar at 6%, hold at 60–70°C for 45–60 minutes with gentle stirring. Let the fibers cool in the bath, then hang to dry 24 hours before dyeing. For cellulose, use aluminum acetate at 5–8% weight-of-fiber in warm water for 30–45 minutes, then a brief chalk bath (1 teaspoon calcium carbonate per liter) to convert aluminum to a form that binds well to cotton and linen. Drying overnight helps the complex set.
Extracting dye without murk
Cover your plant material with water at about a 1:8 ratio for strong color. Warm gently—never a hard boil—to 70–80°C and hold 30–90 minutes depending on the material. Onions and marigold release fast; roots and wood chips prefer longer, sometimes an overnight steep. Strain through a fine cloth so no tiny particles lodge in your weave, because those flecks can later brush off and take color with them. Keep dye liquors labeled; strength and shade vary with season and source.
Right-size batching for jewelry
Small components need small containers. Use narrow jars for concentrated baths so tiny tassels or strips can submerge completely while you keep a rich color-to-fiber ratio. When you want a gradient on a cord or strip, the narrow jar also makes it easy to dip progressively for an ombré effect without mixing in a wide pan.
Coloring Techniques Tailored to Jewelry Scale
Even tones with controlled immersion
This method works for cords, tassels, yardage for wrapping bangles, and fabric destined for cutting into beads. Wet out the material thoroughly, then slide it into the warm dye at 60–75°C. Stir gently to avoid streaks. Hold 20–45 minutes, testing every 5–10 minutes; colors generally appear a shade darker when wet than dry. For deeper shades, lift to air for a minute, then return—repeat dip-and-air cycles to intensify without shocking the fiber. For gradients, lower the piece slowly, pausing at intervals so the bottom spends longer in the bath.
Petal prints and leaf ghosting: bundle dye and eco-printing
Scatter flower petals and small leaves on pretreated fabric, mist lightly, then roll around a dowel or cord with firm tension. Tie with thread. Steam over water for 60–90 minutes, keeping the bundle from sitting in liquid. Cool completely before unwrapping. The result is speckled, botanical constellations that read beautifully at jewelry scale. Use marigold, coreopsis, and purple basil for reliable shapes; add a spritz of vinegar to sharpen yellows, or a wash of iron water on select areas to deepen purples.
Pattern through pressure: miniature clamps and stitched resist
Shibori principles shine on small pieces. Fold a strip accordion-style and sandwich with tiny triangles of acrylic or coin-sized discs, then clamp with binder clips for crisp repeats. For stitched effects, run tight gathering stitches along a narrow band, pull hard, tie off, and dye—the compressed channels emerge pale and graphic. On bead blanks, wrap segments with strong thread, dye, then snip ties to reveal rings of lighter fabric.
Hand painting and stamping
Thicken a filtered dye liquor with gum arabic or alginate until it brushes like watercolor syrup. Paint motifs onto pretreated fabric stretched on a board. For stamped repeats, carve a soft block, pad it with thickened dye, and press firmly. Let the piece cure overnight before the first rinse. For extra precision on jewelry parts, pre-cut shapes slightly oversized, paint, then trim to final outline once dry.
Speckles, shadows, and gentle oxidation
Flick dye with a toothbrush for freckles that animate earrings and pendants. For moody shadows, prepare a weak bath of iron water (rusty nails steeped in vinegar, diluted until pale gray) and brush selectively over logwood or walnut-dyed fabric; the tone will shift cooler as the surface reacts with air. Always test—iron can dull bright colors quickly.
Modifiers and pH play
After dyeing, a short dunk in acidic or alkaline water can steer a hue. Cochineal slides toward orange in acid and purple in alkaline. Weld shifts from lemon to chartreuse with a kiss of washing soda. Walnut resists big swings but deepens with a minute in a weak iron bath. Limit modification to small tests, then scale up for your batch.
Project Guides for Wearable Scale
Silk ombré cords for necklaces
- Cut bias strips of silk 3–4 cm wide; join ends diagonally to make a long ribbon. Fold edges inward and stitch to form a soft tube, or use a tube turner.
- Prepare a concentrated weld bath. Wet the tube, then dip the lower third for 5 minutes, the middle for 2–3 minutes, leaving the top pale. Repeat cycles to smooth transitions.
- Rinse gently, dry, and steam press. Finish ends with cord tips or wrap tightly with thread and a tiny dab of fabric glue hidden under the wrap.
- Combine multiple cords in related tones for layered depth.
Petal-sprinkled earrings
- Cut lightweight silk rectangles sized for your earring frames or bezels.
- Mist with water, scatter marigold and coreopsis petals, roll around a skewer, tie, and steam 60 minutes.
- Unwrap when cool; stabilize with a thin brush-on coat of diluted soy binder if needed for crisp edges when cutting.
- Mount into frames with micro-stitches or set under glass cabochons.
Walnut wrist bangle with shadowed edge
- Wrap cotton strip snugly around a wooden bangle form, overlapping slightly and stitching invisibly.
- Dye by dipping the outer rim in strong walnut liquor for 20 minutes while keeping the inner rim lighter for a two-tone effect.
- Brush a whisper of iron modifier along the very edge for a thin dark halo. Let dry fully.
- Rub with a beeswax-balm, then buff to a soft sheen for a touchable finish.
Stuffed fabric beads with ring pattern
- Cut tiny circles of cotton, baste around the edge, place a pellet of stuffing, then draw up into a firm sphere and knot.
- Wrap each bead with several tight turns of thread at intervals to create ringed segments.
- Dye in madder liquor 30 minutes, rinse, remove ties to reveal pale rings, and let cure before final rinse.
- String on silk with brass spacers for rhythm.
Advanced option: small indigo vat accents
Indigo gives blues that sit well with warm plant colors. A fructose or henna-reduced vat avoids harsh chemicals. Prepare a jam-jar vat, reduce until the surface blooms coppery, then dip pretreated fabric briefly, airing between dips. Limit indigo use on jewelry to accents to keep process time modest and to honor the clean-water ethic of your studio.
Design and Palette Planning for Miniature Surfaces
Scale and contrast
Jewelry lives in small frames, so clarity matters. Choose either high contrast (dark on light, light on dark) or micro-patterns with enough repetition to read as texture. On beads and wrapped bangles, continuous stripes and rings work better than single large motifs that wrap awkwardly.
Layering translucent color
Most plant dyes behave like watercolor glazes. Build color by multiple light passes or dips, allowing dry time between layers. Try weld under madder for flamenco oranges, or onion followed by logwood for chestnut plums. Avoid muddying by limiting layers to two, maybe three, and sampling first.
Neutrals, brights, and the human eye
Anchor bright elements with neutrals so the overall piece doesn’t shout. Walnut, tea, eucalyptus, and cutch supply handsome browns and grays. Use brights—cochineal, weld, logwood—as notes in a chord: three brights play best when one is dominant and two are supporting harmonies.
Finishing, Assembly, and Wearability
Curing, washing, and testing
Let dyed pieces rest at least 24 hours before their first rinse; some plant complexes finish settling during that time. Rinse in cool water with a drop of neutral soap, then air-dry. Rub a white cotton scrap firmly over the surface—if color transfers, repeat a short rinse or extend the curing period. This simple test tells you about practical colorfastness on skin and clothing.
Edge control and stabilizing
For crisp cuts and tidy edges, stabilize light fabrics before trimming by brushing on diluted soy binder or gum arabic; press once dry. On cords and tassels, a minimal touch of clear, water-based adhesive inside metal cord ends prevents fray without stiffening exposed fibers. For soft bangles and brooch bases, add a hidden backing of lightweight interfacing or a second layer of fabric.
Surface protection and luster
Natural wax finishes—beeswax with a little plant oil—lend subtle sheen, add hand-feel, and shed small splashes. Apply lightly, then buff. Protein fibers like silk tolerate a thin casein finish (milk-protein binder) that dries matte and clear.
Hardware, findings, and mixed materials
Select hypoallergenic metals; brass and copper offer warm companionship to plant colors, while silver cools the palette. Think about harmony over time: metals evolve a patina, and plant-dyed fibers gently mellow. Use stitching, lark’s head knots, and tight thread wraps to connect components before resorting to adhesives; this keeps repairs simple and the look authentically handmade.
Care, Troubleshooting, and Small-Studio Tips
Care in wear and cleaning
- Store away from direct sunlight to protect lightfastness.
- Avoid spritzing perfume or hairspray onto fibers; apply before dressing.
- Spot-clean with a barely damp cloth and a whisper of neutral soap; immerse only when necessary.
- If a piece fades or scuffs, re-dye the removable component or brush a touch-up wash of the original dye.
Common issues and fixes
- Blotches or water marks: Often from rapid temperature shifts or uneven wetting. Pre-wet thoroughly and keep heat steady. A second light dye pass can even things out.
- Crocking (color rub-off): Under-cured color or excess surface particles. Brush gently, rinse once more, and cure longer before assembly.
- Dull tones on cotton: Missing the astringent stage or weak aluminum step. Re-run a small test piece through tannin then aluminum acetate, compare to the original.
- Harsh feel on silk or wool: Overheated or over-iron-modified. Reduce heat next time and reserve iron for brief, localized effects.
- Uneven prints in bundles: Bundle too loose or too wet. Increase tension and reduce misting; steam without soaking.
Record-keeping that pays back
Note fabric type, weight-of-fiber, prep steps, dye source, ratios, temperature, and time. Pin a tiny swatch next to your notes. Jewelry uses small batches; your notebook becomes your personal recipe book and saves hours on future collections.
Seasonal and Sustainable Practice
Gathering with respect
Collect windfalls and garden trimmings first. If foraging, take a little from many plants, never all from one. Ask neighbors for onion skins or avocado pits; build community and reduce waste. Buy classic dyestuffs from trusted suppliers who test for adulteration.
Water, waste, and re-use
- Reheat rather than reboil—gentle warmth saves energy and preserves color nuance.
- Use spent dye baths to pre-tone neutral scraps or for paper dyeing before disposal.
- Neutralize acidic or alkaline leftovers toward the middle before pouring onto a gravel bed or a non-food garden area; avoid storm drains.
- Compost plant solids that are free of heavy metals; keep iron- or copper-laced residues out of compost.
Studio flow for small-batch jewelry
Work in micro-series: scour and pre-treat a dozen small blanks at once, then split them among two or three colorways. As pieces cure, assemble earlier batches. This rotation keeps output steady and helps colors mature properly before wear.
Reference Ratios and Quick Recipes
Weight-of-fiber (WOF) basics
Use grams for accuracy. Strong shades for jewelry often start at higher dyestuff ratios than garment dyeing.
- Onion skins: 50–100% WOF for amber–orange.
- Walnut hulls: 50–100% WOF for rich browns.
- Madder root: 50–100% WOF; long, warm extraction for reds.
- Weld: 20–40% WOF for lemon-bright yellow.
- Cochineal: 5–10% WOF; grind and pre-soak for best yield.
- Logwood chips: 5–10% WOF; avoid hard boil to prevent dulling.
- Black tea: 100% WOF as a cellulose helper or gentle beige dye.
Timeline example for cotton beads
- Day 1 morning: Scour. Afternoon: tannin bath. Evening: aluminum acetate bath; hang to dry.
- Day 2: Dye 30–60 minutes; air-cure 24 hours.
- Day 3: First rinse, dry, edge-stabilize, and assemble.
Aesthetic Pairings and Collection Ideas
Warm woodlands
Build around walnut and onion layers, relieved by weld. Use linen for cuffs, cotton for bead cores, and brass findings. Add a few logwood-dimmed accents for depth.
Botanical blush
Avocado pinks eat with cochineal notes for a rose garden set. Keep metals pale—silver or pewter—and lean on silk for glow. Sprinkle with petal bundle prints for earrings that echo the theme.
Citrus and sky
Weld yellows alongside a soft, small-vat indigo blue accent. Reserve large doses of blue for cords; let yellow patterning dance on beads. Use copper findings to warm the dialogue.
From Bench to Market Table
Consistency without losing soul
Embrace variation while managing it. Standardize your prep steps and temperature ranges; let natural shifts express as gentle nuance within a defined palette. Label finished pieces with dye sources—people love the story of marigolds from your own balcony or walnut from a local tree.
Packaging and care cards
Use recycled card and plant-dyed paper bands. Include a tiny care note: keep away from long sunbaths, spot-clean, store dry. Consider a swatch ring showing your core palette; it reassures buyers who want sets or gifts to match later.
Conclusion: Color that Wears Like Memory
Adding natural dyes to fabric jewelry invites you into a rhythm of observing seasons, cultivating patience, and refining craft at miniature scale. The smallness is a blessing—each dip is quick, each test frugal, each success multiplied across beads, cords, and bands. With clean fibers, thoughtful helpers, and techniques sized for detail, your work will carry the grace of plant color through time: petals mapped into silk, bark distilled into linen, roots singing from cotton. Wearers will feel it—pieces that seem to breathe with place, touched by hand and warmed by the quiet science that makes them last.
