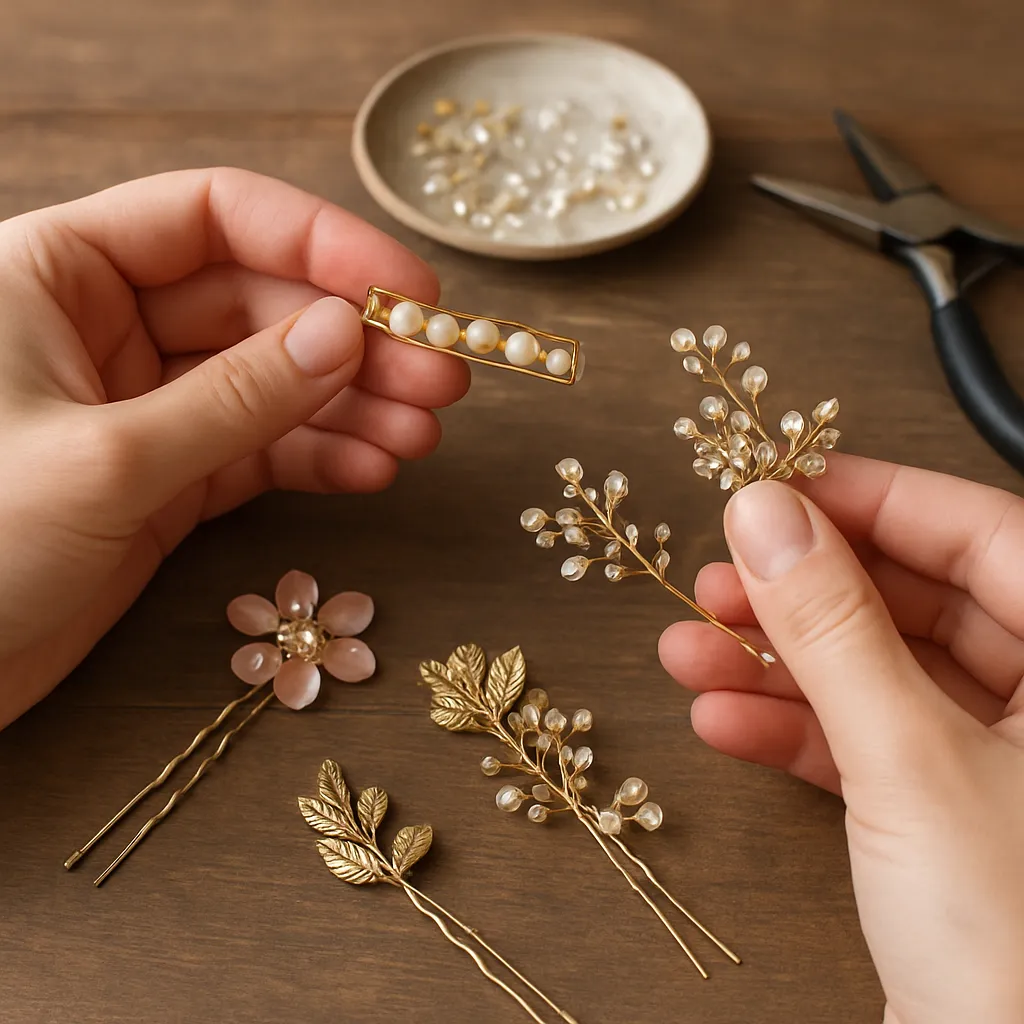
Hairpins and hair jewelry bridge the space between utility and ornament, turning everyday hairstyles into wearable art. Whether you gravitate toward delicate seed-bead vines, hammered metal hair sticks, or sculpted resin motifs, making your own pieces unlocks personal expression, careful material choices, and structural know-how that store-bought accessories rarely offer. This guide walks through inspiration, materials, techniques, finishing, and care—so you can elevate the ordinary ponytail, bun, or braid into something that feels just a bit enchanted.
From Ancient Adornments to a Modern Maker’s Canvas
Adornment of hair is as old as civilization. Bronze-age pins were practical tools; yet even then, artisans carved spirals and placed cabochons where they caught the light. Ancient Greece celebrated laurel motifs that echoed victory and virtue; Rome left behind bone and metal hairpins inscribed with tiny guardians. Across Asia, slender hair sticks evolved into coded language—Chinese ji and Japanese kanzashi signaled season, status, and taste through choice of flowers, stones, and colors. Europe’s Victorian era favored jet, seed pearls, and tortoiseshell combs, while Art Nouveau curved metal into fluid botanical fantasies.
Today’s DIY movement revives that heritage with contemporary materials: stainless-steel bases that won’t bend out of shape, non-toxic resins that preserve pressed flowers, responsibly sourced pearls and stones, and digitally fabricated blanks that you can hand-finish for a unique touch. Your bench can hold a small world—files, pliers, wires, glues, fabrics—yet each project still begins with an idea and a sketch. The goal is not only style but method: an accessory that holds hair comfortably, resists wear, and rewards a second glance with a detail the hurried eye might miss.
Materials and Tools: Building a Maker’s Palette
Choosing materials is both aesthetic and structural. When a barrette fails, it is usually because a beautiful element was not matched to the right base, wire gauge, or adhesive. Assemble a flexible kit so you can move from ultralight bobby pins to load‑bearing hair sticks without wandering far from your worktable.
- Metals: Brass and copper are malleable and take beautiful finishes; nickel silver gives a cool tone; stainless steel yields exceptional springiness for hairpins and comb teeth; sterling or argentium silver elevate heirloom pieces. Pre-made bases include U-pins, hair sticks, French barrettes, snap clips, and combs.
- Wire: For wrapping beads to bases, 26–28 ga is common; for armatures and decorative swirls, 20–22 ga; for forging hair sticks or U-pins, 8–14 ga, depending on metal. Softer metals can be work-hardened with light hammering.
- Beads and Stones: Seed beads, Czech glass, crystal, freshwater pearls, and gemstone cabochons. Flat-back rhinestones or chatons set into bezels or beading foundations deliver bright focal points.
- Fabrics and Fibers: Silk, organza, chiffon, velvet, sinamay, cotton lawn, lace, satin cord, and silk thread. Stiffeners like PVA or starch help sculpt petals and bows.
- Adhesives: Two-part epoxy for structural bonds; jewelry-grade flexible glue for stones; UV resin for quick doming and encapsulating; fabric glues for ribbon and textiles.
- Finishes and Sealants: Microcrystalline wax, Renaissance wax, lacquer, clear nail resin, or polyurethane for protecting metal surfaces and porous elements.
- Tools: Round-, chain-, and flat-nose pliers; flush cutters; needle files; sanding papers (400–2000 grit); steel bench block; chasing hammer; nylon mallet; pin vise or rotary tool; doming block; awl; beading needles; fine tweezers; heat-safe mat; silicone work mat for resin.
Safety considerations are part of true craftsmanship. Ventilate when using glues and patinas, wear eye protection when cutting wire or grinding, and mask up when sanding resin or polymer clay. Tie back hair while soldering or using a micro torch. Store blades and drills in capped containers and keep silica gel packs with metal findings to slow tarnish.
Principles of Comfort, Hold, and Longevity
Think like an engineer as well as an artist. Several ideas underpin accessories that are beautiful and practical:
- Contact and Friction: More contact area with hair increases grip. Roughened inner surfaces, gentle curves that conform to head shape, and micro-serrations on comb teeth enhance hold without snagging.
- Weight Distribution: Heavy focal elements should sit close to the scalp and above or at the center of gravity of the hairstyle. Counterbalance with lighter ornaments near the ends of prongs. Visual balance often parallels mechanical balance.
- Flex and Spring: U-pins and combs should flex slightly and then return to shape. Work-hardened tendrils may be pretty but must not become brittle.
- Edge Management: Every cut wire and metal edge must be rounded and polished. Run pieces over a silk scarf: if they catch, you need more finishing.
- Testing: Shake tests and daylong wear tests reveal weaknesses early. Simulate hair with a hank of yarn for stretch and friction experiments.
Fit and comfort are inseparable from ergonomics. Curvature that follows the skull, prong spacing that matches hair density, and textures that neither slip nor scrape make the difference between an heirloom and a drawer orphan.
Wire-Wrapped Hairpins: A Versatile Core Technique
Wire wrapping turns a simple pin into a botanical branch, a starry arc, or a constellation of pearls. It is low-heat, portable, and compatible with nearly all hair bases.
Basic Beaded Vine on a U-Pin
- Base: 10–12 cm steel U-pin or DIY forged pin from 12 ga stainless or 10 ga brass. Smooth prong ends to a gentle hemisphere with a file, then 1000–2000 grit sandpaper.
- Armature: Anchor 22 ga dead-soft wire near the pinch point with three tight coils. Leave a 2–3 cm tail; trim and tuck.
- Branching: Add 26–28 ga wire for side branches. Slide a bead, hold 1 cm from the main stem, and twist to form a twig. Repeat, alternating sizes for an organic look. Keep beads above the prong intersection to reduce snag risk.
- Stability: After arranging branches, spiral-bind the armature to the U-pin for at least 1.5 cm. This zone resists torque when inserted.
- Work-Hardening: Lightly tap the wrapped spine on a steel block with a nylon mallet. Avoid beads. This sets curves and reduces creep over time.
- Finish: Inspect all cut ends under magnification. Coax any micro-burrs inward with chain-nose pliers and burnish with a steel spoon.
Variations
- Halo Arc: Use two U-pins bridged by an arched, beaded wire for a delicate crown that pins from both sides of a bun.
- Clustered Pearl Spray: Group pearls at staggered heights using fine wire and tiny crimp covers for a bridal shimmer.
- Minimalist Leaf: Hammer 20 ga wire into a leaf silhouette, add a central vein with light planishing, and mount to a pin with a low-profile wrap.
Beaded Bobby Pins and Barrettes: Quick Wins with High Impact
If you are new to jewelry making, start with bobby pins and French barrettes. They reward small investments of time with polished results.
Seed-Bead Encrusted Bobby Pins
- Choose flat-pad bobby pins to provide a bonding surface.
- Cut a small rectangle of beading foundation or ultra-suede to the pad’s size. Glue temporarily, let set.
- Stitch seed beads in random or gradient patterns with nylon beading thread, anchoring through the fabric. Work off the piece if your pad has no holes, then glue the finished swatch onto the pad with two-part epoxy.
- Edge with a row of small beads to hide the join, then back with a thin ultrasuede layer for a comfortable finish.
Cabochon French Barrette
- Materials: 80 mm French barrette blank, 30 mm glass or stone cabochon, bezel cup or beaded bezel, epoxy, and accent beads.
- Method: Set cabochon in a metal bezel with epoxy or stitch a peyote bezel around it. Attach the focal to a slightly domed brass plate that matches the barrette’s curvature, then rivet or glue the plate onto the barrette mechanism’s cover.
- Detailing: Frame the focal with seed-bead picots or granulated metal dots. Keep height minimal where hair slides beneath to preserve hold.
Fabric Florals and Kanzashi-Inspired Ornaments
Textile flowers are classic for weddings, festivals, and photo shoots. They can be ethereal or graphic depending on fabric and petal geometry.
Folded Petal Kanzashi
- Cut squares of silk or organza, 4–6 cm per side. Fold diagonals to form triangles, then fold side corners inward to meet at the point. Clip or hold with tweezers.
- Seal edges with a microflame or fabric sealant to prevent fray. Stitch the base of 6–8 petals on a circle of felt.
- Add stamens (pre-made millinery stamens or seed-bead clusters on wire). Back with ultrasuede for comfort.
- Mount onto a comb or U-pin by sewing through holes or wrapping a low-profile frame. For durability, add a thin brass disk behind the felt to resist flex.
Floral layouts teach strong composition: vary petal sizes, cluster odd numbers, and introduce one contrasting element—like a matte leaf among gloss petals—to direct the eye without overwhelming the hairstyle.
Resin and Polymer Clay for Custom Motifs
Clear and colored resins capture inclusions, while polymer clay sculpts lightweight, precise shapes.
Pressed-Flower UV Resin Inlay
- Use open-back bezels or shallow trays. Seal botanical inclusions with a light coat of resin or spray varnish to reduce bubbles.
- Pour a thin base layer, de-gas with a warm breath or torch at a safe distance, place inclusions with tweezers, and top with resin until slightly domed.
- Partial-cure, check edges, then full-cure under UV. Sand drips with 800–2000 grit and buff. Mount to a barrette plate or comb back using epoxy.
Polymer Clay Cameo Barrette
- Condition clay thoroughly. Create a slab with an embedded cane or mica shift pattern. Cut an oval to fit a barrette plate.
- Press a silicone cameo mold gently into the slab’s center for relief. Bake per manufacturer’s schedule on a tile to prevent warping.
- Wet-sand edges, apply mica powders if desired, and seal with a clay-safe varnish. Adhere to the barrette and clamp evenly during cure.
Metalwork Details: Texture, Color, and Quiet Luxury
You can add tactile richness without solder. Hammered textures catch light and disguise wear, while rolling leaves under a paper towel in a rolling mill (or impressing with metal stamps) conveys organic realism. Color lives in heat-tinting titanium, dyeing anodized aluminum, or enhancing copper with controlled patina. Seal reactive finishes with wax or lacquer so they do not transfer to hair or skin.
When forging hair sticks from 8–10 ga rod, taper the last 5–7 cm gradually. Round the tip to a pencil-soft point and polish until it glides without scraping. Slight S-curves seat better in buns than dead-straight shafts. Add decorative finials only if they won’t catch or unbalance the piece.
Finishes, Skin-Friendly Choices, and Care
Skin and hair comfort matter as much as looks. If metal allergies are a concern, choose ni-free findings or coat contact zones with clear resin. Titanium, niobium, and surgical steel are reliable for those seeking hypoallergenic options. For copper and brass, seal exposed areas that will touch skin, or allow them to mellow and provide a care card explaining natural color change.
- Polishing: Progress through grits to at least 1000 for smoothness; finish with a polishing compound. Avoid compounds near fabric and porous stones.
- Sealing: Wax is reversible and subtle; lacquer or clear resin is more robust but requires careful application.
- Storage: Keep in soft pouches or on branded display cards, away from humidity and hairspray. Include silica gel for anti-tarnish performance.
- Cleaning: Wipe with a microfiber cloth; avoid harsh chemicals on glued or resin components.
Tailoring Builds to Hair Types and Hairstyles
No single pin works for every head of hair. Match the mechanics to texture, density, and style goals:
- Fine, Slippery Hair: Use lighter ornaments with more contact surface. Add micro-teeth or textured wraps on the underside of barrettes. Choose curved combs that hug the head.
- Thick or Coarse Hair: Wider prong spacing and stronger bases. Hair sticks benefit from slightly roughened shafts (satin finish) for grip.
- Curly and Coily Hair: Smooth, rounded edges are vital. U-pins with generous curvature slide with curls rather than through them. Avoid open wire coils that could snag.
- Protective Styles: Larger combs and lightweight, balanced brooch-combs protect edges and reduce tension points. Keep weight distributed across multiple anchor points.
Eco-Conscious Making: Stories in Reclaimed Materials
Hair jewelry can carry the story of its sources. Thrifted metal chains become tassels; a vintage brooch, remounted, shines anew; offcuts of silk bloom into petals. Thoughtful upcycling reduces cost and waste while adding character to your pieces. Plan for sustainability in three ways: design for repair (replaceable components), design for disassembly (minimize permanent adhesives when screws or rivets suffice), and design for longevity (classic proportions and quality finishes). Keep a scrap system: short wire lengths feed bead wraps; tiny metal trimmings become granules or rivets; fabric snippets test dyes and stiffeners before you touch a final piece.
Troubleshooting: Common Pitfalls and How to Fix Them
- Adhesive Failures: Degrease both surfaces with alcohol, scuff smooth metals lightly, and respect cure times. Use mechanical reinforcement (rivets, stitching) wherever possible.
- Wire Ends That Snag: Trim flush, then use a cup bur or nail buffer to soften. Tuck ends along the wire’s axis rather than across it.
- Top-Heavy Designs: Lower the focal element, split weight across two pins, or convert a single comb into a pair of smaller combs.
- Color Mismatch: View materials under daylight and warm light before committing; photograph test swatches in hair to judge real-world contrast.
- Uneven Pairs: Build mirrored pairs together on the bench; measure prong spacing and overall length as you go.
Photography, Packaging, and Gifting
Presentation extends your bench work. Photograph pieces in hair and on neutral backgrounds to show scale and function. Avoid harsh reflections by diffusing light with a sheer fabric or softbox. Package on card stock with slits that hold the piece without bending it; include a small care note and, for metals that tarnish, a mini anti-tarnish tab. If you sell, include clear sizing guidance and hairstyle suggestions to reduce returns.
Project Gallery: Five Detailed Builds
1) Botanical Hair Stick with Gemstone Accent
- Cut 22 cm of 10 ga brass rod. Taper the final 7 cm to a rounded point; sand through 2000 grit.
- Forge a gentle S-curve. Texture the top third with a light cross-peen for sparkle.
- Drill a 1.5 mm hole near the finial. Wire-wrap a 6–8 mm gemstone and a leaf charm to hang as a balanced dangle, ensuring it sits clear of hair paths.
- Polish, seal, and test in a bun: the dangle should rest against the stick, not swing wildly.
2) Minimalist Hammered U-Pin
- Start with 12 ga stainless or 10 ga bronze. Shape a U with a 3 cm crown and 8–10 cm prongs.
- Planish on a bench block to work-harden, focusing on the crown for spring. Slightly flare the ends of the prongs and round them to a soft dome.
- For grip, give the inner faces a satin finish with 1000 grit. Buff outer faces to a high shine for contrast.
3) Deco Barrette with Resin Inlay
- Cut a brass plate matching a 70–80 mm barrette cover. Pierce geometric windows with a jeweler’s saw, file smooth.
- Tape the back, flood with colored UV resin in layers, curing each for depth. Remove tape, sand edges, and polish.
- Attach to the barrette mechanism with epoxy and two tiny rivets to guarantee durability.
4) Bridal Pearl Comb
- Choose a 6–8 tooth comb base. Create a 22 ga wire armature that follows the comb’s arc.
- Wrap clusters of freshwater pearls and clear crystals along the armature, keeping height under 2 cm.
- Bind the armature to the comb with fine wire, hiding wraps under a ribbon neatly stitched in place on the back.
5) Gradient Beaded Bobby Pins
- Lay out a gradient of seed beads (size 11/0) from dark to light across 4–5 pins.
- Stitch on foundation pieces, glue to flat pads with epoxy, and edge-stitch to conceal seams.
- Wear as a stacked set for color flow across a part line or chignon.
Design Decisions That Make Pieces a Joy to Wear
Translating ideas into hair-friendly objects means committing to proportion, restraint, and repeatable methods. Start with a sketch that notes weight maps and anchor points, then prototype in inexpensive wire and faux beads. Evaluate in real hair, not on a mannequin alone. Observe how gravity shifts when you turn your head or step outside into the wind. Refine until insertion is intuitive and removal is snag-free. The most successful ornaments reveal intentional design choices: curve radii that mirror the head, ornament density that echoes hair mass, and textures that feel as good as they look.
Care Routines and Long-Term Performance
Make care effortless: include a tiny microfiber cloth, advise users to put hair jewelry on after hairspray and perfume, and to wipe pieces gently before storing. For pieces with fabric, list spot-cleaning methods and what to avoid. For resin, recommend keeping away from prolonged dashboard sun and high heat. For metals, include a brief guide to patina evolution or care—especially for copper and brass.
Beyond Embellishment: Heirloom Thinking
Great hair jewelry is quiet architecture. It honors the hair it holds, supports the style, and delights the wearer with tactile nuance. Each decision—wire gauge, fabric weave, finish sequence—accumulates into a piece that rewards the hand and eye. As you practice, keep notes: which glues paired best with which stones, which comb shapes suited which curl patterns, how long a U-pin lasted before showing work marks. Iterate. Repair. Gift. In doing so, you place yourself in a lineage reaching back to the first maker who thought to turn a simple pin into something more, and then wore it proudly into the light.
