Statement necklaces are the theater of everyday dress: oversized, expressive, and effortlessly capable of rewriting an outfit. Working within a minimal-tool mindset doesn’t shrink your creative options—it sharpens them. The constraints of a pared-down toolkit push you to solve structural puzzles with ingenuity, to elevate humble materials into wearable sculpture, and to cultivate an intuitive feel for weight, drape, and proportion. This guide walks you through designing, building, and finishing bold necklaces using accessible techniques and items you likely already have at home or can pick up inexpensively. Along the way, you’ll learn repeatable methods that scale from a single showpiece to a small batch for gifts or micro-selling.
The Minimalist Tool Kit
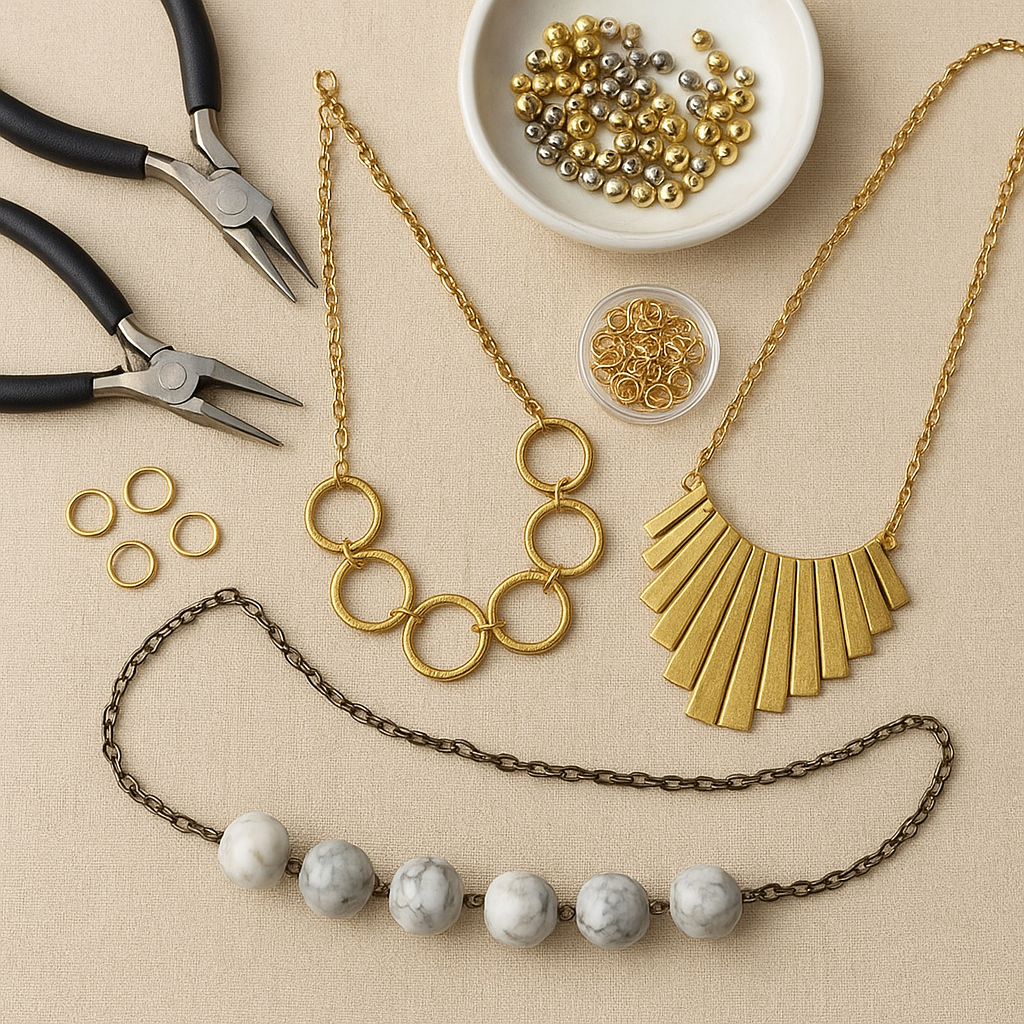
You can make striking pieces with fewer tools than you think. Start with a compact set and add as your practice grows.
- Chain-nose pliers: Flat inside jaws for gripping jump rings, flattening crimps, and guiding small bends. Choose smooth jaws to avoid marring metal.
- Side cutters: For trimming wire, headpins, and soft chain. Keep them dedicated to jewelry metals only.
- Round mandrel substitute: A pen, knitting needle, or small screwdriver can stand in for round-nose pliers to form loops.
- Measuring tape or ruler: Flexible cloth tape for neck measurements, rigid ruler for layout.
- Beading awl or thin needle: Useful for untangling knots and guiding cord through tight beads.
- Adhesive: A clear, flexible craft glue for cord ends and fabric-to-metal joins. Use sparingly and ventilate.
- File or emery board: To smooth cut wire ends and reduce snags.
- Clips: Binder clips or clothespins work as third hands during assembly.
Optional but helpful: a simple bead board for spacing, masking tape to temporarily secure strand ends, and a small tray or muffin tin to sort components by sequence.
Material quick-start:
- Wire: 20–24 gauge for simple loops and connections; 26–28 gauge for light wrapping. Softer (dead-soft) wire bends easily; half-hard retains shape better.
- Cord: 0.8–1.5 mm waxed cotton, nylon, or leather for knotting. For heavier pendants, go toward 1.5–2 mm.
- Chain: Choose a link size that fits your jump rings and intended connectors. Cable or curb chains are versatile and easy to cut.
- Findings: A small selection of jump rings (5–8 mm), a few lobster clasps, headpins/eyepins, and crimp beads or tubes if you plan to string with beading wire.
Design Foundations That Make Statements
The difference between a loud necklace and a compelling one lies in design discipline. Begin by naming your dominant idea—scale, color, geometry, story—then protect it from distractions.
- Focal point: Decide where the eye should land. This could be a pendant, a clustered drop, or an area of high color or material density. Keep neighboring elements quieter to honor the focal area.
- Silhouette: Look at the outline from a few steps back. A strong silhouette reads from across the room: crescents, chevrons, V-shapes, and clean arcs are timeless.
- Balance: Symmetry is not required, but balance is. Counterweight a substantial element with distributed visual weight—multiple small components, color echoes, or chain thickness.
- Proportion: Scale up fewer elements rather than many medium ones. Large beads or plates benefit from spacing; the surrounding negative space is part of the design. Keep proportion between bead size and neck length in mind.
- Texture: Combine smooth with rough, matte with gloss, rigid with soft. Contrasting texture creates rhythm and keeps big pieces from feeling blocky.
- Color: Anchor bold hues with neutrals or metals. Useful schemes include monochrome (one hue, varying value), complementary (opposites), or triadic (equally spaced). Metallics act like punctuation.
- Contrast: Vary scale, finish, and shape to let each area stand out. Thoughtful contrast guides the viewer’s journey across the piece.
- Drape and comfort: Statement need not mean stiff. Consider how components curve around the neck. Test your layout on a curved surface (rolled towel) to preview drape.
Necklace lengths and roles:
- Collar (12–14″): Frames the base of the neck; powerful with open necklines.
- Choker (14–16″): Works for focal-centered pieces; ensure comfortable adjustability.
- Princess (17–19″): The most wearable for everyday statements.
- Matinee (20–24″): Great for layered geometry and long pendants.
- Opera (28–36″) and Rope (36″+): Offer drama and wrapping possibilities; test weight carefully.
Materials You Already Have
Statement does not require expensive gemstones. The magic lives in composition and story. Survey your space for characterful parts:
- Buttons: Stack with wire, lash to a backing, or string as beads. Vintage buttons bring color and history.
- Hardware store finds: Washers, hex nuts, and chain lengths create industrial elegance. Sand rough edges and seal if desired.
- Textiles: Ribbon, denim strips, jersey yarn, lace, or leather offcuts add softness and scale. Braid, knot, or cover a cord core.
- Paper and fiber: Rolled paper beads, crochet-covered beads, macramé elements. Seal paper with clear varnish for durability.
- Nature: Shells, driftwood, seed pods, tumbled stones. Drill with caution or wire-wrap without piercing.
- Repurposed jewelry: Cannibalize broken pieces for clasps, chains, charms, and intriguing odd beads.
Surface care tips: Clean metal hardware with mild soap and dry thoroughly. For raw steel or iron, apply a light wax to slow rust. Test adhesives on scraps to avoid staining textiles. For porous items (paper, wood), seal before contact with skin oils to improve durability.
Essential Techniques with Minimal Tools
Opening and Closing Jump Rings
Use two gripping points—your chain-nose pliers and your fingertips or a second tool. Twist the ring open by moving one side toward you and the other away, like opening a door, rather than pulling ends apart. Reverse the twist to close; a slight over-correction helps the ends meet flush. Listen for the soft click of edges aligning.
Simple Loops and Wrapped Loops (Without Round-Nose Pliers)
- Simple loop: After threading a bead on a headpin, bend the wire to a right angle at the bead. Wrap around a pen or small rod to form a round loop, then trim and adjust the loop so it sits centered above the bead. Attach to chain or another component before fully closing if needed.
- Wrapped loop: For extra strength, begin as above, but after forming the loop, hold it steady and wrap the tail neatly 2–3 times down toward the bead. Trim and pinch the cut end to prevent snagging.
Wrapped loops resist twisting and are ideal for heavy clusters.
Stringing with Beading Wire (Crimps Using Chain-Nose Pliers)
- Thread your sequence onto flexible beading wire (0.018–0.024″) for strong yet fluid strands.
- Slide on a crimp tube, loop through the clasp or jump ring, then back through the crimp.
- Snug the loop so your clasp moves freely, without pinching beads.
- Flatten the crimp with chain-nose pliers. For extra security, rotate and flatten again. Trim the tail or tuck it through nearby beads.
If you lack wire guardians, a small seed bead between the crimp and clasp can act as a buffer.
Knotting on Cord
- Overhand knots: Simple spacers that create rhythm and protect delicate beads from rubbing.
- Surgeon’s knot: A double pass through the loop before tightening; resists slipping on slick cords.
- Sliding knot: Two opposing knots on the standing cords to create adjustability. Useful for chokers and long pendants.
Pre-stretch cords and condition with a bit of beeswax if available; knots will cinch more cleanly.
DIY Clasps and Extenders
- Hook clasp: Form a J-shaped hook from 18–20 gauge wire; sand the tip smooth. Pair with a sturdy jump ring.
- Ribbon ties: For textile-heavy pieces, skip metal clasps entirely and tie at the back. Heat-seal synthetic ribbon ends or fold and glue.
- Chain extender: Add 2–3 inches of small chain at one end with a charm at the tail for weight; it also looks finished.
Attaching Irregular Objects (Without Drilling)
- Cage wrap: Spiral fine wire around a stone or object, creating a frame that locks it in. Add a loop at the top.
- Lashing to a backing: Stitch or wire an object onto a leather or felt pad; then connect the pad to the strand.
- Through-holes with cord: For shells or washers, thread cord and secure with decorative knots.
Three Project Blueprints
1. Ribbon Arc with Clustered Center
Look: Soft textile arc with a dense center cluster that reads as a pendant but drapes like a scarf.
- Materials: 1–1.5″ wide ribbon (24–30″), a handful of large beads or charms for the center, 20–22 gauge wire or headpins, 2 large jump rings, optional chain extender.
- Steps:
- Prepare the ribbon: Fold each end twice and glue to prevent fray. Attach a jump ring to each end by sewing or by folding a small metal clamp over the ribbon end if you have one.
- Build the cluster: Wire-wrap beads and charms onto a central jump ring. Start with your heaviest piece at the center, then flank with smaller ones for visual balance.
- Assemble: Connect the cluster ring to both ribbon-end rings with additional jump rings to form a gentle arc.
- Finish: Add a clasp and extender to the ribbon rings, or tie the ribbon ends behind the neck for adjustable length.
Design note: Place the cluster wide rather than deep so it follows the body’s curve and preserves a strong silhouette.
2. Hardware Geometry Necklace
Look: Minimalist, architectural, and very budget-friendly using washers and hex nuts.
- Materials: Assorted steel washers (choose a dominant size), small hex nuts, 6–8 mm jump rings, short lengths of chain, 20 gauge wire, lobster clasp.
- Steps:
- Plan the motif: Lay out washers in a chevron or staggered grid. Keep proportion by limiting to 1–3 sizes.
- Link with jump rings: Use two jump rings between each washer to maintain flat articulation.
- Add accent nuts: Wire-wrap a few nuts as dangling elements beneath the lowest row for movement and contrast.
- Attach chain: Connect chain segments to the top corners; check drape on a curved surface.
- Clasp: Add lobster clasp and extender chain.
Care: If washers are prone to discoloring skin, seal them with a clear protective coat. This enhances durability without changing the industrial character.
3. Corded Boho Tassel
Look: A bold, tactile piece centered on a substantial tassel and spaced beads along thick cord.
- Materials: 1.5–2 mm cotton or leather cord, large-hole beads, scrap threads or yarn for tassel, 22–24 gauge wire, two large-hole end caps (optional), glue.
- Steps:
- Make the tassel: Wrap yarn around a book 40–80 times, slide off, tie at the top, cut the bottom loops. Bind the neck with wire and a decorative wrap.
- Center connection: Form a wrapped loop at the tassel top and thread it onto the cord.
- Bead spacing: Add 5–9 large beads, anchoring each with an overhand knot to create rhythm and texture.
- Closure: Use sliding knots for adjustability or glue cord ends into caps and add a hook clasp.
Variation: Replace beads with fabric knots or short lengths of chain for a mixed-media effect.
Measuring, Fit, and Comfort
Measure around the neck at the desired resting spot and allow for the focal drop. Heavier components sit lower; compensate with slightly shorter chain or a broader contact area. Consider ergonomics by distributing weight: a wide textile band, multiple attachment points for big pendants, and curved components that follow the collarbone reduce pressure hot spots.
Weight test: Hang your planned centerpiece from a cord and wear it for 10 minutes while moving. Note any pinch points or twisting. Adjust by widening the support or reducing dense clusters.
Finishing Touches That Elevate
- Edge discipline: Flush-cut all wire ends and smooth with a file. Invisible comfort is a hallmark of quality.
- Component alignment: When linking flat elements, use paired jump rings or figure-eight connectors to maintain planar alignment.
- Surface finish: A gentle matte on overly shiny components can reduce glare and increase perceived sophistication.
- Color echo: Repeat a minor color from the focal near the clasp or extender charm for cohesion.
- Movement: One or two articulated elements create life; too many can feel restless. Aim for deliberate motion.
Troubleshooting and Quick Fixes
- Twisting strands: Add a small swivel connector near the clasp or realign components so their natural hang isn’t fighting the string path.
- Gapping around the neck: Insert small spacer beads or re-space knots so the arc remains continuous on a curved form.
- Loose crimps: Double-crimp or choose a tube one size smaller. Flatten, rotate, flatten again.
- Skin green from base metals: Seal contact points with clear lacquer or line the neck area with ribbon or suede.
- Heavy focal tilting forward: Add a stabilizer bead behind the focal or split the focal into a crescent of smaller elements.
- Fraying cord ends: Whip with thread, glue lightly, or cap with metal ends.
Sustainability on a Shoestring
Bold jewelry thrives on resourcefulness. Embrace upcycling as a design stance: convert broken brooches into pendants, turn fabric scraps into wrapped beads, and harvest chain from thrifted belts. Choose durable cords and reusable metal findings to reduce waste. Keep a small bin labeled “links and loops” for rescued hardware; constraint begets originality.
Material ethics: If skin contact is frequent, seek lead- and nickel-safe components. Stainless steel, brass, copper, and sterling are reliable; seal raw brass if you prefer it not to patinate. Reclaimed wood or horn should be sealed and smoothed.
Style, Story, and Gifting
Statement necklaces are personal architecture. Style them with quiet garments to let their voice carry, or layer them against patterned fabrics for maximalism with a unifying color. Ground ornate pieces by repeating one element (color, metal, or motif) elsewhere—earrings, belt hardware, shoe buckle—to tie the look together.
For gifts, include a small card with the necklace’s origin story: where the focal came from, what materials were repurposed, how to adjust the length. Small narratives deepen perceived value and invite care.
Beyond the Basics: Modular and Convertible
- Interchangeable focals: Use a large central jump ring or a lark’s-head cord attachment so pendants can be swapped.
- Segmented strands: Build left, center, and right modules joined with jump rings for easy repairs and redesigns.
- Convertible lengths: Add hidden rings along the chain for clipping at different lengths; integrate a decorative brooch clasp that can migrate.
- Stacking logic: Design multiple simple arcs that combine into a high-drama multi-strand when worn together.
Safety and Skin-Friendly Practices
- Alloy awareness: If sensitive to nickel, favor stainless, titanium, sterling, or niobium for ear and clasp areas.
- Weight limit: Keep total weight under 200 grams for short necklaces; distribute mass across surface area for comfort.
- Breakaway points: For very heavy or chunky pieces, a weaker jump ring near the clasp can act as a safety release.
- Smooth contact: Cover wire-wrapped backs with a leather or felt pad when they touch skin or delicate fabric.
Measuring Shortcuts and Handy Formulas
- Arc spacing: On a 17″ arc, beads larger than 20 mm need at least 2–3 mm spacers to curve smoothly.
- Cluster density: Start with a 1:2:3 ratio—one largest element, two medium, three small—then evaluate from a distance.
- Jump ring planning: Outer diameter should exceed the thickest link by at least 1.5× its wire diameter to move freely.
- Visual triangle: For asymmetry, place the focal 1/3 from one side; echo a small detail on the opposite shoulder for balance.
Care, Cleaning, and Longevity
- Storage: Hang chain-heavy pieces to avoid kinks; nest textile arcs in tissue to preserve shape.
- Cleaning: Wipe with a soft cloth after wear. Keep chemicals away from adhesives and sealed surfaces.
- Refreshing metal: Brass and copper can be brightened with a gentle polish; rinse and dry thoroughly.
- Thread check: Every dozen wears, inspect knots and wraps; add a tiny dot of glue if a knot shows slack.
From First Sketch to Finished Piece: A Workflow
Sketch: Roughly draw the outline and focal size; note colors and key materials. Keep it loose.
Mock-up: Lay components on a bead board or towel rolled to neck curve. Adjust spacing until the arc looks intentional.
Test hang: Temporarily connect with spare jump rings or tape; try it on and move naturally.
Commit: Build from the center outward or from ends inward depending on technique. Check alignment at each stage.
Finish: Trim, file, seal, and add extender. Photograph your piece on a neutral background—natural light at window edge works best.
Creative Prompts to Keep You Moving
- Limit yourself to two colors and one metal; push scale instead.
- Start with a story word—Tide, Hearth, Citadel—and select materials that embody it.
- Design for a specific neckline: boat, V, turtleneck; mirror that geometry.
- Choose one material you’ve never used—rope, felt, clay—and feature it as the hero.
Why Minimal Tools Can Mean Maximum Impact
With fewer technical crutches, you naturally design around what hands can execute cleanly: strong arcs, lucid shapes, intentional negative space, and tactile presence. This economy encourages versatility: the same toolkit scales from refined metal-and-stone pieces to textile sculptures. The result is a studio practice that travels, adapts, and remains focused on what matters most—the quality of attention you give to form, finish, and the conversation between materials and the body.