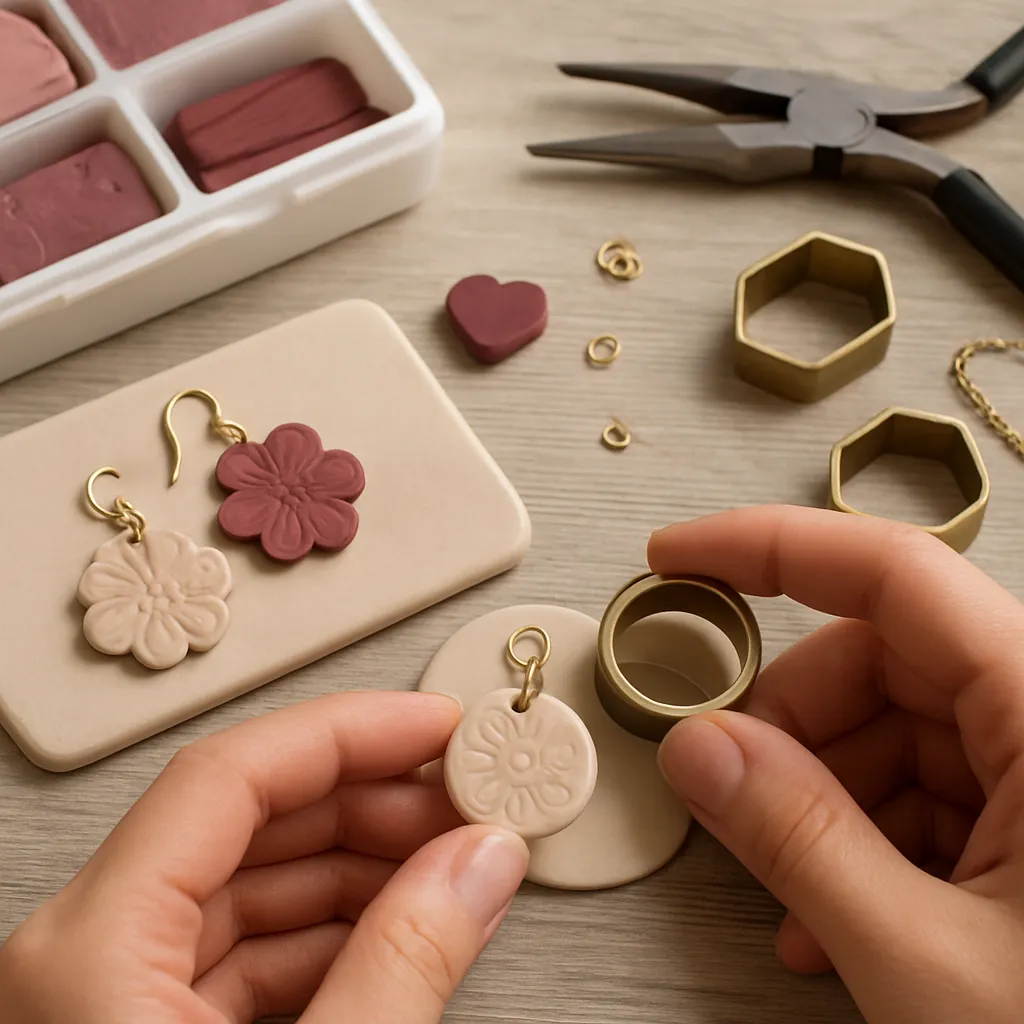
Clay has a way of inviting the hands to play. Press it, roll it, slice it, and the material answers with edges, curves, and color fields that feel both ancient and fresh. In the world of handicraft, clay cutters unlock a repeatable language of shapes that can be refined into earrings, pendants, bracelets, and brooches with remarkable consistency. Where sculpting might celebrate one-of-a-kind forms, cutters help you build a personal library of silhouettes that speed production yet still leave room for expressive surface work, smart assemblies, and meaningful storytelling. This guide brings together practical studio wisdom, methods for precision, and design thinking so your jewelry isn’t just wearable—it’s a record of your evolving craftsmanship.
Why Clay Cutters Elevate DIY Jewelry
Clay cutters make it possible to translate sketches into clean, repeatable parts. They shine when you need mirrored pairs for earrings, modular components for necklaces, or neatly nested shapes for layered work. Unlike metal stamping or casting, cutters require minimal setup and can be used with small batches. You gain the agility to test ideas quickly: cut a trio of arches, vary thicknesses, shift color placements, and bake a set within an afternoon. This iterative pace is especially useful for makers balancing a small shop, a day job, or a market deadline.
Consistency is only part of the appeal. Cutters also sharpen your eye for proportion. Switch from a 20 mm circle to 18 mm and you’ll instantly see how scale affects perceived weight and balance at the ear. Mix organic ovals with a crisp diamond and you’ll sense contrast without words. Because they’re compact, cutters bring precision even to a kitchen table studio—no need for large presses or metalworking rigs.
There’s also a quiet design ritual that emerges: plan a color story, roll a slab, choose your cut, and reserve offcuts for the next experiment. Over time, your tray of shapes reads like a language—components you can shuffle and reorganize into new compositions, always anchored in the practical demands of comfort, fastening, and durability.
Materials and Tools: The Maker’s Shortlist
Jewelry-friendly clays fall into two broad families. The first is polymer clay, a PVC-based material that remains workable until it is heated to a specific temperature in an oven. It does not air-dry and, once properly cured, remains flexible in thin cross-sections, resists breaking under normal wear, and doesn’t shrink. The second family is air-dry clay (paper, cellulose, or resin-infused). These dry through evaporation, often shrink, and can be more brittle; they suit pendants or brooches but are less ideal for very thin earring components unless reinforced and sealed thoughtfully. Many jewelry makers prefer polymer for durability and color range, but air-dry options retain appeal for those avoiding ovens or seeking stone-like textures.
Cutters themselves vary by edge quality and material:
- Stainless-steel shapes: crispest edges and long life; ideal for production runs.
- 3D-printed cutters: affordable, nearly infinite shapes; slightly thicker walls; benefit from thoughtful technique and careful cleaning.
- Custom laser-cut acrylic: useful for stamps and templates; moderate edge sharpness.
Essential tool kit:
- Non-porous work surface: ceramic tile, tempered glass, or polished stone.
- Acrylic roller and/or pasta machine for even slabs.
- Thickness guides or spacer sticks for repeatable sheet height.
- Tissue blade or craft knife for clean lifts and detailing.
- Soft brush and cornstarch, water, or isopropyl alcohol as release and cleanup aids.
- Silicone baking mat, ceramic tiles, copy paper, and an aluminum tent for oven control.
- Needle tool or micro hand-drill for pilot holes.
- Wet/dry sandpapers (400–3000 grit), polishing pads, micro-mesh, and a rotary tool for finishing.
- Adhesives and sealants appropriate to your clay and hardware choices.
- Quality jewelry hardware (jump rings, posts, hooks, clasps) and small pliers.
Store clays away from heat and direct sunlight. Keep a dedicated set of tools for clay; don’t share rollers, cutters, or ovens with food prep. Label everything. Small studio habits like these save time and prevent contamination later.
Design Planning: Shape Language, Color, and Wearability
Before you touch material, sketch silhouettes to test rhythm and symmetry. Pairs and mirrored forms demand attention to negative space—the space around and within your shapes. Leave adequate surface area near the top of a component for drilling or embedding a loop so jump rings have a secure bite. Imagine how a piece will move; an elongated oval suspended by a single ring will rotate more freely than a compact circle on two rings.
Color planning benefits from swatch cards. Mix small test tints and keep a record of ratios to recreate palettes. Explore analog schemes (adjacent hues), complements (opposites), or triads for energy. Marbling and terrazzo effects reward restraint; too many chips and veins can read as visual noise. Repeat one accent color across a collection to tie it together.
Comfort is paramount. Consider ergonomics: how much weight can an earlobe comfortably support all day? Slim down thick sections in areas that don’t require structural strength, and distribute volume across multiple smaller shapes rather than a single, heavy pendant. Skin sensitivities guide hardware choice; hypoallergenic options and smooth backings matter as much as a polished face.
Clay Preparation: From Block to Consistent Slabs
Well-prepared clay gives you clean edges and fewer defects. Start with small portions and warm them in your hands. Feed through a pasta machine from thickest to target thickness to ensure even conditioning. If the clay is overly soft or sticky, rest it on plain copy paper to leach some plasticizer for a few minutes. If it’s crumbly, add a compatible softener and knead thoroughly.
Use spacer sticks or calibrated pasta-machine settings to achieve repeatable thickness across an entire tray of shapes. For earrings, common slab thicknesses range from 1.5 to 3 mm depending on desired stiffness and the brand of clay. Smooth the surface with a final pass wrapped in plastic film or through a clean setting to remove small ridges. Prick visible air bubbles with a needle and compress them out to avoid domed or cracked spots after baking.
Working With Cutters: Clean Entries, Smooth Lifts
Dust your cutter edge lightly with cornstarch or mist with water, then tap off the excess. Place the cutter squarely on the slab and press straight down with even pressure; rocking introduces distortion. For very soft clays or domed “pillow” edges, place a layer of plastic wrap over the slab before cutting to create a subtle chamfer. If clay wants to stick, lift the cutter with the piece still inside and eject gently onto a clean tile using the pad of a finger or a silicone-tipped tool.
To minimize distortion while extracting shapes, peel the surrounding scrap away first, then lift the part. For 3D-printed cutters with thicker walls, push slowly and back out in a single motion. Clean edges with a damp brush or a flexible silicone shaper. Keep a small dish of alcohol wipes handy to remove any residue on the cutter edge every few cuts; debris blunts detail.
Registration tips for layered designs: cut the largest base shape first; pre-bake it briefly to set; then lay thin veneers or inlays on top and use the same cutter to recut the outline so layers align. For patterns created from a slab (terrazzo chips, marbling, canes), cut components that intentionally sample different regions so each piece in a pair shares the same “visual density.”
Surface Design: Texture, Inlay, Leafing, and Sheen
With clean shapes in hand, surface work turns them into jewelry. Texture can be pressed with fabric, lace, texture sheets, natural leaves, even fine sandpaper. For raised metallics, apply leaf or foil and burnish gently. Painterly effects come from alcohol inks, pastel dusts, or carefully thinned acrylics after baking. The “mica shift” technique uses mica-rich clay and slicing to reveal layered shimmer without additional materials.
Inlays and veneers are a natural companion to cutters. Lay a thin patterned veneer over a base slab, then use the cutter to redefine the contour so the veneer and base match perfectly. For lines and dots, consider liquid clay as a grout-like medium. Subtle aging effects, controlled darkening of recesses, or metallic wash can create a refined patina that highlights texture. Seal only when necessary; many polymer finishes are durable without extra coatings, but specialized paints or metallic powders may benefit from a compatible varnish.
Baking and Heat Control: Getting Curing Right
Uniform heat makes or breaks a piece. Place shapes on a smooth ceramic tile or a double layer of cardstock to avoid shiny “tile burnish” or over-browning. Cover with an aluminum foil tent or an inverted baking pan to protect from direct heat. Use an external oven thermometer to verify your oven’s true temperature; many home ovens fluctuate.
Follow the manufacturer’s guidance, but a common rule for many brands is 110–130°C (230–266°F) for at least 30 minutes per 6 mm (1/4″) of thickness. Thinner pieces still benefit from a full time bake to develop strength. Underbaking leaves the clay weak; overbaking scorches the surface and can create bubbles. Make test chips labeled with time and temperature to learn your exact setup. For complex builds, partial bakes allow you to lock in earlier layers before adding new ones.
Proper curing gives you a strong matrix that takes drilling and finishing without crumbling. Allow pieces to cool on the tile to reduce warping. If a part has a slight curve, sandwich it between tiles while it cools. For air-dry clays, respect drying windows and flip pieces to prevent curling; plan for shrinkage when sizing components to fit bezels or settings.
Refining the Form: Sanding, Drilling, and Polishing
Clean edges elevate even the simplest silhouette. Dry-sand only if dust control is excellent; wet-sanding is safer and leaves a smoother surface. Start around 400–600 grit to remove cutter burrs, then progress through 800, 1000, 1500, and up to 3000 grit for a satin sheen. Keep water fresh to avoid re-depositing sludge, and support delicate edges with a finger to prevent micro-chipping. A microfiber buff or a low-speed rotary tool brings out a gentle glow. If you plan to dome with resin, stop earlier to preserve tooth for adhesion.
Drilling holes after baking ensures perfectly round channels and less deformation at the edge. Use a hand pin vise for control; feed slowly and back out frequently to clear dust. For slots or larger openings, create a pilot hole and then shape with needle files. If adding a bail or embedded loop, roughen the contact area lightly to improve grip.
Disciplined sanding, even on the back faces no one sees, communicates care to customers and reduces snags on clothing. Wipe pieces clean with a damp cloth and allow to dry fully before any adhesive or topcoat step.
Hardware and Assembly: Connections That Last
Jewelry lives or dies by its connections. High-quality findings improve wearability and trust. Stainless steel and titanium suit sensitive ears; gold-filled and sterling lend longevity beyond basic plating. Use jump rings that match the scale of your part—often 4–6 mm outer diameter with 18–20 gauge wire for earrings. Always open rings laterally, not by pulling ends apart, to maintain roundness and strength. Consider double rings in high-stress points to prevent failures.
Adhesives help where mechanical capture alone is impossible. Roughen both surfaces lightly. Two-part epoxy offers excellent shear strength; cyanoacrylate is fast but brittle; UV resins cure quickly under a lamp and can double as a doming medium but require full exposure and compatible surfaces. When gluing posts to the back of earrings, set them into a shallow recessed pad of the same clay or a textured landing to expand the bonding area.
For movement, play with hinges made from wire, stacked rings, or flexible connectors. Keep weight and swing under control so pieces don’t flip the wrong way on the body. Mirror pairs during assembly; the best patterning loses impact if both earrings face the same direction by accident.
Three Project Blueprints to Build Skill
1. Classic Arches With Inlay
- Roll a base slab to 2 mm and a contrasting veneer to 0.8–1 mm.
- Texture the veneer lightly; laminate onto the base and burnish.
- Use an arch cutter set to cut two pairs: large arches for the bottom, small for the top.
- Pre-bake 10 minutes; cool, then recut with the same cutters for crisp layered edges.
- Drill holes centered and equidistant from the edges; bake to full time.
- Wet-sand, buff, and assemble with 5 mm jump rings and hypoallergenic hooks.
2. Terrazzo Studs and Hoops
- Create a neutral base slab. Chop colored scraps into chips and press in sparingly.
- Roll with light pressure to level the surface; avoid smearing the chips.
- Cut small circles for studs and larger rings with concentric circle cutters for hoops.
- Place stud pads on the back with a tiny clay pillow to key the post, or drill after baking if you’ll glue posts.
- Bake fully; finish with a satin sand and a light buff. Glue posts with epoxy if not embedded.
3. Pendant With Hollow Relief
- Roll two identical slabs at 1.5–2 mm. Cut a large oval from each.
- From one oval, remove an interior window with a smaller oval cutter to create a frame.
- Texture the frame, lay it over the solid oval, and burnish edges. Add a clay bail or drill after baking.
- Introduce a tiny vent hole on the back if the cavity is completely sealed.
- Bake, finish edges, then apply a controlled paint wash and wipe back to leave color in recesses.
Troubleshooting: From Bubbles to Burnt Edges
- Air bubbles: Condition thoroughly and pop visible pockets before cutting. If a bubble appears after slicing, re-roll and rest the slab.
- Warping: Bake on a flat tile and allow pieces to cool under a second tile. Large components benefit from temporary paper supports during baking.
- Cracking: Underbaking, overly leached clay, or thin sections across stress lines are usual culprits. Adjust thickness and bake time.
- Shiny spots: Caused by direct contact with a glossy surface at high heat. Use copy paper or a matte silicone mat under pieces.
- Scorching: Oven spikes or proximity to an exposed element. Tent the pieces and confirm temperature with an external thermometer.
- Poor adhesion of paint or resin: Surface too smooth or contaminated. Clean with alcohol, lightly abrade, and ensure full cure between layers.
Studio Safety and Good Habits
Keep a dedicated craft oven or a reliably controlled kitchen oven that is not used for food at the same time. Ventilation helps, as does a consistent bake schedule to avoid rush jobs that lead to mistakes. Wipe surfaces frequently; lint and pet hair love clay. Store blades in a safe holder and cap needle tools. Label jewelry that includes nickel or disclose metal types clearly to customers. Read your specific clay’s safety sheet and use gloves if your skin is sensitive to pigments or solvents.
Because clay jewelry often involves small parts, tidy trays and lidded containers prevent losses and mishaps. A simple batching workflow—design, slab, cut, bake, finish, assemble—keeps your bench organized and your mind clear.
Scaling Up: From Hobby Table to Small Brand
As your collections grow, think in families: shared silhouettes, coordinated palettes, and a consistent finish standard. Photograph on neutral backgrounds with soft light and a reference for scale. Consider packaging that protects surfaces while allowing a window for customers to see color and texture. Pricing should account for design time, test pieces, consumables, overhead, and labor at a fair hourly rate. Track batch notes: oven settings, sanding grits used, adhesives chosen. Those logs become your playbook for repeatability and troubleshooting.
Ethical considerations matter: credit pattern inspirations where due, avoid copying signature designs of peers, and be mindful of cultural motifs that carry significance. Trusted suppliers and clear metal disclosures build long-term customer confidence.
Durability and Daily Wear: Building for Real Life
Jewelry must survive bags, hairbrushes, and the occasional rain shower. Favor flexible thin sections over brittle thick ones; round internal corners reduce stress. Back studs with large pads for stability. For dangles that see frequent movement, test samples by flexing and lightly dropping onto a padded surface to simulate daily knocks. Where appropriate, add a micro-bevel to edges to resist chipping. Encourage customers to store pieces flat and separate from keys and coins.
Sustainability in the Clay Studio
Small craft studios can embrace sustainability through smart material use and thoughtful processes. Collect and remix offcuts into terrazzo and marbled slabs. Plan cutter nests to minimize waste. Bake full trays rather than single pairs to reduce energy use. Choose long-lived tools over disposables; buy hardware that resists corrosion so pieces last. Reuse packaging and opt for recycled or compostable paper goods when shipping. Test sealants and finishes to avoid premature failure that would shorten a product’s life.
Advanced Techniques for Depth and Dimension
When your basics feel fluent, add depth with layered veneers and partial bakes. Mokume gane stacks sheets with metallics, textures them, then reveals striations with controlled slicing. Canes create repeat motifs you can position under a cutter for precise framing. For sculptural lightness, form thin domes over a spoon or a baked mold and bond them at edges for hollow beads. Explore translucent clays for stained-glass effects; back them with metallic foils to intensify glow. UV resin can dome surfaces to a glassy look—work in dust-free conditions and cure thoroughly to avoid tack.
Care and Maintenance for the Wearer
Provide simple care cards: wipe gently with a soft cloth; avoid prolonged water immersion, perfumes, or hairspray directly on the piece; store in a pouch or box. Metal components may oxidize—recommend a polishing cloth for silver. If a component deforms after heat exposure in a hot car, gently flatten and allow to cool under a book; properly baked polymer typically handles normal temperatures but benefits from considerate treatment. Clear, friendly instructions reduce returns and raise customer satisfaction.
Design Prompts to Keep Creativity Moving
- Limit yourself to one cutter set and three colors for a week; explore all permutations.
- Translate a piece of architecture into silhouettes—arches, windows, cornices.
- Make a “texture library” tile every month; cut small reference chips labeled with the tool used.
- Sample seasonal palettes but keep one signature hue constant to unify your brand.
- Iterate negative space: frame cutouts as pendants, then use the inner offcuts as studs.
Ergonomics of the Bench: Working Smarter, Not Harder
Your body is a studio tool too. Organize the bench so often-used items—roller, blades, wipes—sit within easy reach. Adjust chair and surface height to keep wrists neutral and shoulders relaxed. Short, frequent breaks prevent hand fatigue, especially during repetitive cutting or finishing sessions. Add a small anti-fatigue mat for long sanding or assembly periods. Good posture and lighting do more for speed and consistency than most gadgets, and they help protect long-term making capacity.
Choosing and Caring for Cutters
Match cutter material to task. Steel excels at crisp, delicate edges and high-volume work. 3D-printed cutters unlock complex profiles and quick prototyping—ideal for testing trends or custom commissions. After every session, wash in warm soapy water and dry completely to prevent corrosion or residual clay build-up. For stubborn residue on printed cutters, use a soft toothbrush. Store in labeled trays by size and shape so you can grab the right profile quickly, and test each new cutter on a scrap slab to learn its temperament.
From First Idea to Finished Piece: A Repeatable Workflow
- Ideate: sketch silhouettes, define palette, decide hardware and movement.
- Prepare: condition clay, roll consistent slabs, plan cutter nesting.
- Cut: press straight, clean edges, pre-bake for multi-layer alignment if needed.
- Surface: texture, inlay, leaf, or veneer with restraint and intention.
- Bake: verify temperature, tent, time for thickness, cool flat.
- Finish: wet-sand, buff, drill, seal if required.
- Assemble: fit hardware, test movement, check for snags and balance.
- Document: note materials, bake times, grits, adhesives for future batches.
A Note on Comfort and Longevity
Every design choice carries through to wear. Lightness enhances comfort; smooth backs protect skin; balanced proportions keep components facing forward. Edge finishing prevents fabric catches, and quality clasps mean fewer lost pieces. Thoughtful material pairings—like translucent clay over leaf for depth without weight—let you amplify visual richness while staying easy on the body. Over time, these priorities translate into a recognizable style that customers trust.
Closing Reflections: Precision Meets Play
Clay cutters invite a dance between precision and experimentation. They deliver reliable outlines and mirrored pairs, freeing your attention for stories told through color, texture, and small engineering decisions. With careful preparation, disciplined finishing, and an eye on comfort, your pieces will look as good in the hand as they do on the body. Return to the bench often, keep a curious record of each experiment, and let your shapes evolve—iteration by iteration—into a vocabulary that is unmistakably yours.
