There is a kind of magic in two earrings that don’t match yet feel like they belong together. Handcrafting intentionally mismatched pairs isn’t just an aesthetic choice; it’s a way to tell a story in stereo. Each earring becomes a character, and the pair is the duet. This guide shows how to design, build, and finish mismatched earrings that look deliberate and refined, with the tactile satisfaction that only handmade work can offer. From materials and color to engineering, comfort, and styling, you’ll learn practical techniques and creative frameworks that make mismatching feel natural rather than accidental.
Why Intentional Mismatch Works: Design Principles You Can Feel
At first glance, the eye looks for order; if it doesn’t find it, it searches for a different kind of logic. The art of mismatching hinges on creating a logic that is visible, engaging, and wearable. Start by choosing one or two rules for your pair and apply them consistently. Think of it like composing music: you need motif, variation, and a steady rhythm that ties everything together.
Here are the pillars most makers rely on when crafting pairs that make sense to the eye and the body:
- Visual echoes: Repeat something across both earrings—an accent bead, a texture, a metal finish, a silhouette type. The echo can be tiny; subtlety often reads as sophistication.
- Counterpoint: Allow one earring to play a role the other contrasts. Long vs. short, matte vs. glossy, smooth vs. faceted. Contrast backed by an echo reads intentional.
- Hierarchy: Decide which earring is the “lead” and which supports. Let one take visual spotlight while the other sets up context.
- Weight and comfort: Earrings are kinetic objects attached to skin. Plan for comfort as a design constraint, not an afterthought.
In practice, makers rely on familiar concepts—balance, proportion, color, harmony, asymmetry, and repetition—to create that internal logic. Use negative and positive shapes thoughtfully; a silhouette that “breathes” on one earring can be answered by a denser composition on the other, a dance of fullness and negative space. Tie everything together with a core idea: a shared material, a recurring texture, or a thematic element. That’s your thread of cohesion.
Materials and Tools: From Box of Bits to Wearable Conversation
Handicraft shines when materials keep their personality. The slight irregularity of a hand-cut stone, the grain of wood, or the imprint of a linen-textured hammer face is what makes mismatched pairs feel alive. Start by sorting your resources, then pick a palette of surfaces and structures that you can cross-reference between earrings.
Materials to Consider
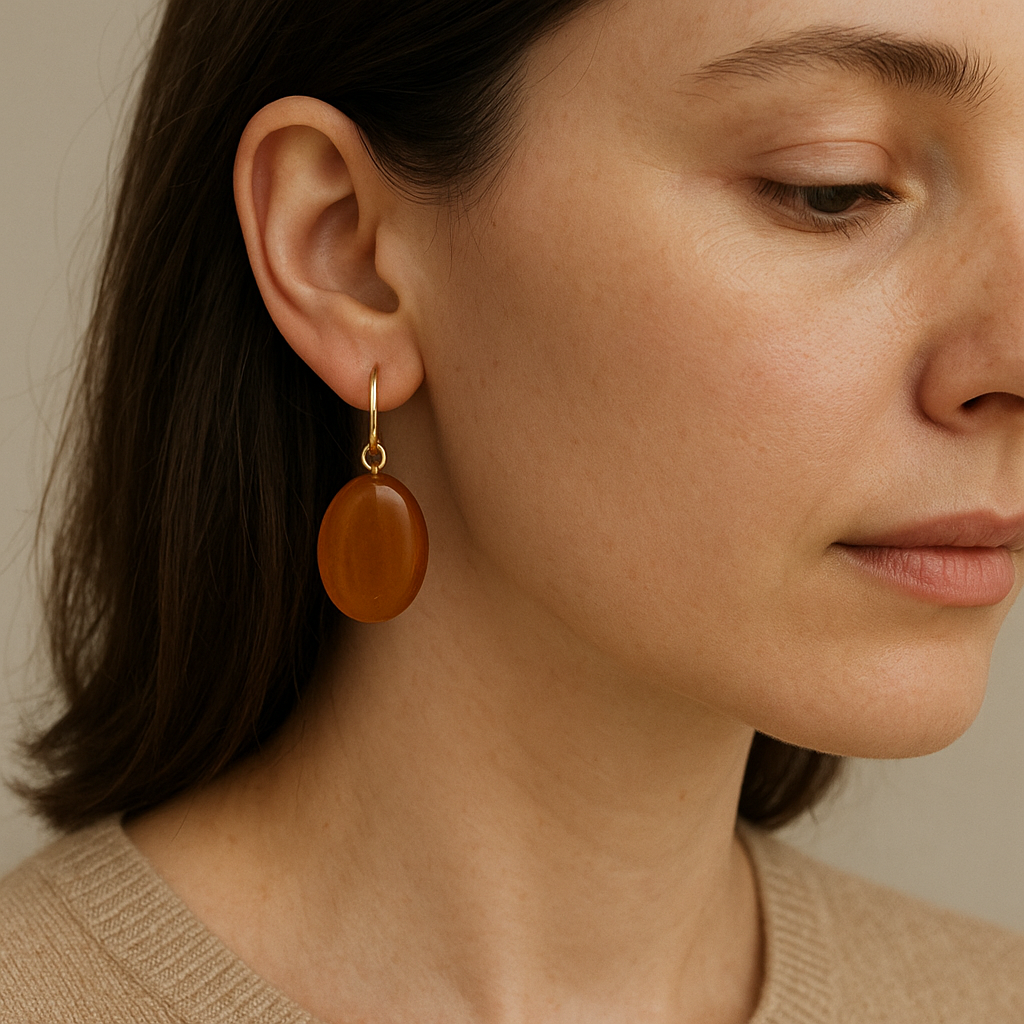
- Metals: Brass, copper, sterling silver, gold-fill, aluminum, titanium niobium for hypoallergenic needs. Each metal offers a different temperament—warmth in brass, crispness in silver, utility in aluminum.
- Natural elements: Wood veneers, mother-of-pearl, bone, horn, shell fragments, sea glass, stone chips, clay beads. Plenty of opportunities for varied textures that still play nicely together.
- Hand-shaped media: Polymer clay, porcelain, air-dry clay, paper clay, resin casts, cold enamel. These are ideal for sculpting “related but different” components.
- Textiles and fiber: Silk tassels, linen cords, macramé knots, wrapped threads. Soft elements modulate a shiny metal-heavy composition.
- Found objects: Vintage buttons, watch gears, tiny keys, charms, fragments from broken jewelry. Upcycling is not just economical; it adds narrative depth.
Tools You’ll Use Often
- Pliers: Chain-nose, round-nose, and flush cutters for precision. Nylon-jaw pliers protect soft metals and coated wires.
- Wire and sheet setup: Wire gauges 18–24 for structural parts, 26–28 for wrapping. Thin sheet (0.3–0.8 mm) for tabs and silhouettes.
- Surface refinement: Needle files, micro-mesh sanding pads, polishing cloths, burnishers.
- Texturing tools: Ball-peen hammers, chasing tools, stippling punches, rolling mill texture plates, fabric for imprinting.
- Adhesives and settings: Two-part epoxy for non-porous joins, E6000 for flexible bonds, bezels and prongs for stones and resin cabochons.
- Finishing gear: Patina solutions (liver of sulfur for silver, ammonia fumes for copper), sealants (microcrystalline wax, Renaissance wax, water-based varnishes).
- Findings and closures: French hooks, leverbacks, latch-back hoops, posts with friction backs, threaders. Match the closure to the design’s weight and length.
Safety and Comfort Basics
- Allergies: Use nickel-free components; niobium and titanium are safest for sensitive ears.
- Weight: Aim to keep each earring under 6–7 grams for all-day wear; under 4 grams is ideal for most lobes.
- Edges: Deburr and round all contact points. A single burr can make a light earring feel intolerable.
- Finish: Seal patinas and porous materials to prevent discoloration of skin and clothing.
Design Formulas for Intentional Mismatch
Use these repeatable structures when you’re starting out or when a project needs direction. Mix, combine, and adapt them to your materials.
1) The Shared Core
Pick one element—stone type, bead shape, metal finish—and vary everything else. Example: Both earrings feature an oval moss agate bead. One earring suspends the bead in a wire halo; the other turns it sideways on a bar with a small charm. The shared bead anchors the pair.
2) Shape Rhyme
Use cousins rather than twins: a circle next to an oval, a hexagon paired with a kite. The geometry rhymes without repeating itself. Maintain a similar visual mass so the eye recognizes parity.
3) Directional Dialogue
Let one earring lead the gaze downwards (a drop), while the other guides it outwards (a wing or fan). The wearer’s face becomes the space where the directions meet. This works beautifully for hairstyles that expose one ear more than the other.
4) Negative/Positive
Cut a shape from metal and use both the cut-out and the frame as separate earrings. They’re literally made of the same material, just distributed differently. This immediately signals intent.
5) Color Echo
Use color once boldly on one side and softly on the other. For instance, a saturated enamel disc on the left echoed by a small seed-bead accent of the same hue on a minimalist right earring. The echo reads as a deliberate call-and-response.
6) Story Pair
Create two characters from the same world: a tiny fishbone charm and a water-drop crystal; a moon and a tiny starburst; a lock and a key. These narrative cues invite curiosity and conversation.
7) Modular Swap
Design components that clip or slide onto a base. The wearer can reconfigure length, add a charm, or switch color accents. Sell a base set with extra charms to expand options.
Color and Surface: Subtle Ways to Control Attention
Color and finish set mood and perceived value. Mismatched pairs thrive on controlled differences—change something, and keep something.
Color Strategies that Read as Intentional
- One-hue palette: Vary saturation and texture within a single hue family—powdery matte sky blue polymer on one side and glossy cobalt glass on the other.
- Complementary accents: If one earring uses a cool main hue, place a warm micro-accent in the other (and vice versa). Keep the complementary hit small to avoid chaos.
- Analogous drift: Travel from teal to green to chartreuse across the pair. The gradient effect connects them without mirroring.
- Neutrals with signal color: Use metal and neutral beads in both earrings, then add a tiny pop of color on one side only. The neutrals stabilize the disparity.
Surface and Texture
- Matte vs. gloss: Combine one high-polish element with another that is satin or sandblasted. Variance in reflectivity plays like a drum/piano duo—different timbres, same song.
- Hammer identities: Use the same hammer texture on both earrings but in different areas or scales.
- Patina brotherhood: Apply the same patina to two different forms—copper triangles and copper circles—so they inherit a family resemblance.
- Mixed materials: Let wood grain soften a metal-heavy design; use fiber wraps to add warmth and control swing speed.
Engineering for Comfort, Movement, and Longevity
Well-made earrings are engineered objects. The best mismatched pairs feel balanced even when one is longer or denser than the other. This is where craft meets physics—and where good craftsmanship turns ideas into heirloom-worthy jewelry.
Weights, Lengths, and Centers of Gravity
- Target weights: Keep each earring within a comfortable window. If one must be heavier, make it shorter and closer to the lobe to reduce torque.
- Leverage math: A 5 g earring that hangs 70 mm from the piercing exerts more pull than a 6 g earring hanging 25 mm. Shorten, distribute mass upward, or switch to a wider-back post.
- Stability: Long, delicate chains tangle less if the pendant has a tiny counterweight near the top; stability looks intentional because it moves gracefully.
Closures and Comfort Fit
- Hooks for airiness, leverbacks for security, posts for clean lines, threaders for minimalist drama. If one earring is more kinetic, give it the safer closure.
- Use surgical steel, titanium, or niobium for sensitive wearers. Consider offering a swap option at checkout.
- Ear support disks or larger clutch backs distribute weight and prevent droop on heavier studs.
Joinery and Durability
- Cold connections: Rivets, tabs, micro-bolts, and wrapped loops are sturdy and repairable.
- Adhesives: Only as an assist, not a crutch. Roughen surfaces, degrease, and clamp. Allow full cure times.
- Wirework: Perfect closed loops. Any gap invites disaster in a moving object like an earring.
- Soldering (if you solder): Pickle, neutralize, and sand to remove skin-irritating residues; quench slowly to minimize warping of delicate forms.
Hands-On: Four Project Blueprints
These blueprints emphasize contrast plus commonality. Adapt measurements to your style and comfort.
Project A: Negative/Positive Metal Duo
- Materials: 0.6 mm brass sheet, 20-gauge sterling wire, fine files, 800–2000 grit papers, patina solution, Renaissance wax, French hooks.
- Steps:
- Sketch a leaf silhouette. Saw out the leaf from brass. Save both the cut-out leaf and the frame.
- Drill suspension holes at structurally sound points (1.0–1.5 mm from edges).
- File and sand edges until silky; pass a finger along edges with eyes closed to detect burrs.
- Apply a light patina to both pieces, then selectively polish highlights.
- Seal with wax. Attach the cut-out leaf to one hook, the frame to the other. Add a micro-bead to the frame if needed for visual parity.
Project B: Story Pair—Moon and Tide
- Materials: Darkened silver discs (12–14 mm), small freshwater pearl, tiny kyanite stick, 22-g wire, short chain segments, leverbacks.
- Steps:
- Doming block: Give one silver disc a shallow dome (moon). Texture the other disc with gentle stippling (tide).
- Patina both, polish raised areas. Attach pearl under the moon, kyanite under the tide disc via chain.
- Ensure total visual mass is similar by trimming chain length on the lighter side.
- Mount on leverbacks for secure, slightly dressy wear.
Project C: Polymer Clay Cousins
- Materials: Polymer clay in two related hues, liquid clay, blade, texture tools, posts and pads, two-part epoxy.
- Steps:
- Condition clay; roll to 2–3 mm. Cut one organic oval and one teardrop.
- Texture only one piece; leave the other smooth but add a tiny inlay dot in the same color as the textured side.
- Bake per brand instructions. Lightly sand and buff to satin.
- Epoxy posts, cure fully. Finish with micro-wax for a soft glow.
Project D: Upcycled Charms with Structural Echo
- Materials: Two mismatched vintage charms, 0.8–1.0 mm brass wire, 3 mm jump rings, coil-making mandrel, oxidizing patina.
- Steps:
- Design custom ear wires that share the same spiral detail to unify the set.
- Oxidize and polish the new wirework to match the charms’ patina level.
- Install charms at slightly different heights; make sure overall dimensions feel like a pair (e.g., 55 mm vs. 50 mm).
- Test swing and silent movement; file any noisy contact points.
Workflow: From Idea to Repeatable Craft
A tidy process saves time and stress, especially when pieces are cousins rather than twins.
Sketch, Mock, Iterate
- Sketch three variations per idea. Exaggerate differences in the sketch; you can always tone down in materials.
- Make paper or cardstock mockups to test silhouette and scale on the ear.
- Set a visual rule for the pair (e.g., same texture, different shape) and stick to it through the build.
Build in Parallel
- Cut and prepare materials for both earrings at once. Process steps in batches: saw both, file both, texture both.
- Weigh components mid-build; adjust by drilling a small hole, adding a bead, or thinning edges.
- Check hang angle by tapping the top with a finger; pieces should settle without flipping.
Finishing Discipline
- Standardize sanding grits and timing so surfaces match in quality even when forms differ.
- Match sheen across both earrings: both satin, both gloss, or both matte, unless sheen is your intentional contrast.
- Record patina times and dilution; aim for repeatable hues.
Upcycling and Sustainability as a Design Superpower
Mismatched designs thrive on recovered materials. Vintage beads, orphaned charms, and broken necklaces supply singular parts that carry history. Because each component is unique, you can emphasize its irregularities and still achieve an intentional look by adding unifying features such as a custom ear wire, a shared patina, or a consistent texture.
- Deconstruct old pieces and sort by material, era, and finish. Keep a “cousin bin” for items that relate.
- Use gentle cleaning to preserve age. Over-polishing can erase character that contributes to intention.
- Add a small, consistent hallmark—like a stamped dot—on the back of each earring to mark them as kin.
Comfort, Testing, and Real-World Wear
Before calling a pair finished, simulate a day’s wear. Put them on while doing chores or desk work. Observe tangle risk with scarves and hair. Validate that weight distribution still feels good after two hours. This practical testing ensures a design that not only looks intentional but feels good in motion—evidence of serious ergonomics.
Quick Comfort Checklist
- No edges catch on knitwear.
- Backings hold firmly without pinching.
- Movement is smooth, not jittery; no metal-on-metal squeak.
- Skin contact points are sealed or polished to a skin-friendly finish.
Styling, Wardrobe Pairing, and Personal Expression
Mismatched pairs are expressive, but they need context. Encourage wearers to think of them as punctuation for an outfit: a dash, a parenthesis, or an exclamation point. A little styling guidance increases the confidence of someone who’s new to the look.
- Minimalist outfits love big contrast pairs. Pattern-heavy looks prefer tiny but clever mismatches.
- Short hair or updos can handle length differences; long hair benefits from pieces with stronger silhouette or reflective accents.
- For formal settings, keep the mismatch in geometry rather than in loud color; for casual, flip it.
- Offer modular add-ons so one pair can shift from day to evening with a clip-on charm.
Storytelling and Presentation for Makers
If you sell your work, the story is part of the craft. Give your pair a name that hints at the logic—“Orbit and Anchor,” “Morse and Echo,” “Key and Doorway.” Include a short card explaining the shared elements and contrasts. Buyers relax when they understand why the pieces belong together.
- Packaging that holds the pair at different heights shows the conversation between them.
- Photography: Shoot flatlay and on-ear angles; use a plain background and one styled shot with wardrobe.
- Care card: Include metal type, cleaning instructions, and closure notes, especially for mixed finishes.
Troubleshooting: When Mismatch Looks Accidental
Most “accidental” vibes come from inconsistency or unresolved weight differences. Use this diagnostic flow:
- Do they share at least one element? If not, add a micro-echo: a 3 mm bead, a stamp, a matching jump ring color.
- Is one shinier than the other? Align sheen, or make sheen the intentional contrast and explain it via design statement.
- Do lengths fight the face? Try matching the bottom line: both end near the jawline, even if their shapes differ.
- Is one visually heavier? Add negative space to the heavier side or a small mass to the lighter side.
- Are closures mismatched without reason? Choose closures that support each earring’s behavior and comfort.
Advanced Techniques for the Curious Maker
Once you’re comfortable, explore processes that deepen contrast while preserving unity:
- Cold enamel and resin inlays: Fill carved recesses with pigmented resin on one side and leave the other side open and airy.
- Keum-boo or foil accents: Add a thin gold accent on mismatched shapes; the gold thread ties them together across form differences.
- Micro-riveting: Layer thin metal motifs; use identical rivet heads across both earrings as a quiet echo.
- Textile-metal hybrids: Stitch silk or linen through drilled metal tabs on one earring while wrapping the other earring’s wire with the same thread.
Ethics, Skin Safety, and Longevity
Responsibility elevates the craft. Source conflict-free stones, lead-safe solders, and nickel-free findings when possible. Seal patinas that could rub off on skin. Offer clear notes for care and repairs. A maker’s reputation rests on longevity as much as on look.
Checklists You’ll Use Again and Again
Pre-Design Checklist
- Pick a rule: shared element, color echo, or shape rhyme.
- Define mood: playful, serene, architectural, rustic.
- Set weight targets and maximum length for comfort.
- Select closure types appropriate to weight and movement.
Bench Checklist
- Batch process for consistency: cut, file, texture, patina, seal.
- Deburr all edges; test with fingertip.
- Weigh components mid-build; adjust mass distribution.
- Proof the hang and swing; adjust jump ring orientation and length.
Finish and Presentation Checklist
- Match sheen across the pair, unless sheen is your chosen contrast.
- Photograph neutrals and styled looks; include dimension references.
- Write a two-sentence story card explaining the logic of the pair.
- Offer closure swaps for sensitive ears or different lifestyles.
Case Studies: Reading Intent in Real Examples
Case 1: Botanical Cousins
Left: a small fern silhouette cut from copper, flame-painted for iridescence. Right: a copper frame with a single green glass drop. Shared copper and flame tones unify them; plant theme is obvious but not literal. A satin finish on both stabilizes the look.
Case 2: Industrial Romance
Left: a tiny reclaimed watch gear inside a domed resin cabochon. Right: a slender hammered bar with a micro-rivet near the end. Both use steel-toned accents and repeated circular motifs. Movement is quiet and deliberate, matching the urban mood.
Case 3: Minimal Geometry
Left: a matte silver triangle stud. Right: a short threader with a small circle. The shapes rhyme, the finishes match, and scale is balanced. Subtle enough for daily wear, distinct enough to feel designed.
Pricing, Editions, and Collector Mindset
Because each pair is half-custom, price for the extra design time. Offer small-batch editions around a theme, not identical twins. Number pairs within a collection to encourage collecting: “Tidal Drift No. 4.” Keep a swatch book of patinas, texture samples, and color chips so editions remain coherent over time.
Maintaining the Handmade Signature
Let small hand marks show where they add warmth: a faint hammer kiss, a thread wrap, a tool texture. Editing marks is also part of the craft; refine what distracts and keep what enriches. Over time you’ll develop a recognizable signature—certain ear wire shapes, a peculiar texture, a recurring motif—that makes even bold mismatches feel unmistakably yours.
Putting It All Together
Intentional mismatching thrives on rule-making and gentle rule-bending. Choose a core link—material, motif, texture—and then let contrast do the rest. Test for comfort, consider movement, finish with care, and present with a story. With practice, you’ll discover that two different earrings can sing together more beautifully than a pair of duplicates ever could, not in spite of their differences but because of them.