Small objects get to tell big stories, and few are as personal as a ring you craft with your own hands. Working with adjustable bases takes the fear out of ring-making by eliminating rigid sizing and letting you build, test, and iterate quickly. Whether you lean toward botanical motifs, glittering micro-mosaics, or found-object memory keepers, this approach turns jewelry into playful, practical handicraft. The result is a canvas you can tailor to any finger, any season, and any outfit—without a studio full of specialized equipment.
Why Adjustable Ring Bases Belong in Every Maker’s Toolkit
Adjustable ring bases are pre-formed metal shanks that can be gently opened or closed to fit different fingers. They come with a variety of connection points—flat pads, bezels, trays, loops, prongs—so you can attach almost anything to form the ring’s focal. This modularity invites experimentation: today’s pressed flower can become tomorrow’s tiny collage. If you enjoy iterative design, teaching, or markets where customers want to try before they buy, adjustability is a game-changer.
Common base materials include brass, copper, stainless steel, and plated alloys. Each has a character: brass warms up vintage styles, copper plays beautifully with verdigris, stainless feels modern and hypoallergenic to many, and sterling silver offers a classic fine-jewelry look you can later solder or hallmark. Filigree bases bring ornate scrollwork and multiple tie-in points for wire, while minimalist split shanks keep the focus on a single gem or dome. Because the band is open, it’s good practice to ensure the ends won’t pinch or catch; a quick file and polish can make them sleek and skin-friendly.
Most bases arrive in a neutral finish—raw or plated (gold, silver, gunmetal, rose)—ready for you to adapt. You can reshape them deliberately to fit a design, but remember that the less you bend, the longer the metal retains its spring and surface integrity. Treat them like a reliable foundation, not a bendable toy, and they will reward you with long service.
Tools, Materials, and Smart Substitutions
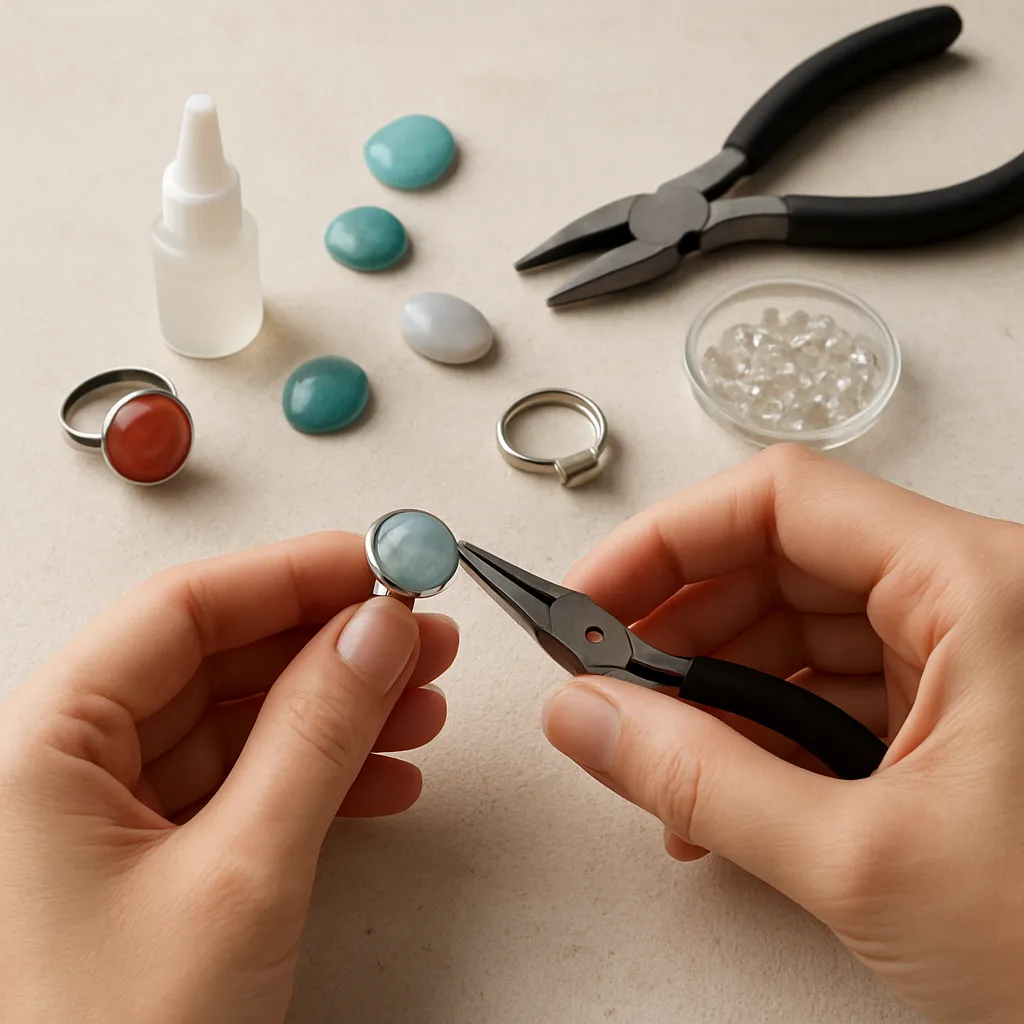
You don’t need a full metalsmithing bench to make expressive rings. You do, however, need a handful of essential tools and a plan. Organize your workspace into three zones: cutting/forming, bonding, and finishing.
- Cutting/forming: flush cutters, small shears, craft knife, round- and flat-nose pliers, needle files, a rawhide mallet, steel ring mandrel (or a smooth cylindrical substitute like a thick wooden dowel if you’re careful).
- Bonding: mixing palette, toothpicks or micro spatulas, cotton swabs, isopropyl alcohol (for degreasing), nitrile gloves, and your chosen adhesive or setting material.
- Decorative media: polymer clay, paper snippets, dried flowers, fabric, mica powders, pigments, micro beads, tiny charms, and cabochons (glass, stone, resin, wood, shell).
- Surface treatments: micro mesh sandpapers, polishing cloth, sealants, microcrystalline wax, liver-of-sulfur substitutes (for gentle aging), patinating paints or gels if metal-safe.
Choosing your bonding strategy is central. For non-porous to non-porous connections (glass to metal, metal to metal), a two-part epoxy holds well. For quick tacks on porous surfaces, a cyanoacrylate can help, but it’s more brittle and can fog clear plastics. Many makers love resin for inlays and dome effects because it both binds and beautifies—just work in thin layers to control bubbles and cure evenly. For cold connections, consider micro rivets or tiny screws if your base has anchor points.
Smart substitutions keep costs down: watch crystals stand in for domes; lace snippets or sari silk for texture; clipped photos under clear cabochons for instant miniature portraits. Remember scale: in ring design, two millimeters can make the difference between elegant and awkward. Keep your elements proportional to finger width and the base’s tray size.
Understanding Fit, Balance, and Daily Wear
Even though the band is adjustable, aim for comfort and stability from the first sketch. A ring that spins or catches will live in a drawer; a ring that sits low and smooth becomes a daily favorite.
Comfort profiling
Low-profile focal pieces (3–5 mm tall) are easy to wear and won’t snag sweaters. If you crave statement height, taper the silhouette so the tallest part sits above the knuckle, not beside it. Be mindful of weight: heavy tops make rings rotate; counterbalance with a broader band or lighter materials in the focal.
Fit without guesswork
Keep a simple sizing kit in your studio: a printable sizer, a mandrel, and notes on typical ranges. Adjust the band on a mandrel instead of a finger to avoid sharp kinks. Write down your target sizing range for each piece; it will inform packaging and sales descriptions, especially online.
Grip surfaces and skin-friendliness
Degrease all bond areas with alcohol before assembly. Break shiny surfaces lightly with fine sandpaper so glues or resin key into the metal. Round any sharp corners on the base or focal. A final rub with microcrystalline wax keeps metal smooth against the skin.
Design Language: From Minimalist to Maximalist
Start with intent. What story should the ring tell? A travel memento? A pressed petal from a wedding bouquet? A color study for your capsule wardrobe? Consider one focal idea and two supporting details—color twist, texture contrast, or metallic accent—so the ring reads clearly even at arm’s length.
- Minimalist: a brushed metal tray with a single hematite cab; matte black band; whisper-thin enamel line.
- Boho: filigree base, tea-stained linen under a rose quartz dome, warm brass accents.
- Botanical: sealed fern tip in clear resin, copper band kissed with soft patina.
- Industrial: oxidized steel tone, micro gear, matted epoxy with graphite powder.
- Nostalgic: sepia photo clipping beneath beveled glass, hand-lettered initial lacquered on top.
Create a swatch board with metal finishes, paper snippets, and stones. Photograph combinations under natural daylight to see how colors shift. Because a ring lives in motion, tilt and rotate your samples: reflectivity, depth, and sparkle often change dramatically at different angles.
Five Core Techniques for DIY Rings Using Adjustable Bases
1. Quick Cabochon on a Glue Pad
This is the classic beginner-friendly method—fast, sturdy, and neat. Choose a base with a flat or textured pad, and a cab that exactly matches or slightly overhangs.
- Dry fit: Press the cab gently to ensure full contact. If the pad is domed, lightly sand the underside of the cab or pad to improve mating.
- Prep: Degrease both surfaces. Score the pad crosswise with a craft knife for extra tooth.
- Bond: Mix two-part epoxy and apply sparingly—just enough to wet the interface without squeeze-out. Seat the cab, twist a millimeter to break bubbles.
- Clamp: Use low-tack tape or a soft gel grip to hold everything square for the full cure time.
- Clean: If any glue peeks out, roll it away with a toothpick before it hardens.
2. Bezel Cup with Polymer Clay Inset
Bezel-style bases with shallow walls are perfect for sculpted clay cameos, faux gemstones, or terrazzo effects.
- Condition clay, press into the bezel, and level with a razor flush to the rim.
- Add inclusions (foil, mica, tiny canes) and press designs lightly so they don’t rise above the rim.
- Cure per clay instructions; let cool fully so it contracts and releases stress.
- Seal with a thin glaze or a skim of resin for a glassy dome.
3. Micro-Collage Under Glass
Trays with slightly raised edges are made for memory art. Layers of paper, fabric, pressed petals, and metallic flakes become a world in miniature.
- Cut a base circle or oval to fit snugly. Dry place all elements to test composition.
- Seal porous materials first with a non-water-based sealer to prevent stains or bubbles.
- Adhere the collage to the tray with a thin film of archival glue; let dry flat.
- Top with a clear glass cabochon, or pour a dome of thin resin in 2–3 layers to avoid heat spikes and bubbles.
4. Wire-Lashed Focals on Filigree
Filigree and perforated bases allow mechanical attachments without any glue. This is excellent for stones with drilled holes or wrapped loops.
- Plan anchor points and pre-shape soft wire (26–28 gauge) for lashing.
- Cross-stitch the focal to the base through openings; keep tension even.
- Tuck wire tails under scrolls and burnish smooth so nothing scratches.
5. Cold Rivets and Micro Screws
For mixed media or heavy focals, cold connections add strength and a crafted look.
- Mark and punch pilot holes in the focal and base where structurally sound.
- Use short posts, peen gently over a bench block with a ball-peen hammer.
- Finish with a touch of wax to prevent oxidation at the joint.
Surface Alchemy: Texture, Color, and Controlled Aging
Surface treatment is where utility meets personality. Light hammering across a raw brass band adds lively sparkle that hides small scratches. Satin finishes achieved with fine abrasive pads give a modern, diffused sheen. If you want age without grime, develop a real or simulated patina: warm copper with a hint of teal, brass with olive undertones, silver with gentle shadows around details.
- Oxide baths: Use mild, controllable solutions and neutralize fully. Apply selectively with a cotton swab to keep contrast.
- Painted patinas: Metal-safe acrylic systems mimic oxidation; seal with wax for a hand-rubbed luster.
- Heat coloration: Carefully flame-clean copper or brass for straw to plum tones; quench and wax.
Stones and glass appreciate a final clean; avoid acids on porous stones. For tray inlays, a final skim coat of clear resin can unify textures and magnify depth like a tiny pond over your art.
Safety, Ergonomics, and Workspace Flow
Good habits keep making joyful. Ventilate whenever you use solvents or resin. Wear nitrile gloves to protect skin and avoid fingerprints on glossy surfaces. Blade discipline matters: cut away from hands, cap knives instantly, and keep a small sharps container. Use a dust mask when sanding plastics, resins, or woods; a desktop air purifier helps corral fine particles.
Set up a curing zone that’s dust-free. A simple plastic bin inverted over your work is a reliable dust tent. Label cups, stir sticks, and syringes for each material so you don’t cross-contaminate.
Troubleshooting: From Wobbly to Wow
- Loose cab on pad: Surfaces likely weren’t prepped. Degrease, scuff, and rebond with fresh adhesive. Ensure full face contact.
- Cloudy dome: Trapped moisture or incompatible sealer. Let paper cure 24 hours after sealing and use thin resin layers.
- Spinning ring: Focal is top-heavy. Add a silicone comfort band insert or rebase the focal on a wider shank.
- Lifted collage edges: Use a burnisher to press edges while glue is wet; wick away excess to prevent ridges.
- Scratching band ends: File, then burnish with a steel spoon; add a micro dab of wax.
- Plating wear: Embrace the relic vibe or seal with clear lacquer on the underside to slow rub-through.
Creative Prompts to Stretch Your Style
- Botanist’s diary: Tiny fern under a glass cab, Latin name micro-stamped around the tray rim.
- Library pocket: Words clipped from a favorite poem under tea-stained paper, sealed with soft matte finishing.
- Seashore token: Mini shell chips and salt-sanded glass in a shallow pour of tinted resin.
- Night sky: Navy mica with pinhead silver beads set as star clusters; a gloss dome to mimic the Milky Way.
- Textile echo: Brocade scrap framed in a bezel; edge painted with metallic ink to tie fabric and metal.
- Mechanical whisper: Watch cog, graphite dust, and a frosted topcoat for a soft industrial set.
Sustainability and Material Mindfulness
Rings are an ideal playground for upcycling. A single thrifted beaded necklace can become a dozen focal clusters. Old keys flatten into abstract silhouettes; chipped vintage brooches yield stones perfect for glue pads. Choose repairable designs over disposable novelty: screws and lashing wire invite later adjustments and add years of wearability.
Think lifecycle. Will the focal yellow? Can the band be recoated or repolished? Are the glues reversible for future conservation? When you plan for maintenance, you build in value and reduce waste. Even packaging can join the ethic: small linen pouches or recycled paper boxes with care cards printed in soy ink set a coherent tone.
From Gift to Micro-Business: Presenting and Selling Your Rings
Adjustable rings shine at craft fairs: shoppers can try them instantly, and you can resize on the spot. Offer a mirror, hand sanitizer, and ring sizing mandrel for a neat, hygienic browsing station. Display rings upright on cards or in grid trays; keep the focal line of sight around 1.3–1.5 meters to invite eye contact.
Pricing blends materials, labor minutes, overhead, and brand story. Time your builds; you might be surprised how quickly a well-rehearsed design comes together. Photograph on a neutral background, show a hand shot for scale, and note the sizing range in the listing. Include a simple care card to reduce returns and support customer satisfaction.
Care, Maintenance, and Thoughtful Repairs
Advise owners to remove rings for vigorous handwork, prolonged water exposure, or harsh cleaners. Wipe metal with a soft cloth after wear; body oils can be gentle protectants, but sunscreen residues sometimes attack finishes. For domed pieces, store face-up or in a pouch to prevent scuffing. If a joint loosens, a tiny dot of fresh adhesive often restores strength; for mechanical builds, a quarter turn on a micro screw brings everything back to snug.
Advanced Experiments for the Curious Maker
UV Tints and Layered Depth
Build depth by stacking ultra-thin resin layers with subtle color tints, embedding micro elements at different heights. Think: a pale smoke gray base, then a constellation of glitter, then a transparent blue veil, then a final clear gloss. Each layer should gel before the next to prevent bleed.
Hybrid Inlays
Combine polymer clay marbling with a skim of clear resin to magnify swirls. Add foil leaf only in valleys; the dome will make it appear suspended.
Photoetch and Inset
Etch a thin brass disk with a personal motif, darken recesses, and seat it inside a tray. The effect is custom signet—no engraving machine required. A hand-burnished wax finish keeps the highlights crisp.
Textured Metal Overlays
Emboss copper shim with a rolling pattern (leaf vein, linen texture), cut to tray shape, and adhere. The light catches peaks and valleys for a woven-metal illusion. Edge-paint with a micro brush to hide any gap line.
Teaching and Community: Rings as an Accessible Workshop
Adjustable bases make fantastic group projects: no torches, minimal tools, and immediate wins. Build a module-based class—adhesion fundamentals, collage composition, surface finishing, and care—so students leave with both knowledge and keepsakes. Provide kits with mixed trays and small assortments of stones and paper; the variety sparks conversation and cross-pollination of ideas. Encourage participants to bring personal ephemera: ticket stubs, map snippets, handwriting samples—these turn a generic ring into a talisman.
Design Ethics: Cultural Respect and Personal Narratives
When referencing cultural motifs, research their meaning and context. Collaborate with artists from those traditions when possible, or opt for abstract echoes rather than direct copies. Rings serve as portable statements; make sure yours uplift rather than appropriate. Personal stories—names, songs, coordinates—are safe ground and resonate deeply with wearers.
A Practical Workflow from Blank Base to Boxed Beauty
- Concept: mood, palette, silhouette, and one focal idea.
- Dry assembly: test combinations on the tray or pad; photograph options.
- Surface prep: degrease, scuff, and prefit; mask areas you want to keep pristine.
- Commit: apply adhesive or pour thin resin layers; pop bubbles with a warm breath or brief heat pass.
- Set: protect from dust; wait the full cure time even if it looks done sooner.
- Edge care: file micro burrs, apply wax, buff to a chosen sheen.
- Final check: adjust on mandrel, ensure smooth interior, confirm sizing range.
- Present: mount on a card or nestle in a pouch with a concise care note.
The Joy of Iteration
What makes adjustable ring projects addictive is how forgiving and modular they are. One weekend you’ll chase glassy domes and ocean palettes; the next you’ll lash a found pebble to filigree and accent it with a faint fern-green patina. Each technique you learn builds on the last, and each base invites a different solution. Over time, your rings begin to share a signature: the way you layer paper fibers, the warmth of your metal finishes, the confident restraint or exuberant maximalism you bring to tiny spaces.
Start with one base and one idea, then make three variations. Notice what feels good to wear, what catches the light just right, and what draws compliments from friends. Handicraft thrives on evidence loops: build, wear, observe, refine. With adjustable bases as your foundation, you have the freedom to iterate endlessly—and to turn the everyday motion of your hands into a moving gallery of your imagination.