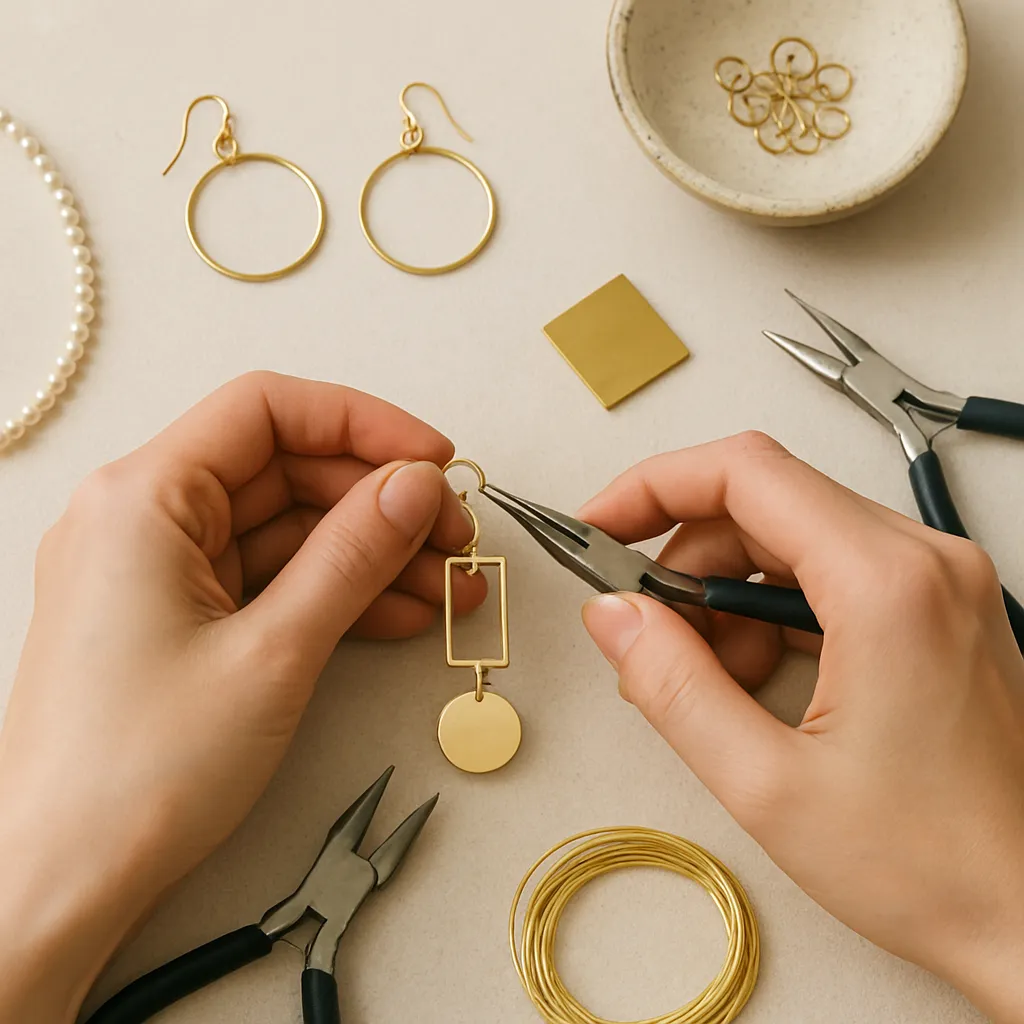
Minimalist art distilled the visual world into essential forms, and that same discipline can guide the hands of a jewelry maker seeking clarity, restraint, and lasting elegance. Crafting jewelry in this spirit is not about making less; it is about choosing deliberately. Every line, curve, and surface earns its place. This guide explores how to translate minimal ideas into wearable pieces, how to select materials and tools that support quiet design, and how to build a repeatable process so that your pieces feel inevitable rather than improvised.
Why Minimalist Art Translates So Well Into Jewelry
Minimalist art prioritized clarity, order, and directness, often through serial structures, repeated units, monochrome palettes, and rational geometries. In jewelry, those same choices yield forms that are easy to wear, comfortable to pair with different wardrobes, and timeless rather than trend-bound. The principles ask you to treat line, mass, and surface as your primary vocabulary. Done well, those decisions create a calm intensity that invites the wearer to look closely and to feel the piece rather than simply notice it.
Think of the pendant or ring as a small-scale sculpture, where the body is the site and movement is part of the composition. Minimal art’s refusal of ornament maps naturally onto silhouettes that emphasize outline and volume over decoration. Seriality can guide a set of stacking rings; a rational grid can become a bangle’s perforation pattern; a monochrome bar of titanium can replace a gemstone as a focal point. The result is a design language that respects the wearer’s daily life and does not overwhelm their presence.
At the heart of this approach are a few key ideas worth naming: minimalism as discipline and clarity; geometry as a structural anchor; proportion and balance as the emotional tuning of a piece; and reduction as the practice of removing everything that does not carry meaning.
Materials and Tools That Support Clean, Essential Forms
Minimal designs depend on materials that hold crisp edges, maintain consistent finishes, and age gracefully. Metals are workhorses here: sterling silver for its workability and neutral color; gold (solid or gold-filled) for warmth and durability; brass for an earthy glow that can be left to mellow; bronze for its classic tone; stainless steel and titanium for strength and lightness; and aluminum for its anodized color range and featherweight wearability. Each metal signals a different attitude: formal, casual, architectural, soft, or industrial.
Non-metal options also excel in minimal work. High-grade acrylic offers glass-like clarity or perfect opacity and can be laser-cut into exacting shapes. Resin allows embedded voids or ultra-flat planes of color, though it demands careful finishing. Wood (especially maple, walnut, and ebony) brings warmth and tactility, while porcelain and concrete introduce a quiet, matte modernity. For each material, ask how it contributes to structural honesty—your design should express what the material naturally wants to do, not force it into an incompatible role.
Essential tools for minimalist jewelry revolve around accuracy and finishing. Start with high-quality pliers (chain-nose, round-nose, flat-nose), flush cutters, a bench block, a rawhide or nylon mallet, needle files, and an assortment of sandpapers (from 400 to 3000 grit). Add a jeweler’s saw with fine blades for crisp edges, calipers for measurement, and a scribe for layout. For metal joining, a small torch, soldering bricks, third-hand tweezers, flux, and pick are standard; a pickle solution cleans oxides post-solder. If you prefer cold connections, a riveting kit and micro-drill expand your options. A rotary tool or flex shaft with polishing wheels, abrasive buffs, and rubberized abrasives helps refine surfaces. For absolute flatness, invest in a surface plate and lapping films. Clean, repeatable results rely on precision at each step.
Safety and workflow matter. Use eye protection, a respirator when sanding or polishing, and good ventilation near solvents or torches. Keep a dedicated cleaning area and separate bins for scrap metals, organized by alloy for easy recycling. Minimal work favors a minimal bench: lay out only the tools you need for a session, and stow the rest to avoid accidental dings or scratches.
Design Principles: From Concept to Sketch to Prototype
Minimal jewelry begins on paper—or in a digital sketch—but grows through refinement. Because you remove ornament, mistakes and indecision have nowhere to hide. The process becomes a loop: notice, adjust, test, and reduce again.
Start by identifying constraints. Choose a single formal idea to explore—line, plane, volume, or void—and commit to it. Explore 20 quick sketches around that idea without judgment. Then select two or three and apply design filters: simplify the silhouette, control edge radii, and standardize distances between elements. If you’re leaning geometric, select a governing ratio (e.g., 1:1.5) and apply it to widths and spacings to keep relationships coherent. If curves dominate, define center points and arcs rather than “eyeballing.”
Consider the body early. Where will the piece touch skin? Which surfaces must be soft to avoid snagging? Will hair catch in openings? How does weight distribute over a wrist or earlobe? The resulting ergonomics become constraints that shape your ideal form. Minimize friction, pinch points, and jangling parts—quiet design should feel quiet in motion.
Build a materials palette that doubles as a visual identity. Decide on metal color families (cool silvers versus warm golds), permissible finishes (mirror, satin, stone, ebonized), and allowable accents. Define one rule for color: either “color only via material” or “a single controlled pigment across the line.” This discipline frees you from decision fatigue and strengthens coherence across pieces.
Prototype fast and cheap where possible. Use chipboard, 3D-printed PLA, or scrap sheet metal to test scale and proportion. Photograph prototypes on the body from multiple angles; print the photos and mark where the form feels heavy or thin. Make incremental changes until the form looks “inevitable.” That inevitability is the quiet authority of minimal design.
Techniques for Clean Lines and Quiet Forms
Wire Forming and Solderless Joins
Wire is a natural medium for linear thinking and architectural arcs. Choose consistent gauges to systematize your collection: 18-gauge for structure, 20-gauge for ear wires, 22–24-gauge for finer details. Train your hands to produce repeatable bends using dowels, mandrels, or custom jigs. For joins, explore wrapped loops (with tightly controlled wraps), micro-rivets, or tension-fit closures. Hammering on a bench block planishes wire into ribbon-like facets that catch light subtly, but stop before work-hardening leads to brittleness.
Sheet Metal: Sawing, Filing, and Forming
Sheet supports planar thinking. Mark out designs with a scribe and cut just outside your line, then file to the line for accuracy. Deburr carefully; in minimal work, an unrefined edge ruins the illusion of calm. For forming, use dapping blocks to introduce domes, or fold-forming for controlled creases. Create openings with drilled pilot holes and interior sawing; treat negative areas as shapes in their own right. A satin finish achieved via Scotch-Brite or fine abrasive papers reads as modern while hiding micro-scratches better than mirror polish.
Soldering and Clean Joins
Soldered connections can vanish visually, allowing form to read uninterrupted. Control heat with a small, focused flame, bring the whole piece close to soldering temperature, and then direct heat at the join until the solder flashes. Avoid flooding; in minimal pieces, extra solder is visual noise. Pickle between operations to prevent fire-scale, and progressively sand after final assembly to unify reflectivity across surfaces.
Surface Finishes: Controlling Reflection and Touch
Finishes are more than looks—they are how a piece speaks and feels. A high polish is crisp but unforgiving of scratches. A fine satin speaks softly and hides wear. Directional brushing emphasizes length; cross-brushing calms glare. Steel-wool or abrasive buffs can create a controlled matte that complements geometric silhouettes. Experiment with micro-bead blasting for velvety diffusion. The interplay between surface and light is a primary expressive tool, second only to silhouette. Build a library of finish samples to standardize outcomes in your studio and to show clients.
Casting and 3D Printing
For volumes that must be exact or repeatable—an ultra-thin wedge, a perfect torus, a hollow form with razor edges—consider CAD. Parametric modeling ensures consistent wall thickness and radii. 3D print in wax or resin for lost-wax casting, or direct print in sintered metals for prototyping. Keep tolerances tight, but respect minimum thicknesses for durability. Casting offers a path to precision without losing hand-finishing warmth—post-cast filing and finishing return the human touch.
Non-Metal Minimalism
Porcelain slip can be cast into thin planes that fire to surprising strength, then finished with clear glaze or left matte for a chalky modernism. Maple or ebony can be milled into clean blocks; stabilize and seal wood to reduce movement. Concrete paired with brass creates a quiet material dialogue—seal concrete to guard against skin oils. Acrylic and resin require careful sanding through grits to restore optical clarity; consider chamfers that catch light without fuss.
Step-by-Step Projects to Learn the Language
Project 1: Linear Bar Pendant
This pendant embodies reduction to line and plane, with proportions tuned for everyday wear.
- Materials: 3 mm x 40 mm rectangular bar (sterling or brass), 0.8 mm drill bit, 1.5 mm jump rings, fine chain, clasp, sandpapers 400–2000, polishing compound.
- Mark: Scribe a centerline along the bar’s length. Decide on hole placement: 2 mm from each end for a suspended look or a single offset hole for asymmetry.
- Drill: Use a center punch, then drill slowly with lubricant to avoid burring. Deburr holes with a larger bit by hand.
- Refine: File all edges to a consistent 0.2 mm chamfer. Sand through grits in one direction to create a uniform satin.
- Assemble: Attach jump rings, then the chain. Check how the pendant hangs; adjust hole placement in your next iteration if it tilts undesirably.
Project 2: Circle-Within-Circle Earrings
Serial geometry builds a quiet conversation between inside and outside, mass and void.
- Materials: 0.8 mm sheet (silver or gold-filled), circle templates, jeweler’s saw, needle files, 600–2000 grit papers, ear wires (20-gauge).
- Layout: Mark outer circles (18–22 mm) and inner circles (10–14 mm) with a layout fluid for visibility. Keep rim width consistent (e.g., 3.5 mm).
- Cut: Saw the outer circle first, then drill a pilot hole and saw the inner circle. Keep the blade perpendicular for true edges.
- Finish: File to the line, then sand both faces. Add a slight outer bevel to soften against skin without losing crispness.
- Assemble: Solder or rivet jump rings and attach ear wires. Test swing and weight; aim for under 4 g per earring for comfort.
Project 3: Open Cuff with Offset Gap
An exercise in proportion and ergonomics: the cuff must hug the wrist without pinching.
- Materials: 4 mm x 2 mm rectangular wire (sterling or brass), bracelet mandrel, rawhide mallet, files, sandpapers, optional satin wheel.
- Measure: Wrist circumference plus 1.2–1.5 cm equals cuff inner circumference including a 2.5 cm gap.
- Form: Anneal, then bend around the mandrel. Keep the gap offset by 5–8 mm from center for a subtle tension in the composition.
- Refine: File ends to a softened square or micro-radius to echo the rectangular profile.
- Finish: Apply a longitudinal satin to elongate the form visually. Check spring and adjust by gentle planishing.
Project 4: Stacking Rings in a Controlled Series
Seriality shines in a small set where each ring is a measured variation on a theme.
- Materials: 1.5 mm round wire (three lengths for three rings), solder, ring mandrel, saw, files, sandpapers.
- Cut: Size each length for your target ring size, accounting for wire thickness.
- Form and Join: Close each ring with a tight butt joint, solder, pickle, and round on the mandrel.
- Differentiate: Flatten one ring’s top arc lightly; add a square profile to another by planishing; keep one round. They stack as contrasts within a family.
- Finish: Keep finishes consistent across the set to unify the series.
Project 5: Modular Pendant System
Modularity explores repetition and user involvement: the wearer can rearrange elements.
- Components: Three shapes cut from 1 mm sheet—rectangle, circle, and narrow bar—with precisely placed slots.
- Connectors: Slim U-shaped wires that slide through slots with friction.
- Assembly: The wearer threads connectors to stack forms vertically or offset them. Your design work lies in slot spacing and friction tolerances.
- Finish: Ensure all edges are silky to encourage touch and rearrangement.
Surface, Light, and Tactility
A minimal piece’s voice often lies in its surface. Light reveals edges, proves flatness, and announces wear. Consider how a mirror-polished edge next to a satin face sets up a whisper of contrast. Explore micro-chamfers along outer perimeters to produce a precise glint without ostentation. Pair cool metal with a single plane of matte lacquer or powder coat for a calm, graphic statement. Introduce a controlled texture—a fine linear brushed grain or a subtle pebbled matte—only where it supports the form rather than decorates it.
Chemical coloring and oxide layers are powerful in restrained doses. Liver of sulfur on silver yields grays and blacks; careful masking can leave a bright line along a shadowed surface for depth. Bronze and brass accept heat and chemical patination: experiment on swatches to create stable tones that will evolve gracefully. A thoughtfully managed patina is not an effect; it is a time signature that complements the piece’s geometry.
Color in a Minimal Vocabulary
Minimalism isn’t limited to monochrome, but color must be disciplined. Describe a rule such as “one hue per piece” or “color only in interior planes.” Anodized aluminum and titanium offer integral color with outstanding durability; consider a single, low-saturation tone that reads as material rather than paint. Cold enamel (two-part resin) adds glossy planes that feel architectural—mask edges impeccably and sand flush for unity. If using stones, treat them as units rather than ornament: a uniform series of 2 mm onyx beads, for example, can become a linear dot motif that repeats across a collection.
Wearability, Closures, and Durability
Minimal jewelry should vanish in use—no snagging, pinching, or unexpected rotation. Choose closures that are secure yet visually quiet: friction-fit posts with low-profile backs, tension clasps integrated into a pendant’s form, or magnetic clasps hidden within a geometric bead. For necklaces, balance pendants so they hang level; for earrings, test swing to avoid tapping the jaw. Hypoallergenic materials (titanium, niobium, surgical steel) for posts and ear wires build trust and broaden your audience. Where plating is used, be transparent about wear over time and offer re-plating or refinishing services.
Edge management is essential. Where a 90-degree edge feels sharp, introduce a 0.2–0.5 mm radius to maintain crispness without cutting. Test each piece by running it along a knit swatch; if it snags, refine until it passes cleanly. Avoid hair traps in small openings. A quiet design cannot demand constant attention from its wearer.
Sustainable and Ethical Choices
Minimalism values restraint; apply that ethic to sourcing and studio practice. Use recycled silver and gold from reputable refiners, track scrap diligently, and choose conflict-free stones if you use them at all. Favor durable finishes over disposable plating cycles. Design for repair: modular parts and accessible joins simplify future fixes. Limit packaging to essentials and choose paper-based or compostable solutions. By treating resources with care, your work gains moral clarity alongside visual clarity. Embrace sustainability as a design parameter, not an afterthought.
Building a Cohesive Collection
A collection is a conversation among related pieces. Select a small set of rules—one geometry, two finishes, one connection strategy—and explore variations across forms: studs, hoops, pendants, cuffs, rings. Repeat a signature detail (a 1 mm chamfer, a line of perforations at a fixed spacing) to knit pieces together. Limit seasonal changes to one variable at a time, such as introducing a new width or a single new color. Document SKUs with material, gauge, dimensions, and finish to ensure consistency with every restock or custom order.
Photography, Presentation, and Storytelling
Minimal jewelry asks for minimal staging. Use soft daylight or a large diffused light source to avoid harsh highlights. Photograph on neutral matte surfaces; consider a pale gray or warm off-white that flatters both cool and warm metals. Include close-ups of edges and finishes—these details are your proof of quality. For on-body shots, keep clothing simple and let the piece organize the frame. Name pieces systematically to reflect their logic—“Arc 18,” “Grid 3×2,” “Plane 04”—so customers intuit the family relationships.
Packaging should echo your design values: slim, recyclable boxes, uncoated papers, and a single ink or blind deboss. Include a care card that reads with the same simplicity as your pieces. A disciplined presentation reinforces that nothing extraneous survived your process of reduction.
Troubleshooting Common Issues
- Uneven satin finish: Sand in one direction with a fresh abrasive; follow with a finer grit in the same direction; clean thoroughly before handling.
- Wavy edges on sheet: After sawing, file to the line using a hard bench pin; check against a backlight; correct with fine filing and lapping films.
- Visible solder lines: Use solder matching the base metal’s color; bring both sides to temperature evenly; refinish the whole plane post-solder.
- Earrings rotate forward: Reduce weight or move the loop closer to the center of mass; use larger backs or integrated balance bars.
- Necklace pendant tilts: Adjust hole spacing or add a second discrete suspension point to level the piece.
- Resin dull after sanding: Progress through all grits to 3000; then polish with plastic compound; wash between grits to prevent contamination.
- Titanium ear sensitivity: Switch to niobium for posts or wires; both are biocompatible but some prefer niobium’s softness.
Developing a Personal Minimal Vocabulary
Minimalism is not a single look but a commitment to clarity. Spend time with references from architecture, product design, and graphic design as well as fine art. Deconstruct what you love into actionable rules: constant edge thickness, specific radii, canonical angles (30°, 45°, 60°), or an alignment system that governs holes and joins. Keep a studio log of every experiment, with photos, dimensions, and finishing notes. Over time, you’ll recognize patterns in what feels “right” to your eye and hand.
As you refine, let materials speak honestly. If your voice prefers stone-smooth planes, lean into satin finishes and orthogonal forms. If your work wants a whisper of warmth, allow brushed gold or oiled wood to soften silhouettes. Through it all, return to the core principles: clarity of intention, discipline in execution, and confidence in leaving well enough alone. Minimal jewelry finds its power in restraint—what you refuse to add is as meaningful as what you choose to keep.
Care, Aging, and the Beauty of Use
Minimal pieces reveal wear readily; plan for it. Provide clear care instructions: store separately to avoid rubbing; wipe with a soft cloth after wear; avoid harsh chemicals; refresh satin finishes with a fine Scotch-Brite pad used gently in one direction. Encourage owners to see subtle marks as the collaboration of body and object rather than damage. Where appropriate, offer annual spa services: ultrasonic cleaning, re-brushing, and edge touch-ups that return the piece to its intended state.
Some materials benefit from protective coatings; others are better left to evolve. A controlled brass oxide can deepen over months, aligning with the quiet history your work accumulates. Treat aging as a design component, not a flaw, and communicate those expectations clearly.
From Studio to Market: Pricing and Ethics
Price with transparency: account for materials, studio overhead, labor time at a professional rate, and a margin for wholesale or retailer commissions. Minimal pieces often appear “simple” to outsiders; educate through process photos or notes that reveal the rigor behind that simplicity. Keep edition sizes reasonable and plan production flows that protect quality—batch cutting, then batch finishing, then batch assembly prevents context-switching and quality drift. Stay open to custom sizing and small variations when they preserve the collection’s integrity.
Closing Practice: A Repeatable Path to Clarity
Develop a ritual that escorts every piece from idea to finish: sketch without judgment, choose a governing ratio, prototype in cheap material, test on the body, refine edges, align finishes, and document the final. Along this path, reserve time to remove one element: a hole, a ridge, a line. Ask whether the piece grows stronger in its absence. Minimal jewelry is not austere for its own sake—it is deliberate. Give each decision weight, make it visible in the outcome, and allow the final form to breathe.
At every turn, let your hand respect the demands of craft, your eye attend to proportion and balance, and your tools deliver the precision that minimal forms require. With those commitments, even the quietest bar, circle, or plane becomes a compelling companion in daily life—small in scale, clear in intent, and generous in the space it leaves for the wearer.
