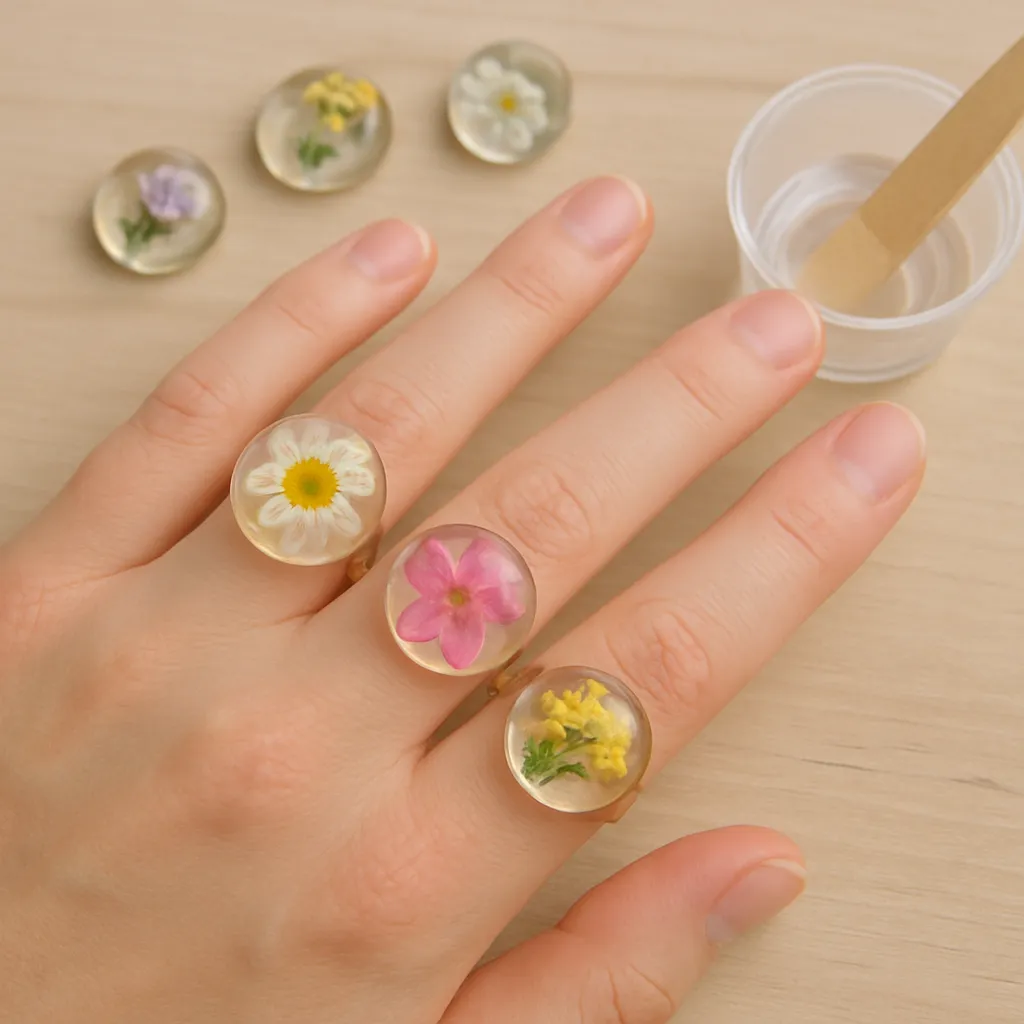
Flower resin rings bring a small garden to your fingertips: a petal’s lacework, the geometry of a fern, a sun-bleached daisy preserved as if time had paused. They sit at the crossroads of craft and science, inviting you to explore color, clarity, and composition while celebrating what grows along sidewalks and woodland trails. This guide dives deep into materials, safety, design, and finishing so you can produce pieces that don’t just look good for a season but last for years, holding their stories in crystal-clear resin.
The Appeal: Nature, Permanence, and Wearable Stories
Encasing flowers in a ring turns fleeting bloom into long-lived keepsake. Where a bouquet wilts, a tiny bloom or leaf polished into jewelry becomes a reminder—a wedding corsage petal, a hike’s discovery, a garden’s first spring. The craft is approachable to beginners yet deep enough to hold a lifetime of experimentation, from color theory and micro-composition to mastery of finishes and structural considerations.
There is also a tactile seduction: domed surfaces that catch light, beveled edges that roll under the finger, and warm color shifts as daylight meets indoor lamp glow. The better you understand clarity, brittleness, flexibility, and adhesion, the more consistently you can produce heirloom pieces. Crucially, every decision—type of flower, drying method, resin system, ring band style, and finish—shapes the ring’s long-term performance and visual poetry.
Safety and Workspace Setup
Work with common-sense respect for your materials. Even the most user-friendly formulations deserve ventilation and gloves. Plan ahead for spill control, dust management, and a dust-free curing box.
- Ventilation: Use cross-ventilation or a small fume extractor; avoid bedrooms or kitchens.
- Skin and lungs: Wear nitrile gloves; if you sand cured pieces, use a P100 mask or wet-sand to reduce airborne dust.
- Surface prep: Cover the table with a silicone mat; keep isopropyl alcohol and paper towels handy.
- Temperature: Aim for 20–24°C; cold rooms slow curing and encourage bubbles.
- Dust control: After pouring, place molds under a plastic bin or simple curing tent to shield from lint.
Materials and Tools You’ll Need
Choosing good components prevents headaches later. Consider not only appearance but chemistry, hardness, and aging resistance.
- Resin system: For jewelry, two-part epoxy or UV-cure formulations are popular. An epoxy designed for jewelry typically cures harder with higher gloss and lower yellowing. Seek a formula marketed as UV-resistant to reduce ambering over time.
- Silicone ring molds: A dedicated jewelry-grade mold ensures consistent ring sizing and a clean demold. Transparent molds help with alignment.
- Measuring tools: Accurate scale for 2-part epoxies (prefer weight mixing unless the maker specifies volume).
- Mixing gear: Graduated cups, silicone sticks, and pipettes for precise placement.
- Dried flowers and foliage: Small, flat botanicals work best for rings; bulky blossoms can distort silhouettes.
- Sealant: A clear acrylic spray or thin glue to seal botanicals and reduce bubble release.
- Abrasives and polish: A full sanding stack (400–5000+ grit), micro-mesh, polishing compounds, and buffing pads.
- Finishing tools: Rotary tool (optional), ring mandrel, micromesh pads, and microfiber cloth.
- Optional pro gear: Pressure pot to crush microbubbles; UV lamp for spot-cures when working with UV resin.
Botanical Preparation: Selecting, Drying, and Sealing
The success of a ring often starts weeks earlier, when you pick and dry plant material. Moisture is your enemy: it outgasses, creating bubbles, and it browns petals. Properly prepared botanicals hold their color and shape under resin with minimal edge fray.
Choosing Flowers
- Favor thin, small petals: alyssum, forget-me-not, baby’s breath, fern tips, larkspur flakes, hydrangea fragments.
- Avoid fleshy or wet blossoms; they shrink unevenly and discolor.
- Test colorfastness by placing a sample in sunlight for a day—some pigments fade quickly.
Drying Methods
- Silica gel: The gold standard for preserving shape. Bury petals/leaflets; leave 1–5 days, checking often.
- Pressing: Traditional book pressing creates flat silhouettes with graphic charm; use blotter paper to wick moisture.
- Microwave press: A quick option with specialized vents; monitor closely to avoid scorching.
Sealing and Handling
- Seal dried pieces lightly with acrylic spray to slow bubble release and color bleed. Two mist coats are better than one heavy coat.
- Handle with tweezers; oils from fingers can cause halos around petals.
- Trim edges with micro-scissors for clean contours that read well at ring scale.
Understanding Resin Science in Plain Terms
Hard-wearing jewelry depends on the interplay between mix ratio, exotherm, pot life, and cure schedule. Inaccurate measuring or impatience can leave a tacky finish or microcracks. Keep a simple notebook of temperatures, ratios, and times; repeatability becomes your superpower.
- Mix ratio: Respect the manufacturer’s directions exactly; even 5% error can soften a surface or stall cure.
- Stirring: Fold slowly for two minutes, scraping cup sides and bottom to minimize entrained air.
- Degassing: Rest a minute; pass a flame or heat gun lightly to coax bubbles to the surface; avoid overheating.
- Exotherm control: Smaller pours reduce heat spikes that warp molds or scorch botanicals.
Clarity matters not just for beauty but for reading the tiny composition inside the ring. Higher refractive index and low viscosity promote transparency; pressure casting further suppresses microbubbles. With good prep, you can achieve water-clear optics that make petals glow.
Step-by-Step: Casting a Flower Resin Ring
1. Plan the Composition
- Sketch ring size and placement of petals; plan negative space to avoid visual clutter.
- Test-fit in the mold cavity. What you love on the table may crowd the small internal diameter of a ring.
2. Prepare the Mold
- Clean with tape or compressed air; dust creates pinholes.
- Optional: Use a light mold-release spray, but note some releases can fog resin; test first.
3. Mix and Tint (If Desired)
- Measure precisely; mix slowly to avoid air.
- For tints, use resin-compatible dyes or mica in microscoops; subtle is better at ring scale.
4. First Pour: The Bedding Layer
- Pour a thin base layer in the ring cavity—just enough to float a petal without protruding.
- Let thicken slightly so botanicals don’t sink unexpectedly.
5. Place Botanicals
- Use tweezers to lay petals; anchor with a drop of resin on a toothpick so they stay put.
- Gently remove trapped air under petals by nudging edges; a pin can vent micro-pockets.
6. Second Pour: Encapsulation
- Top off slowly until the cavity is slightly heaped (resin shrinks as it cures).
- Pass heat quickly to break surface bubbles; avoid blowing dust into the mold.
7. Cure
- Cover to protect from dust; let the piece cure per product schedule, resisting the urge to poke.
- If using UV resin, cure in several low-intensity passes to prevent heat warping.
When set, demold carefully. If the ring resists, freeze the mold for 10 minutes; silicone contracts slightly and releases more easily.
Shaping and Finishing: From Cloudy Edges to Gemlike Shine
Raw castings often have a faint seam or meniscus. Finishing bridges craft into art. The mantra is progressive abrasives, gentle heat management, and a final gloss that rivals glass.
- Leveling: Remove the seam line with 400–600 grit on a flat block; keep the ring square to avoid faceting unintentionally.
- Wet-sanding: Work through 800, 1200, 2000, 3000, 5000+ grits. Wetting reduces dust and keeps resin cool.
- Detail zones: Inner bands benefit from a ring mandrel and narrow sanding strips; avoid thinning the wall.
- Polishing compounds: After sanding, switch to plastic-specific compounds with a soft wheel or microfiber. Keep speeds low to prevent heat bloom.
Good polishing restores optical depth so petals seem suspended in water. If haze persists, you likely skipped a grit or overheated the surface. Step back one grit, even two, and rework patiently. When done right, the ring reads like a lens over a tiny landscape.
Design Language: Color, Scale, and Negative Space
Working small demands restraint. One petal may be stronger than five. Space gives breathing room and allows light to flow through. Think of three design axes—color contrast, form contrast, and rhythm.
- Color: A pale hydrangea fragment inside smoke-tinted resin; a bold poppy petal against clear; complementary accents (yellow-blue, violet-yellow green).
- Form: Pair feathery textures with a solid petal; insert a single fern tip to establish a directional line.
- Rhythm: Repeating dots of baby’s breath create a constellation effect; a single focal bloom anchors the composition.
Also consider wearability: a domed exterior looks lush but may feel bulky; a beveled edge snags less on sweaters. For daily wear, inside comfort-fit shaping and a thin, consistent wall feel refined on the finger.
Advanced Techniques and Variations
- Split pours: Suspend petals precisely by casting halfway, letting it gel, then completing the pour to lock them mid-plane.
- Gold leaf flecks: Use sparingly; excessive metallics can shadow botanicals.
- Gradient tints: Start clear at one side and gradually deepen dye at the other for depth.
- Surface doming: Add a final micro-pour on the exterior for a candy-gloss dome; ensure previous layer is lightly abraded for adhesion.
- Embedded bands: Pour around a metal comfort-fit core for structural strength and a hypoallergenic interior.
Experiment too with alternative inclusions such as lichen, moss, seed pods, or tiny feathers. Each material changes light behavior and texture, broadening your palette beyond petals.
Common Problems and How to Fix Them
- Bubbles under petals: Pre-seal botanicals; warm resin slightly; massage edges with a pin before full pour; pressure-cast if available.
- Yellowing over time: Choose UV-resistant formulas; store finished rings out of direct sun; avoid amine blush by observing mix ratios and room humidity.
- Tacky surface: Under-mixed or off-ratio; apply a thin flood coat correctly mixed, or sand back and recoat.
- Warps or sink lines: Pour in cooler, thinner layers; allow gel stages between pours; keep molds level.
- Scratches post-finish: Step back to 2000 grit, rework through micro-mesh, and finish with plastic polish; store rings in soft pouches.
Durability, Comfort, and Everyday Wear
A ring is more than pretty; it must survive keys, door handles, and soap. Aim for at least 2–3 mm wall thickness on bands without metal cores. Round or bevel edges to resist chipping. Avoid solvent cleaners; mild soap and water suffice. Over months and years, micro-scratches accumulate; a quick re-buff restores gloss. If you sell your work, offer simple care tips and a discounted refresh service to keep pieces luminous.
Ethics and Sourcing: Flowers with a Story
Wildcraft with respect: pick modestly, avoid protected species, and prefer trimmings from gardens and florists’ offcuts. Document the origin of special botanicals—wedding bouquets, memorial arrangements—so customers connect with the narrative. When colorfastness is questionable, stabilize with sprays and test samples; better to discover limitations before a commission deadline. Clear provenance and sustainable habits are part of the craft’s beauty.
Workflow for Consistency: From One-Off to Micro-Batch
If you hope to sell or gift regularly, build a repeatable workflow that protects quality while allowing creativity.
- Pre-batched petals: Organize by color family and size; label with drying date and method.
- Mold rotation: Keep two or three sets so one can cure while you pour the next.
- Timing templates: Set alarms for gel windows when split-pouring or doming multiple pieces.
- Quality control: Inspect at four checkpoints—pre-pour, post-pour, after demold, post-finish—under raking light.
- Documentation: Record resin lot numbers, room temperature, and finish schedule; troubleshooting becomes straightforward.
Care and Longevity: Making Heirlooms
With good materials and technique, a flower ring can remain clear and bright for years. Store away from high heat and sunlight when not worn. Hand-wash only; chemicals in some cleaners cloud surfaces. Gentle re-polish once a year maintains luster. Think of the piece as a tiny display case: protect it, and it protects its content. Museum thinking helps—strive for archival decisions at every step.
Creative Prompts and Project Ideas
- Seasonal quartet: Spring pastels, summer brights, autumn rusts, winter whites—four rings, one palette cycle.
- Monochrome study: Blue-on-blue hydrangea inside faint sapphire tint; let texture, not color, lead.
- Minimalist negative space: One tiny fern spine placed off-center, set in clear for maximum airiness.
- Memorial keepsake: A petal from an important bouquet, documented and paired with a note card telling its story.
- Botanical typography: Arrange micro-petals to hint at initials; delicate and highly personal.
Finishing Philosophy: Where Craft Meets Light
What separates a nice ring from a breathtaking one is often the finish, not the flower. Light loves smooth curvature and uninterrupted surfaces. Keep the geometry honest—true circles, even walls, crisp inner edges—then refine until edges glow. The objective is not a mere lack of scratches but a surface that seems to drink and return light in a controlled way. When you achieve that, the flower inside appears to float. Your role becomes curator of light as much as maker of jewelry.
Troubleshooting Checklist at a Glance
- Is the mix ratio exact? Inaccurate scales or eyeballing cause most curing woes.
- Are botanicals fully dry and sealed? Moisture = microbubbles and browning.
- Is the workspace clean and warm enough? Dust and cold sabotage clarity.
- Did you allow proper gel stages before topping off? Rushing traps air lines.
- Did you complete the full sanding progression before polish? Skipped grits lead to persistent haze.
Frequently Asked Questions
Can I use fresh flowers?
Not directly. Fresh plant cells outgas and collapse, creating bubbles and browning. Dry and seal first for stability.
What if my ring sticks to the mold?
Chill it; cold contracts silicone and eases release. If walls still grip, your pour may have undercured. Extend cure time or correct the ratio next batch.
How do I keep the inside smooth?
Use a mandrel and thin sanding strips; finish with a soft buff. A slight inner bevel increases comfort and longevity.
Why did my clear resin turn slightly amber?
All epoxies shift slightly over time. Choose a formula with strong UV inhibitors, minimize dye load, and store finished pieces away from window light.
From Practice to Signature Style
As your hands learn, your voice emerges. Maybe you lean into airy, almost invisible rings where a single petal hovers near the edge, or perhaps you build graphic statements with pressed leaves and smoky gradients. With time, your choices—favorite botanicals, preferred ring profile, characteristic color temperatures—become recognizable. That is the heart of craft: not perfection for its own sake, but decisions repeated and refined until they feel inevitable.
Final Notes on Quality and Joy
A flower resin ring is a promise that the small things matter: the hue in a petal vein, the weight of a band, the way a tiny curve sends sunlight across a desk. Protect the process with patience, honor nature by preparing it well, and let the piece tell a story without crowding it. If you do, your rings will carry their gardens gracefully—clear, strong, and bright—with the quiet confidence of well-made work, where good materials, thoughtful composition, and careful finishing conspire to make beauty feel effortless.
