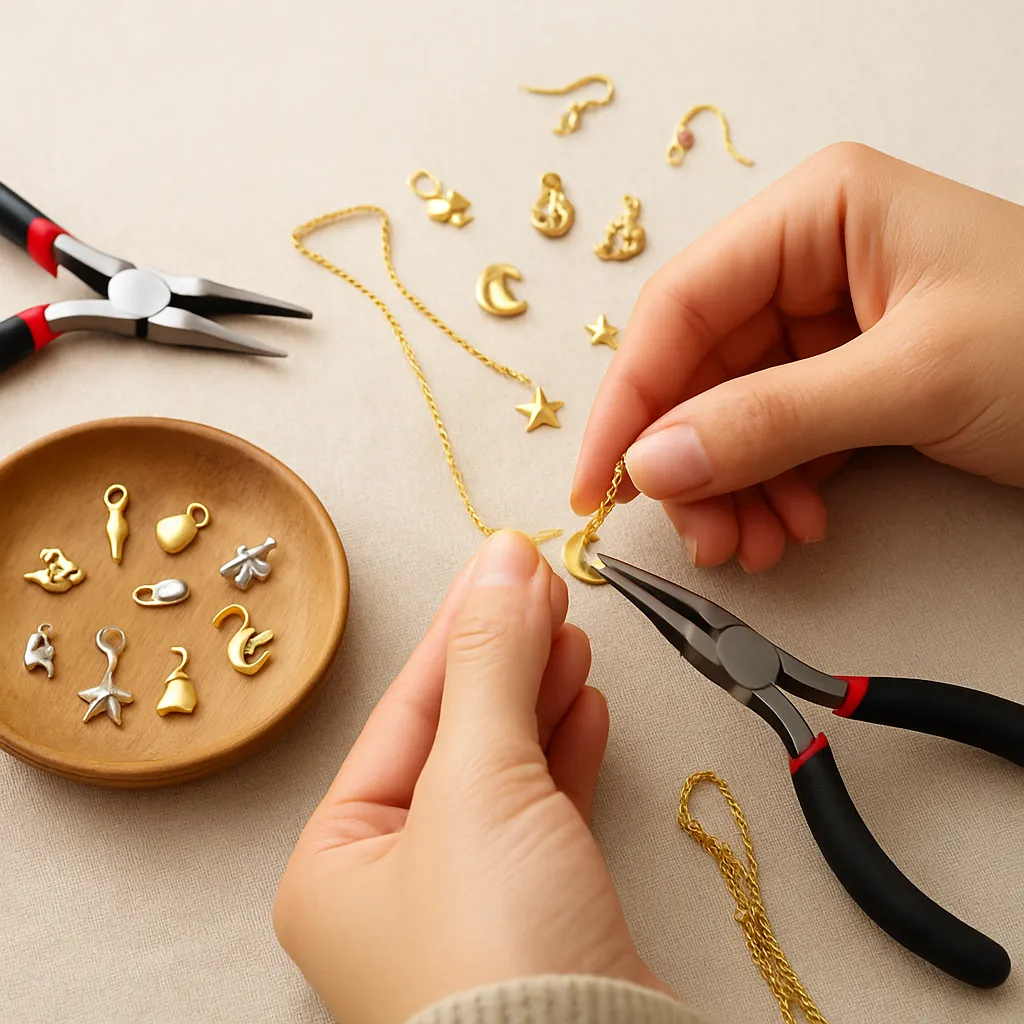
Mini charms distill memories, places, and personalities into tiny, wearable objects. Working with them invites the hands to slow down, the eye to notice details, and the mind to compose stories in metal, clay, resin, and fiber. This guide explores the appeal of miniature adornments and offers the practical knowledge to design, build, and finish your own charm-forward jewelry—bracelets that jingle with intentions, necklaces that layer a map of your travels, earrings that carry botanical fragments from your favorite walk. Whether you are new to jewelry making or an experienced maker searching for new scales and textures, you will find techniques, design principles, and projects that fit the tactile joy of Handicraft.
The charm-sized world: history, meaning, and scale
Charms are among the oldest personal artifacts. Archaeologists uncover small pendants carved from bone and stone, used as talismans for protection or to mark status. Centuries later, travelers stitched coins and amulets to clothing, then to bracelets and chains. In the 20th century, charm bracelets became living diaries; loved ones gifted a charm for each milestone, from graduations to distant journeys. Mini charms continue that tradition in a contemporary way—subtle in size, personal in message, versatile in styling.
Working at miniature scale reshapes how you think about detail. A one-millimeter difference can determine legibility or balance. At this scale, your eye for precision is as important as your idea. The constraints are generative: charms remain legible when simplified, textures become more expressive, and the junctions—jump rings, bails, wire wraps—become design elements instead of merely functional parts. The poetry of mini charms comes from the conversation between essence (a form reduced to its signal lines) and texture (a surface that invites touch).
Materials and tools for mini charm jewelry
Choose materials that complement small scale and survive daily wear. Metals are classic: sterling silver, gold-filled, brass, bronze, and stainless steel. Polymer clay, resin, shrink plastic, wood, shell, and glass add color and translucency. Found objects—a postage stamp encased in resin, a press-dried leaf, a tiny gear—bring narrative. Let tactile qualities guide you: how does it feel as you handle it? Does the surface catch light? Does it scratch easily? Each answer shapes durability and comfort.
- Metals and findings: jump rings (18–22 gauge, 2–6 mm inner diameter), split rings, lobster clasps, lever-back earring findings, head pins and eye pins (0.5–0.8 mm), chain (cable, curb, figaro), soldered closed rings for high-stress points, and bails for attaching charms that lack holes.
- Tools: two pairs of smooth-jaw pliers (chain-nose and bent-nose), round-nose pliers for loops, flush cutters, bead reamer, small steel bench block, nylon or rawhide mallet, micro files, fine sandpapers (800–3000 grit), polishing cloth, and a loupe or headband magnifier for close work.
- Soft media: high-quality polymer clay, UV or two-part epoxy resin, alcohol inks, mica powders, tiny silicone molds, and sealants safe for skin contact.
- Adhesives: jewelry-grade epoxy and flexible gel cyanoacrylate for non-load-bearing attachments (never rely on glue for the main structural connection).
- Stringing and fiber: nylon-coated beading wire, silk or polyester thread, micro-macramé cord, and waxed linen for earthy texture.
Consider metal sensitivity and compliance when making pieces for gifts or sale. Stainless steel, titanium, niobium, and 14k gold are frequently hypoallergenic. Nickel content regulations vary by region; if selling, verify your sources and keep spec sheets.
Techniques to make and attach mini charms
Open and close jump rings like a pro
Jump rings are the backbone of secure, mobile connections. Instead of pulling the ring ends apart sideways, twist them like a gate: one hand forward, the other back. After attaching the charm, twist back with a firm, micro-overlap motion to align the ends. On soft metals, burnish the seam with a polished steel tool to cold-work the closure. Use soldered closed rings for stress points such as bracelet anchor loops; attach to them with an open ring so you retain serviceability.
Wire-wrapped loops for security
Wherever possible, replace simple loops with wrapped loops. Use a head pin or cut wire, form a loop with round-nose pliers, and wrap the tail two to three times neatly against the charm’s top. Trim and tuck the cut end so it will not snag. Wrapped loops distribute strain and reduce the chance of a charm escaping when snagged on clothing.
Bezel setting and resin encapsulation
Miniature photographs, pressed botanicals, and paper ephemera shine in bezels. Seal porous materials with a thin layer of archival varnish to prevent resin stains. Warm two-part epoxy resin slightly to reduce bubbles; pour in layers rather than flooding at once. Torch or gently exhale across the surface to pop bubbles, but protect plants or foils from heat. UV resin offers speed, ideal for iterative testing, but may yellow over time—choose a high-quality, non-yellowing formula if clarity is critical.
Polymer clay micro-sculpting
With polymer clay, think in silhouettes: tiny leaves, fruits, animals, and abstract geometric tiles. Condition clay thoroughly, work clean with lint-free hands, and bake per brand specifications using an oven thermometer for accuracy. Sand and polish after curing to bring out sheen, or apply a matte sealer for tactile contrast. Embed a wire loop before baking for reliability, or drill a pilot hole post-cure and add a screw eye with epoxy if you must retrofit.
Shrink plastic illustration
Shrink plastic transforms color pencil or marker drawings into durable minis. Sand one side to hold colored pencil, design larger than final size (the sheet often shrinks to 40–50%). Punch holes before shrinking, and consider using an oven for even results. Flatten hot pieces under a smooth tile to reduce curl. Seal with a UV-resistant spray or thin resin coat if the design will see heavy wear.
Cold connections and micro hardware
When you cannot solder, cold connections shine. Micro rivets, miniature screws, and fold-over tabs create mechanical strength. Practice on scrap to refine hole sizing and peening technique. Even simple figure-eight connectors (two interlocked small rings) can decouple torsion and extend longevity.
Design principles: balance, story, and movement
Great mini charm jewelry reads clearly from a distance and rewards inspection up close. To design for both, start with your central message—memory, mood, or theme—then build supporting forms. Consider line, mass, texture, and negative space as you would in any art object, recognizing that wearability adds a kinetic layer.
- Balance and rhythm: Distribute weight so that clasps sit where you intend. Use repeating shapes or intervals to create rhythm; break the pattern at a meaningful point to highlight a focal charm.
- Scale: Mix micro (3–5 mm) with small (6–12 mm) charms for visual hierarchy. A single slightly larger charm can act as the anchor.
- Texture: Matte next to glossy, smooth beside faceted. Texture differences are legible even at miniature scale and deepen the tactile experience.
- Color: Limit palettes to two dominant hues plus a neutral; accent sparingly with metallics. For birthstones, balance saturated gems with negative space or transparent beads.
- Movement: Charms invite motion. Use short drop lengths for bracelets to avoid snagging; go longer on necklaces where swing can be dramatic.
As you arrange parts on a tray, step back and squint. If the story still reads, your composition is strong. If not, simplify forms, increase contrast, or reconsider spacing. Designing at this scale is an act of editing; remove anything that does not serve function, comfort, or meaning.
Five project blueprints to start and expand
1) The memory-map bracelet
Gather six to nine charms that mark places or milestones. Use a soldered closed ring near the clasp as an anchor point; attach each charm to the chain with 4 mm jump rings, staggering drop lengths so the bracelet bends comfortably. Test on your wrist; adjust spacing so charms distribute evenly and the heaviest sits opposite the clasp. Add a safety chain if the bracelet is precious.
2) Layered necklace with focal mini
Compose a three-layer necklace: a choker with delicate seed beads, a mid-length chain with two tiny charms, and a longest chain with a small focal. Keep total weight modest and chains of different profiles to avoid tangles. Make each chain independently wearable with its own clasp; use a connector for optional synchronized wear. This modularity increases versatility.
3) Botanical resin earrings
Press micro blooms or ferns, trim to fit 8–10 mm open bezels, seal with archival medium, then cast in thin resin layers. Finish with lever-back findings for security and to echo the oval silhouette. Add a dusting of crushed foil behind the plant to create subtle light play without stealing the focus.
4) Polymer clay story charms for kids-at-heart
Sculpt tiny fruits or constellation tiles from polymer clay, texture with toothbrush bristles or linen, and bake. Paint details with alcohol ink, seal, and attach with wrapped loops. String onto a nylon cord necklace with adjustable sliding knots for casual wear. Label each charm on a small card to invite storytelling during gifting.
5) Zipper pulls and bag charms
Convert mini charms into rugged zipper pulls using short lengths of micro paracord or ball chain. Secure with split rings that can’t open under shear. Great for school bags or travel pouches—add an initial charm to differentiate bags at a glance.
Comfort, fit, and wear testing
Jewelry is sculpture for the moving body. Test prototypes during daily tasks: typing, carrying a tote, washing hands. Identify snag points and audible jingle levels. If something nicks skin or clothing, deburr with micro files or adjust attachment angles. Prioritize ergonomics: pieces should be effortless to clasp, hang smoothly, and keep their orientation while worn. Convert heavy dangles into clusters of lighter parts; a sum of small weights is kinder on earlobes and wrists.
Surface finishing, aging, and protection
Finishes amplify mood. High polish conveys modernity; satin reads quieter; brushed cross-hatching looks artisanal. Protect plated components from premature wear by avoiding abrasive storage. To create a gentle aged look, develop a controlled patina on copper or brass using liver of sulfur; neutralize and seal with microcrystalline wax. For silver, polish selectively to keep recesses dark, which increases depth at small scale. With polymer clay, micromesh sanding and buffing yields glass-like gloss; with resin, dome carefully to avoid edge pull-away.
Seal porous elements—wood, paper, dried flowers—with archival materials. Always test sealants on scraps, watching for color shift or tackiness. On mixed-media charms, keep skin-contact zones nonporous and smooth, and avoid finishes that exude plasticizers over time.
Symbolism and personalization
Mini charms excel at carrying messages. Birthstones, initials, tiny lockets with micro photos, zodiac glyphs, flora and fauna from a meaningful landscape, coordinates stamped in tiny type, or a single vintage key fragment each speak differently. Lean into symbolism without crowding: a trio often feels complete. Stamp or engrave short words or dates on blank tags; oxidize to heighten legibility. If gifting, include a small card that decodes motifs and materials—a ritual that deepens connection between maker, wearer, and object.
Sourcing and sustainability
Thoughtful materials make better stories. Salvage chain from broken heirlooms, harvest beads from a thrifted necklace, or cast natural textures (seed pods, bark) in silicone to reuse repeatedly. Buy findings from suppliers who disclose metal content and worker protections. Upcycling is not only ethical; it adds visible history. Consider packaging that aligns with sustainability: reusable tins, cloth pouches, or recycled paper cards printed with soy ink. Note care instructions to prolong life and reduce waste.
Care, maintenance, and repairability
Small objects live long when maintained. Store silver with anti-tarnish tabs, separate pieces to avoid abrasion, and keep resin out of prolonged sunlight. Design for service: prefer openable connections where practical so a lost charm can be replaced. Include a mini care kit with a polishing cloth and a few spare jump rings. For plated parts that have dulled, refinish by light buffing and clear coat, or replace components to refresh the whole piece economically.
Safety and good studio habits
Ventilate when using sprays, resins, or patina solutions; wear nitrile gloves as appropriate. Keep sharp tools capped; sweep micro offcuts with a magnet or damp cloth to protect pets and bare feet. Label chemical bottles clearly and store away from food areas. When making jewelry for children, avoid small detachable parts that pose choking hazards; use robust hardware and test beyond normal forces.
Photographing and gifting (or selling) your work
Miniature work needs smart photography to show scale and detail. Use diffuse light, a simple background, and add a reference (a coin edge, fingertip, or folded linen) without clutter. Shoot macro close-ups, plus a full-wear shot. For gifting, include a story card and a small microfiber cloth. If you sell, track material costs and time. Price not only for parts but for craftsmanship, prototyping, and customer support. Offer simple customization—initials, birthstones—within a clear lead time to preserve quality.
Common problems and how to solve them
- Charms rotate and face backward: switch to a bail or add a miniature counterweight charm opposite. Use flat cable chain to limit axial spin.
- Tarnish appears quickly: store with silica gel and anti-tarnish tabs; clean with a nonabrasive polish; finish with a thin wax coat.
- Jump rings opening: choose heavier gauge; close with slight over-travel; consider soldered rings at stress points or double-ring a connection.
- Resin micro-bubbles: warm resin, pour in layers, and seal porous inclusions. Use a toothpick to coax bubbles to the surface.
- Polymer clay breaking at loop: embed a wire armature before baking or switch to a drilled-and-screw-eye plus epoxy method.
Building a cohesive collection
A single bracelet is a vignette; a collection is a language. Define a palette of metals, two or three recurring motifs, and a signature surface finish. Document loop sizes, ring gauges, and chain types you adopt as standards. Consistency speeds production and repairs and ensures that new pieces harmonize with earlier ones. Treat each release like a chapter—spring botanicals, summer travel, autumn harvest—so customers or recipients can anticipate and combine pieces across time.
Expanding your skill set: from simple to intricate
After mastering jump rings and wrapped loops, experiment with micro soldering: close your own rings, add posts to flat charms, and create seamless bails. Learn low-temperature fusing on fine silver for granulation-like textures. Explore metal clay for sculptural minis that sinter into solid metal after firing. Test kinetic elements—tiny hinges, swivels, or spinning disks—that add delight without bulk. Each new capability extends your design vocabulary and deepens your relationship with materials.
Ethics of imagery and meaning
When you incorporate cultural symbols, research respectfully. Avoid sacred motifs used casually. Credit illustrators or photographers when adapting images, obtain licenses as needed, and keep proof of rights. Mini charms may be small, but their messages travel; integrity matters at every scale.
A maker’s mindset
Working with mini charms teaches patience and attention. You learn to handle delicate surfaces, to edit a concept to its essence, and to solve problems invisibly. You also learn that small is not lesser—small concentrates. Approach every project with curiosity and care, and let the constraints of miniature scale sharpen your eye. Over time, your pieces will gain a quiet authority born of repeated, thoughtful practice, and your reputation for fine craftsmanship will grow naturally.
Quick-reference tips and micro techniques
- Pro tip: Pre-harden soft jump rings by tumbling in stainless steel shot or by work-hardening gently with a burnisher on a bench block.
- Orientation aid: On earrings, set opposing wraps to mirror each other so the pair feels cohesive at a glance.
- Clean cuts: Use flush cutters so trimmed wire ends seat closely; dress the end with a file to avoid snags.
- Chain choice: Cable or rolo chain resists tangling with small charms better than snake chain, and it’s easier to repair.
- Test wear: Wear new designs for a full day at home before gifting or selling to identify hidden stress points.
Why mini charms keep captivating us
Miniature adornments sit at the intersection of art and life. They carry the weight of memory without weighing down the body. In a glance or a quiet jingle, they mark seasons, places, and promises. They invite touch, reward contemplation, and evolve as you add or rearrange. Make one to commemorate a single moment; make a hundred to compose a life on a chain. As long as there are stories to tell in small, there will be makers turning materials into keepsakes—balancing form and function, testing connections, refining finishes—until the piece on the wrist or at the throat feels inevitable.
What to prioritize as you progress
- Precision in connections so charms survive daily motion.
- Durability through smart material choices and test wear.
- Composition that reads from across a room yet delights up close.
- Ergonomics for comfort and ease of use.
- Versatility so pieces mix, layer, and adapt to different days.
- Symbolism that feels authentic to the wearer.
- Patina and finishing that enhance character rather than obscure it.
- Hypoallergenic components for inclusive wear.
- Sustainability in sourcing and packaging that respects materials and makers.
Master these priorities, and every charm you make—no matter how tiny—will speak clearly, wear beautifully, and endure.
