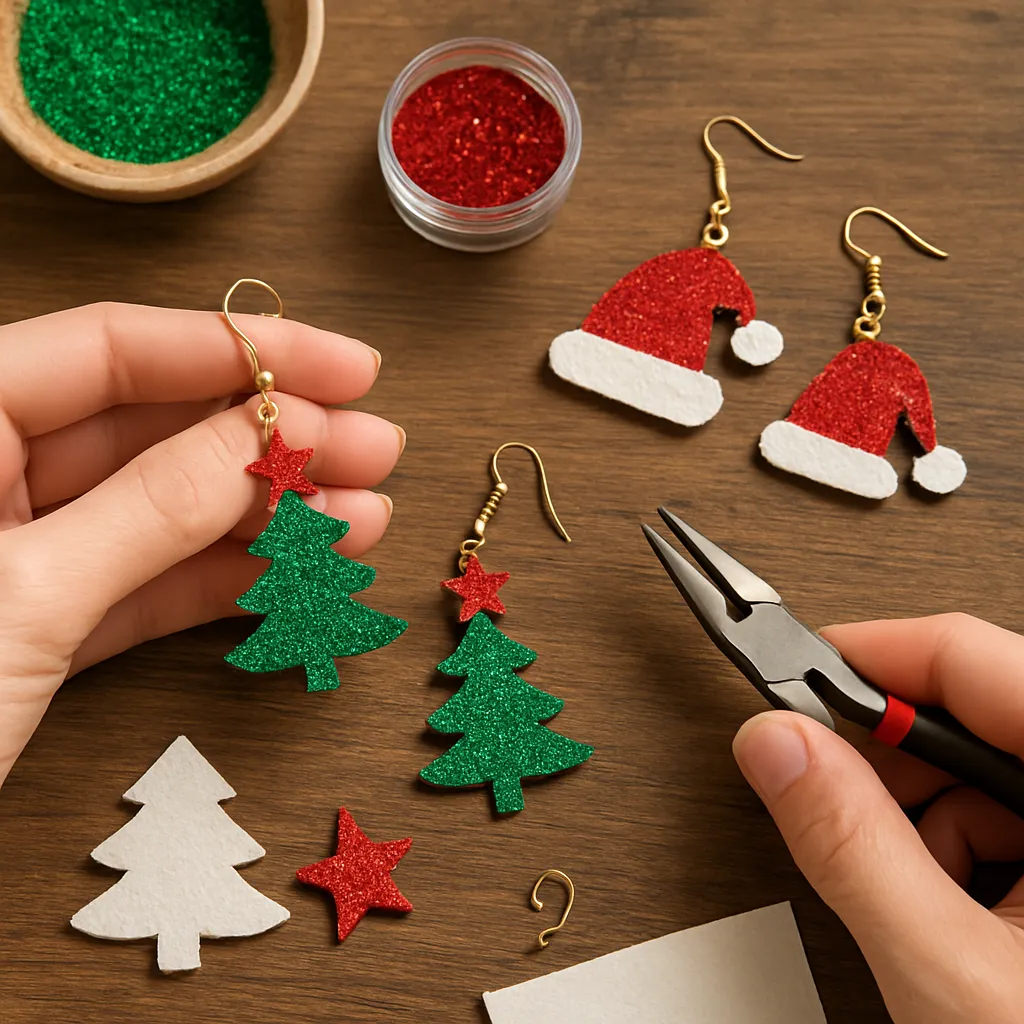
Holiday-themed earrings are tiny canvases that let you carry a bit of celebration wherever you go. They can be playful or elegant, richly symbolic or delightfully whimsical, and they invite makers of all skill levels to explore color, texture, and seasonal motifs. Whether you prefer sculpting miniature motifs from clay, weaving tiny tassels, or setting sparkling stones in metal, these projects combine expressive design with practical wearability. This guide gathers inspiration, material knowledge, and step-by-step methods to help you craft earrings that feel festive, comfortable, and beautifully made.
Why Holiday-Themed Earrings Capture the Season
Earrings communicate mood at a glance. A sliver of metallic shimmer, a pop of crimson, or the delicate silhouette of a snowflake can conjure entire celebrations. Unlike statement necklaces or elaborate headpieces, earrings are small enough to be spontaneous while still making a clear impression. They also lend themselves to ritual—slipping on a favorite pair can become part of how you mark an occasion, the way you might light a candle or hang a garland.
Seasonal earrings also thrive on storytelling. A pumpkin with a crooked smile nods to childhood costumes; a lantern form suggests luminous gatherings after dusk; a heart punctuated with a single crystal speaks to love amid winter’s hush. You can embrace literal motifs—gingerbread people, menorahs, shamrocks—or abstract cues like frost-like textures, harvest palettes, or petal shapes for spring festivals. What matters is the detail that bridges sentiment and style.
Another reason these projects resonate: they’re efficient experiments. Small scale lets you test techniques without large material costs. You can refine texture stamps, paint mixes, and metal patinas quickly. Each pair is an exercise in balance, color play, and proportion, sharpening your eye and hand while yielding wearable joy.
Materials, Tools, and Safety for Festive Earring Making
Core Earring Components
Most DIY earrings come together with a few categories of supplies:
- Metals: Brass, copper, stainless steel, sterling, gold-fill. Choose based on look, price, and skin sensitivity. Sterling and niobium are common for sensitive ears, while stainless is durable and cost-effective.
- Beads and stones: Glass, crystal, gemstone chips, seed beads, pearls, or wooden beads. Faceted stones catch light; matte beads soften the look.
- Clay and plastics: Oven-bake clays, air-dry clays, or lightweight plastic charms. Clay offers sculptable detail for motifs like holly leaves, moons, and stars.
- Fibers: Embroidery thread, silk ribbon, cotton cord, felt, or leather remnants. Fibers enable tassels, fringes, and appliqué.
- Resins and coatings: UV resin or two-part epoxy for encapsulating glitter, dried petals, or paper cutouts; clear coats to seal surfaces.
- Hardware: Ear wires, posts, backs, jump rings, split rings, head pins, eye pins, chain segments, and bezels. This family of parts is collectively known as jewelry findings.
Essential Tools
- Cutting and shaping: Precision knife, craft scissors, small saw or metal shears, cutters for wire.
- Pliers: Round-nose for loops, chain-nose for gripping, flat-nose for right angles, and crimping pliers if you use crimps.
- Surface tools: Sandpaper (various grits), needle files, texture mats, stamps, and burnishers.
- Heat and curing: Toaster oven for oven-bake clay; UV lamp for resin; heat gun for shrinking films or setting some paints.
- Adhesives and sealants: Gel cyanoacrylate (CA) for quick bonds, two-part epoxy for strength, flexible fabric glue for fibers, and clear sealers to protect paint or pigment.
Safety Considerations
- Ventilation: Work in a well-ventilated space, especially when using spray sealers, resin, or strong adhesives.
- Skin sensitivity: Offer nickel-free, titanium, niobium, or sterling ear wires for comfort. Label items clearly if selling and consider marketing options as hypoallergenic.
- Weight and balance: Heavy earrings can strain lobes. Keep individual components lightweight and test comfort by wearing prototypes for an hour.
- Tool safety: Cut away from yourself, and wear safety glasses when cutting wire or sanding metal.
- Material compatibility: Ensure glues and sealers are suited to your materials to prevent clouding or brittleness.
Design Principles Tailored to Earrings
Great earrings harmonize color, shape, texture, and movement in miniature. Because they hang from a pivot point—the ear—they’re in motion, which changes how they read in light and space.
Scale and Proportion
Begin with target length and width. Classic daily wear sits between 20–45 mm total drop; statement holiday pieces might reach 70–90 mm but should be ultra-light. Pair delicate ear wires with proportionate dangles to avoid a top-heavy look. Remember that both earrings form a mirrored composition around the face; consider how they frame cheekbones or echo a neckline.
Color and Holiday Symbolism
- Winter celebrations: Whites, silvers, icy blues for frost and snow; greens and reds for evergreen and berries; touches of gold for candlelight and warmth.
- Autumn and harvest: Burnt orange, mustard, aubergine, and copper suggest leaves and spices.
- Spring and renewal: Pastels, floral hues, tender greens, and fresh neutrals.
- Summer and fiestas: Saturated primaries, citrus brights, turquoise and coral tones.
Neutrals like charcoal, bone, and champagne help loud colors breathe. Metallics (gold, silver, copper) act as visual punctuation, anchoring playful beads or clay charms.
Texture and Movement
Texture gives small surfaces presence: hammered metal, linen-like clay imprints, micro-bead inlays. Movement enlivens designs—add short chains, tiny charms, or free-spinning connectors so light plays across different angles.
Symmetry, Asymmetry, and Motif Abstraction
Symmetrical pairs feel classic, but asymmetry adds narrative—think one earring with a full moon, the other with a starry dangle. Abstracting motifs—reducing a pumpkin to an oval with ribbed texture or a tree to a green triangle—keeps pieces wearable beyond a single day while still suggesting the holiday.
Step-by-Step Tutorials for Popular Holiday Motifs
Polymer Clay Candy Canes and Snowflakes (Winter)
Materials: Oven-bake polymer clay in red and white (plus pale blue and white for snowflakes), basic tools, toothpick, small cutters, jump rings, ear wires, baking surface, fine sandpaper, clear sealer.
- Candy cane canes: Condition red and white clay. Roll two equal snakes; twist them to form a barbershop stripe. Gently roll to fuse, then curve tops. Insert a head pin through the straight end to the curve. Texture lightly with a toothbrush for a sugary look.
- Snowflakes: Roll pale blue to 2–3 mm. Cut disks or hexagons. Use a toothpick to press radiating lines, adding tiny V notches to mimic ice crystals. Insert eye pins near the top.
- Bake according to package instructions on a dedicated tray. After cooling, wet-sand edges for refinement.
- Seal lightly for sheen. Attach jump rings and ear wires. Optional: add a tiny crystal dangle to the snowflakes for sparkle.
Star of Light Drops (Festival of Lights)
Materials: Thin metal blanks (brass or aluminum), star-shaped punch or small star charms, sapphire-blue beads, fine chain, round- and chain-nose pliers, file, ear wires.
- Prepare blanks: File edges smooth. Punch a hole at the top of each blank and another at a lower corner for a dangling bead.
- Assemble: Attach a short chain segment to the top hole and an ear wire to the chain. Wire-wrap a bead at the lower corner so it swings freely.
- Finish: Lightly brush with a Scotch-Brite pad for satin sheen. The combination of star silhouette and blue bead captures seasonal symbolism without feeling costume-y.
Lantern Tassel Earrings (Lunar New Year)
Materials: Small filigree caps (gold-tone), red silk tassels, tiny jade or aventurine beads, gold wire, head pins, ear wires.
- Create lantern bodies: Slide tassels into filigree caps so the cap forms the lantern “top.”
- Add stones: Thread a green bead on a head pin, create a neat loop on top with round-nose pliers, and connect it to the tassel cap.
- Attach to ear wires via a jump ring. The tassel’s movement evokes lantern fringe; the bead adds symbolic prosperity.
Autumn Leaves with Patina (Harvest and Thanksgiving)
Materials: Copper leaf blanks, liver-of-sulfur or heat patina, sealant wax, small drill, jump rings, ear wires.
- Texture veins using a stylus or light hammering with a veining tool. Drill a hole near the stem.
- Apply controlled patina for variegated color, then seal to preserve the finish.
- Assemble with simple ear wires. Optional: add a mini acorn bead or a short chain for layered drop.
Diya Flame Drops (Diwali)
Materials: Lightweight brass or polymer clay, orange and gold pigment, micro glitter, tiny rhinestones, ear posts and pads, strong adhesive.
- Shape or cut diya forms: a shallow bowl with a pointed end, plus a teardrop flame insert.
- Paint or pigment the flame to glow; accent the bowl rim with fine glitter or stones.
- Mount on posts using epoxy; press gently so pads make full contact.
Gingerbread People with Icing Lines (Winter)
Materials: Caramel-brown polymer clay, white acrylic paint pen or liquid clay, mini heart sprinkles, head pins, ear wires.
- Cut tiny gingerbread shapes with a cookie-cutter or template. Embed a head pin from the head down into the head section, leaving a loop above.
- Bake and cool. Add “icing” details with a paint pen or piped liquid clay, then seal matte to keep a cookie-like look.
- Attach ear wires and, if desired, add a micro heart sprinkle at the chest with a dab of epoxy.
Valentine’s Mismatched Hearts
Materials: Two heart charms (one smooth, one faceted), rose-gold chain, tiny pear-cut crystal, jump rings, ear wires.
- Design asymmetry: On one earring, hang the smooth heart alone; on the other, stack the faceted heart with a pear crystal below on chain.
- Keep total lengths close so the pair feels intentional. Use rose-gold for warmth.
Advanced Techniques and Finishes
Wire-Wrapped Briolettes
Briolettes—teardrop stones drilled at the tip—become elegant drops with neat loops. Cut 8–10 cm of 26–24 gauge wire. Thread through the stone, bring wire ends together, and twist once above the stone. With the long tail, wrap 3–5 neat coils up the neck, then form a loop using round-nose pliers and secure with another wrap. Trim and file the cut end until smooth. This precise wire-wrapping elevates even modest beads into refined focal points.
Cold Enamel and Resin Inlay
Fill shallow bezels with tinted UV resin or cold enamel to create stained-glass motifs like candy windows or starbursts. Work in thin layers to prevent bubbles; cure under UV light or per product directions. For holiday sparkle, suspend a few hex glitter pieces in clear layers—less is more for clarity.
Foil, Leaf, and Gilding
Add gold or copper leaf to clay or sealed wood components for festive gleam. Apply sizing adhesive sparingly; lay leaf; burnish; and seal. Pair gilded elements with matte beads to keep contrast sophisticated.
Etching and Stamping Metal
Impress snowflake patterns or botanical lines using metal stamps and a bench block. For a soft, frosty look, follow with light satin finishing. If you etch chemically, use proper PPE and neutralization baths; finish edges thoroughly.
Hardware, Assembly, and Wearability
Ear Wires and Posts
- Fishhooks: Easy to assemble and classic; add silicone backs to reduce loss.
- Lever-backs: More secure and formal; good for valuable stones.
- Posts: Minimal and modern; great for small studs or when you want a dangle to start closer to the lobe using drop posts.
Jump Rings and Orientation
Open jump rings by twisting sideways (never pulling apart), which preserves shape. Align components so earrings face forward; often this means adding an extra jump ring to rotate a charm 90 degrees. Soldered or heavy-gauge rings are helpful for high-motion dangles.
Comfort and Balance
Consider ergonomics: distribute weight near the lobe with lightweight materials lower on the stack. Test swing by gently shaking the finished pair; if components tangle, shorten chain segments or change attachment points. Backings should grip firmly without pinching.
Material-Specific Tips
Clay
Condition thoroughly for strength. Bake at consistent temperature; use a separate tray lined with paper to avoid shiny spots. Sand wet to reduce dust, then seal selectively. To prevent brittleness, keep flat shapes at 2–3 mm thickness with rounded edges for durability.
Metal
Deburr every cut edge. Tumble-polish for shine and work-hardening, or hand-buff with micro-mesh pads. Protect patinas with wax or lacquer.
Fiber and Leather
Apply fray-preventers to cut edges; use sharp punches for holes. For tassels, steam or gently comb to align threads. Keep fiber lengths modest for daily wear to avoid catching on scarves.
Resin
Measure precisely, mix slowly, and use a warm water bath for fewer bubbles. Doming bezels yields a glassy lens that highlights embedded confetti or micro florals.
Designing for Composition and Story
Think like a mini-poster designer. Decide on a focal element (a star, a leaf, a bell) and support it with scale and color hierarchy. Secondary details—tiny seed-bead spacers or a sliver of glitter—should guide the eye rather than compete. Sketch quick thumbnails to test options before cutting into materials. Deliberate composition lets even the most playful motif feel intentional and wearable.
Sustainability and Budget Wisdom
Work with remnants: short chain scraps, single beads from broken bracelets, leather offcuts, or misprinted charms become treasure on a small scale. Choose recycled metals when possible and save trimmings for future accents. Holiday makes are ideal for upcycling: turn last year’s gift-wrap into resin inlays, repurpose fabric selvedges into tiny bows, or recover vintage clip-ons as modern dangles. Plain kraft boxes, cotton pouches, and simple care cards reduce waste while elevating the gifting experience.
Photography, Gifting, and Selling
Photograph earrings on clean backgrounds with soft light angled to reveal texture and sparkle. Include a scale reference like a ruler or coin. For gifting, anchor earrings on a sturdy card and nestle in tissue. If selling, offer metal options (sterling, gold-fill, stainless) and explain care. Share the story—why you chose a lantern silhouette or how the texture echoes frost on a window. Narrative sells, while clear specs—dimensions, materials, weight—build buyer confidence.
Troubleshooting Common Issues
- Clay cracks after baking: Increase conditioning, avoid over-thinning, and ensure even temperature; round internal corners in cutouts.
- Resin remains tacky: Under-cured or off-ratio; add more UV exposure or remix with accurate measurements.
- Ear wires irritate skin: Switch to titanium, niobium, or well-made sterling; cleanse components to remove polishing residues.
- Earrings twist sideways: Add an extra jump ring or a swivel to correct orientation.
- Paint chips: Use compatible primer and flexible sealant; scuff glossy surfaces lightly before painting.
Inspiration Calendar: Motifs Through the Year
- January: Ice crystals, pale moons, evergreen sprigs.
- February: Hearts, arrows, rosebuds, chocolate truffle charms.
- March: Clovers, rain boots, soft rainclouds with bead “raindrops.”
- April: Tulips, rabbits, egg speckle patterns, umbrellas.
- May: Blossoms, bees, wreaths of tiny leaves.
- June: Sunbursts, shells, pearls, picnic gingham in resin.
- July: Sparklers, stars, nautical anchors, watermelon slices.
- August: Citrus slices, palm fronds, luminous sunsets in gradient resin.
- September: Apples, pencils, warm plaids in clay canes.
- October: Pumpkins, bats, friendly ghosts, smoky quartz for moody tones.
- November: Wheat, acorns, cranberries, hammered copper.
- December: Snowflakes, bells, wreaths, ribbons, twinkling crystals.
Care, Storage, and Longevity
Provide simple care advice: Keep earrings dry; remove before showering or exercise; store in individual pouches to prevent scratching and tangling. For metal, polish with a gentle cloth and keep away from hairspray and perfume. For fiber tassels, comb lightly and steam to refresh. Clay pieces benefit from an occasional wipe with a damp cloth; avoid solvents. If you sell or gift, include a small card that lists materials used and tailored care tips.
Beyond the Single Holiday: Modular and Timeless Design
To extend wear beyond one day, design bases that accept swap-in charms. A minimal hoop or huggie can anchor interchangeable drops: snowflakes for winter, leaves for fall, hearts for February. Neutral palettes with a single seasonal accent also feel wearable longer. In this way, you craft a tiny wearable wardrobe aligned to celebrations and everyday outfits alike.
From Hobby to Micro-Business
Should you decide to sell, build collections around themes—Winter Lights, Harvest Glow, Spring Petals—so shoppers can mix and match. Price by factoring materials, bench time, overhead, packaging, and a profit margin. Photograph consistently, describe precisely, and offer clear return policies. Most importantly, let your personal voice shine: holiday jewelry thrives on warmth and memory. A collection grounded in authentic inspiration will resonate more than trend-chasing ever could.
Closing Thoughts
Holiday-themed earrings distill celebration into an inch or two of delight. They reward patience and polish: attentive finishing, secure assembly, and thoughtful material choices. As you explore techniques from texturing to resin doming, your craftsmanship will deepen, and your creative library of motifs will grow. Make pairs for friends, trade designs with fellow makers, document your experiments, and revisit favorites each season. With mindful materials, a dash of sparkle, and a respectful eye for tradition and play, your tiny holiday artworks will carry light and color wherever they go—and return to your jewelry box year after year.
Quick Reference Checklist:
- Plan palette and motif; sketch thumbnails.
- Choose lightweight materials; test comfort and swing.
- Use nickel-free or premium metals for hypoallergenic options.
- Finish edges, seal surfaces, and verify bond strengths.
- Stage photos and write clear descriptions for gifting or selling.
- Embrace mindful sustainability through remnants and recycled metals.
