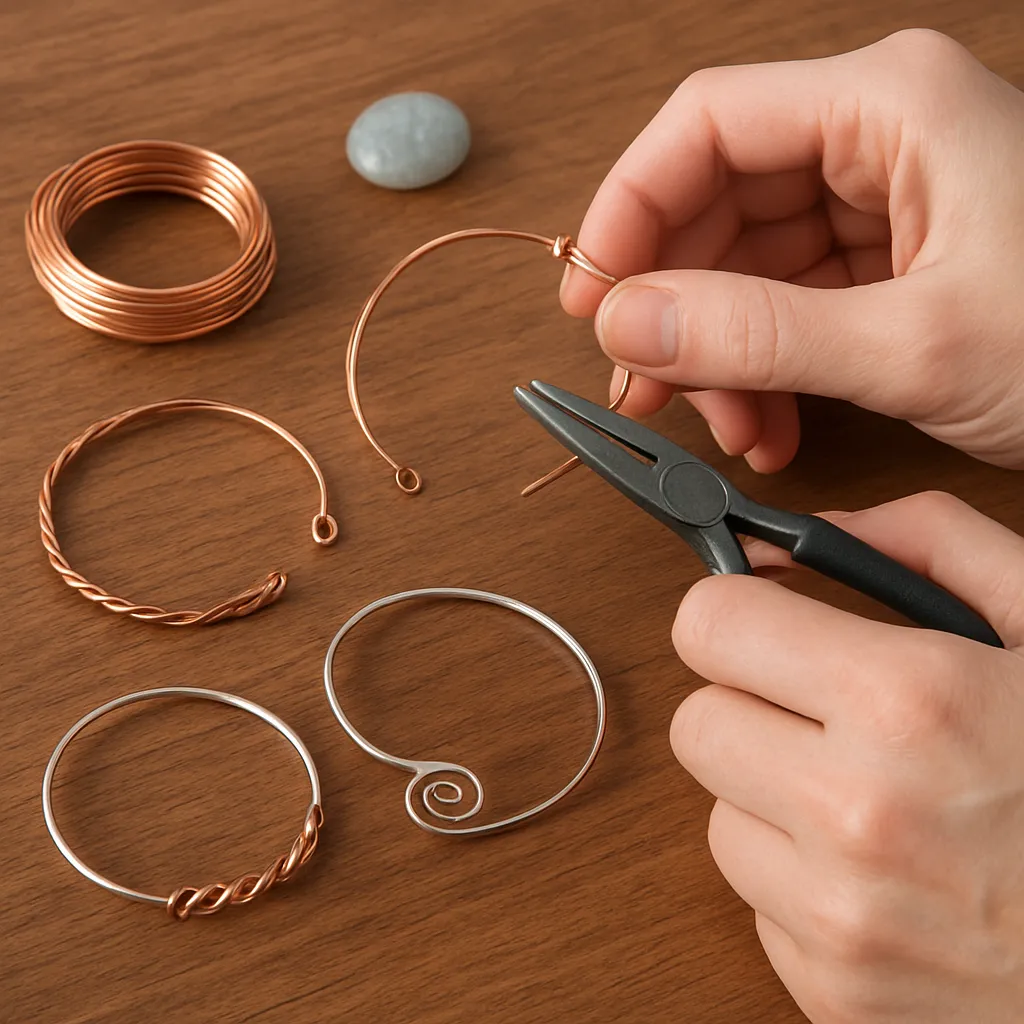
Metal-wire bracelets sit at the sweet spot between utility and poetry: a strip of malleable metal transformed by the hand into a circle that lives on the wrist. They are approachable for beginners, endlessly variable for experts, and incredibly satisfying to finish in a single afternoon. This guide explores tools, materials, design thinking, and step-by-step builds so you can craft bracelets that feel good, fit well, and age beautifully. Whether you prefer lean lines or ornate wire weaving, the principles are the same—good planning, precise forming, clean connections, and thoughtful finishing that respects both the material and the body wearing it.
Essential Materials, Tools, and Safety
Most wire bracelet techniques can be executed with a compact kit. Start from what you own, then add or swap tools as your style evolves. A pared-down setup can still produce gallery-worthy results when you apply patient technique and attend to details like edge smoothing and finish.
- Metals and profiles:
- Copper: forgiving, affordable, and superb for learning; develops a warm brown patina with wear.
- Brass: slightly stiffer than copper; polishes bright gold and takes texture crisply.
- Aluminum: light, silvery, corrosion-resistant; great for wide cuffs with volume.
- Sterling silver: classic, bright, and relatively soft; plan for firestain removal if soldering.
- Stainless steel: springy and strong but tougher to cut and form without specialty tools.
- Memory wire: pre-tempered spring steel that holds shape; ideal for coil bracelets.
- Wire hardness:
- Dead soft: bends easily; perfect for intricate wraps and large curves.
- Half-hard: holds shape for bangles and cuffs; balances formability with spring.
- Spring-hard: resists bending; used in clasps and structures subject to stress.
- Wire sizes: Learn to read gauge numbers (AWG). Lower numbers mean thicker wire. 12–14 AWG for rigid bangles, 16–18 AWG for link-based bracelets, 20–24 AWG for wraps and beadwork.
- Core tools:
- Cutters: flush cutters for soft metals; heavy-duty shears for thicker brass/copper; saw frame for clean ends.
- Pliers: chain-nose, round-nose, flat-jaw; nylon-jaw pliers to straighten without marring.
- Forming aids: bracelet mandrel (round or oval), dowels, pipes, and ring mandrels for links.
- Striking tools: rawhide or nylon mallet for forming without marks; ball-peen and cross-peen hammers for texture; steel bench block or anvil.
- Finishing: files (coarse-to-fine), needle files, deburring tool, sandpapers 400–3000 grit, polishing cloths or compounds.
- Optional: micro torch for annealing and soldering, pickle pot, tumbler with steel shot, patina solutions, jigs.
- Safety:
- Eye protection whenever cutting, hammering, or using a torch.
- Ventilation for patinas and flux fumes; nitrile gloves for chemicals.
- Secure hair and sleeves; mind hot metal after heating—use tweezers or tongs.
Design Principles and Sizing That Respect the Body
Great bracelets feel inevitable: smooth where they should be smooth, crisp where lines demand it, and proportioned to the wearer’s frame. Start with the wrist. Measure the circumference over the wrist bone using a flexible tape. Decide on bracelet type—bangle, cuff, or chain-based—then translate that measurement into a blank length, compensating for thickness and curvature.
- Bangles (closed): need to slide over the widest hand span. Measure around knuckles with thumb tucked.
- Cuffs (open back): adjust to the wrist; typically leave a 1.2–2 cm gap depending on thickness and style.
- Chain/link styles: build to exact wrist circumference plus 0.5–1 cm for comfort and clasp length.
Consider shape. Oval cuffs often match human anatomy better than perfect circles, reducing pressure points. Think about ergonomics: edges must be softened; top-heavy designs require counterbalance; textures that look sharp should not feel sharp. Plan for durability by reinforcing stress points—clasps, joins, and thin areas—through work sequence and choice of wire hardness.
Finally, decide on visual language. Do you want sumptuous textures and oxidation, or cool, reflective planes? Spare lines lean toward minimalism; complex weaves showcase hand skill. Harmony comes from repetition of elements—consistent coil sizes, repeated hammer marks, or echoing curves between links and clasp.
Metallurgy in the Studio: Forming, Springback, and Surface
Wire is metal in its most conversational form, but it will talk back. As you bend and hammer, atoms realign, increasing hardness and spring. Plan your sequence to manage springback: bend slightly past the target angle, let the wire relax, then tune.
- Straightening: run wire through nylon-jaw pliers or pull it under tension across a wooden edge.
- Work sequence: do major curves first; add details after you’ve reached approximate size; finish with texturing and polish.
- Heat cycles: brief annealing softens copper, brass, and sterling. Mark a reference color (dull red in low light for copper), quench, pickle, and rinse before continuing. Avoid overheating aluminum and plated wires.
- Work-hardening: light hammering on a steel block with a polished hammer face increases stiffness. Intentional work-hardening sets shape and improves clasp longevity.
Foundational Techniques You’ll Use Constantly
- Measuring and cutting: allow extra length for curves and final filing; mark with a scribe instead of pen to avoid ghost lines.
- Deburring: file both faces and edges; run 400–600 grit around the perimeter; test with fingertips for snags.
- Basic loops and eyes: form over round-nose pliers; keep loop planes aligned; for strength, “wrap” the neck two or three tight coils with finer wire.
- Jump rings and coils: wind wire on a mandrel or drill bit; saw or shear to create consistent rings; close by twisting, not pulling apart.
- Hammer textures: planish (smooth and even), ball-peen dimples, cross-peen striations, or texture plates; always polish hammer faces to avoid unpredictable marks.
- Wire weaving: figure-eight weave, herringbone, and Viking knit build volume without excessive weight; maintain consistent tension for even spacing.
- Cold connections: wrapped joins, rivets, and tension locks eliminate the need to solder; great for mixed metals or heat-sensitive beads.
- Soldering basics: for sterling and copper, clean, flux, fit tightly, and heat evenly until solder flows; do not chase the solder with the flame.
Project 1: Minimalist Hammered Cuff in Brass
Materials: 6 mm x 2 mm brass strip or 10–12 AWG half-hard brass wire; files; mallet; ball-peen hammer; bracelet mandrel; sandpaper; polishing cloth.
- Plan and cut: measure wrist circumference, subtract intended gap. Add 1 cm for shaping loss. Cut blank.
- Round and dress ends: radius the corners; file and sand edges until silky.
- Form: place the blank on the mandrel. Using a rawhide mallet, curve the blank into an oval, working from center toward ends. Expect springback; over-bend slightly then relax.
- Texture: switch to a ball-peen hammer to stipple the outer face on a steel block; flip and lightly planish to flatten.
- Work-harden and refine: final taps on the mandrel set shape. Check the gap, adjust for comfort.
- Finish: sand through grits to 1000+ for a satiny sheen, then polish. Optionally liver-of-sulfur for contrast, wiping back to reveal highlights.
Project 2: Stacked Copper Bangles with Subtle Variation
Materials: 12–14 AWG copper wire; mandrel; flush cutters; torch (optional for soldered joints); files; patina solution; steel wool; wax.
- Wind three coils around a dowel slightly smaller than target size.
- Cut to create three rings; file ends for perfect butting if soldering.
- Either solder closed or use tight wrap joins with 22 AWG wire for a cold connection.
- Lightly hammer each bangle differently: one planished, one cross-peened, one left smooth.
- Patinate together for cohesion; burnish highlights with steel wool. Seal with microcrystalline wax to slow oxidation.
Project 3: Figure-Eight Link Bracelet with Beads
Materials: 18 AWG wire for links; 24 AWG for wraps; small faceted beads; round- and chain-nose pliers; clasp.
- Create a consistent coil of 18 AWG on a 5–6 mm mandrel; cut into rings.
- Form each ring into an elongated “8” by pinching waist with chain-nose pliers.
- Stabilize each waist with two tight wraps of 24 AWG wire and capture a bead on alternating links.
- Connect eights with jump rings, checking lay and drape on the wrist.
- Add a handmade S-clasp or toggle for a fully unified piece.
Project 4: Three-Strand Braided Cuff
Materials: Three lengths of 12–14 AWG dead-soft copper or aluminum; tape; mallet; mandrel; files; optional patina.
- Cut strands 20–30% longer than final length to allow for braid consumption.
- Tape ends together and braid with even tension; keep the braid flat and untwisted.
- Clamp braid on the bench block and planish lightly to lock it in place.
- Form on the mandrel into an oval cuff; trim and round ends.
- Finish edges meticulously; oxidize and highlight if in copper to emphasize interlacing.
Project 5: Memory-Wire Multi-Coil Bracelet
Materials: Stainless memory wire; bead assortment; memory-wire cutters; round-nose pliers; end caps or tight end loops.
- Cut 3–5 loops using memory-wire cutters (never use regular cutters on hardened wire).
- Form a tight end loop or glue on an end cap.
- String beads with periodic wire-wrapped charms on 24–26 AWG to add articulation.
- Close the other end with a matching loop or cap; ensure no sharp edges remain.
Project 6: Riveted Overlay Cuff for Bold Texture
Materials: 1 mm copper strip; decorative brass or nickel-silver wire shapes; small tubing or wire for rivets; center punch; drill or punch; riveting hammer; files.
- Design an overlay: spirals, chevrons, or geometric bars cut from contrasting metal.
- Mark rivet locations where layers overlap; drill matching holes.
- Assemble with wire rivets: mushroom one end, insert, then set the other end on a steel block with gentle, even taps.
- Form on a mandrel and finish edges. Apply patina to increase contrast, polish highlights.
Closures and Findings that Last
Clasps are both engineering and ornament. Well-made closures quietly do their job and complement the bracelet’s rhythm.
- S-clasp: bend 16–14 AWG wire into an elongated S; hammer the curves to stiffen; add decorative end coils. Pair with opposing jump rings.
- Hook and eye: refine the hook return so it doesn’t snag; lightly planish the hook for strength.
- Toggle: create a ring or bar from consistent jump rings and straight wire; ensure bar length exceeds inner ring diameter by at least 1.2× for security.
- Magnetic clasps: practical for limited dexterity; choose strong, encased magnets for safety; avoid with pacemakers.
- Box and slide clasps: best purchased unless you have fine soldering skills; ensure precise fits and smooth edges.
Surface Treatments: From Mirror Bright to Ancient
Surface finish is a narrative layer. High polish feels modern; matte or oxidized finishes whisper of time and touch. Useful approaches:
- Mechanical polish: hand-sand through grits, then buff with compound; tumbling with steel shot also work-hardens and polishes small features evenly.
- Matte and satin: Scotch-Brite pads or 1000–3000 grit papers for a soft luster that resists fingerprints.
- Oxidation: liver of sulfur darkens copper and silver; apply warm, then quench and gently polish back highlights to amplify texture.
- Heat color: copper blooms through ruby, purple, peacock to brown; fix with wax or lacquer to retain colors.
- Textures: hammer, stamp, roller print (if you have a mill), or wire-brush. Always clean before finishing to avoid sealing in grease.
Comfort, Fit, and Skin Considerations
Bracelets are kinetic—rotating and sliding as you move—so edges, weight, and balance matter. Deburr obsessively. When testing, rotate the bracelet on your own wrist; it should never scratch, pinch, or catch. For sensitive skin, favor metals advertised as hypoallergenic (titanium, niobium, 316L stainless) or apply a barrier sealant to interior surfaces. Avoid plating or lacquers where heavy abrasion will quickly wear them off; design with solid materials in mind for longevity.
Troubleshooting Common Issues
- Wire kinks: never pull through a tight bend; instead, soften a developing kink immediately by backing out and re-bending with a larger radius.
- Plier marks: tape jaws or use nylon-jaw pliers; polish out minor scuffs with 1000+ grit and buff.
- Uneven hammer texture: practice on scrap to learn strike rhythm; aim for overlapping, even blows with a polished hammer face.
- Solder won’t flow: clean join surfaces, increase contact, apply fresh flux, and heat the whole piece rather than chasing the seam. Choose the correct solder grade (hard/medium/easy) for multi-stage builds.
- Bracelet too springy: anneal, reform, then selectively planish to add structure where needed.
- Patina blotchy: degrease thoroughly with hot soapy water; apply patina warm and agitate gently; neutralize and seal consistently.
- Sharp ends on cuffs: round the contour more than you think necessary; a 2–3 mm radius often transforms comfort.
Quality Benchmarks for Confident Wear
A simple checklist can elevate your results from “homemade” to heirloom:
- Symmetry: match curves left-to-right; check silhouette on a grid or paper outline.
- Edge finish: no burrs detectable by fingertip; inside edges are as smooth as the outside.
- Join integrity: solder seams invisible; cold wraps tight, even, and immobile.
- Spring and set: cuff gently flexes to don and doff yet returns to shape.
- Finish uniformity: reflectivity or matte quality consistent across surfaces.
Ethical Sourcing and Studio Sustainability
Beautiful bracelets can also be responsible. Buy recycled copper and silver when possible; save trimmings for scrap return. Upcycle household copper (old electrical wire) after stripping insulation and cleaning. Design parts to nest when cutting to reduce waste. Reuse rinse water for non-critical cleaning. For long-wearing finishes, prefer bare, solid metals over short-lived coatings; sustainable choices often improve tactile quality as pieces develop character through wear.
From Gift to Microbusiness: Presenting Your Work
If you share or sell your bracelets, presentation extends the experience. Package each piece with a simple care card explaining finish and metal type. Photograph on neutral backgrounds that echo your brand—raw linen for earthiness, matte slate for modernity. Price with a clear formula that accounts for time, materials, consumables, and profit. Consider size ranges, offering small-medium-large in cuffs and bangles. If you work in sterling, learn about purity marks and the legal context of metal stamping in your region.
Advanced Directions for Curious Hands
Once fundamentals feel instinctive, explore structural experiments:
- Hybrid builds: combine forged wire frames with woven inserts or bead channels.
- Soldered lattices: create open grids from 16–18 AWG, then planish and curve into cuffs.
- Married metals: puzzle-fit contrasting metals and solder into a single blank before forming.
- Stone settings in wire: build prong or bezel-like cages from heavy gauge and finer binding wires; anchor to a cuff spine.
- Jigs and templates: use pegboards or commercial jigs for repeatable curves; repeatability underpins consistent collections.
Care, Aging, and Repair
Bracelets live hard lives, brushing desktops, bags, and doorframes. Accept and design for graceful aging. Polished copper will mellow; brass warms. Suggest occasional washing with mild soap and water, thorough drying, and a light wax to slow oxidation. Offer re-polish or re-oxidation services: it builds relationships and keeps your work looking its best. For bent bangles, anneal (if applicable), true on a mandrel, and re-harden with gentle planishing.
A Maker’s Mindset
Wire encourages play. Start with an idea, then let the metal teach you. Respect its resistance. Plan pauses into your workflow so judgment can reset—many mistakes vanish when you return with rested eyes. Take notes: which hammer made the texture you loved; how much over-bend delivered the perfect oval; which finish your customers ask for most. These small records shape your evolving craftsmanship.
Quick Reference: When to Heat, When to Hammer
- Heat to reset: if curves fight you or wire kinks repeatedly, annealing restores compliance.
- Hammer to set: once shape is correct, planish to lock it in; avoid heavy blows that distort profile.
- Polish last: after all forming and most texturing; otherwise you’ll polish twice.
Material Pairings That Sing
Copper with turquoise beads for desert warmth; brass with onyx for sharp contrast; sterling with moonstone for soft luminosity. Mixed-metal overlays unify through repeated motifs or synchronized finishes. When combining metals, mind galvanic differences in damp environments; prefer similar metals for daily-wear cuffs that contact skin broadly.
From First Bend to Signature Style
Every maker’s trajectory travels a similar arc: first bends, first hammer marks, first comfortable cuff that makes you smile every time you slip it on. Then come the refinements: the barely-there chamfer on the inside edge, the clasp that clicks home perfectly, the texture that feels like rain. Along the way, invest in one quality tool at a time, mind your body mechanics, and build a small library of forms you can reproduce. Your bracelets will begin to carry a voice—recognizable curves, preferred finishes, recurring motifs—that expresses more than trend can teach. With attention to durability, fit, and finish, wire becomes architecture for the wrist, equal parts ornament and companion, proof that metal, moved by hand, can feel alive.
As you continue exploring, keep a small tray of offcuts for prototypes, a page of sketches near the bench, and a willingness to revise. The best bracelets arise from iterative curiosity: a slight tweak to the clasp radius, a humbler polish that resists scuffs, a curve softened for comfort. Over time, these choices accumulate into a vocabulary rooted in skill and sensitivity. That is the quiet foundation of wearable design—equal measures of intention and responsiveness, of structure and softness, of eye and hand—brought together around a wrist-sized circle that accompanies daily life.
Before your next session at the bench, pick a focus: a new texture, a refined clasp, or a different profile on the filing step. Then let your hands translate that intention into action. The wrist will tell you when you’ve succeeded. And if it doesn’t, the metal offers endless do-overs: re-curve, re-file, re-finish. That patient cycle is where skill accumulates and style emerges, one thoughtful bracelet at a time.
Key terms woven through this guide—mandrel, gauge, annealing, work-hardening, patina, ergonomics, hypoallergenic, durability, and minimalism—will become second nature as you practice. Keep them at hand, literally and figuratively, as you design for the wrist: a small circumference with endless creative latitude.
