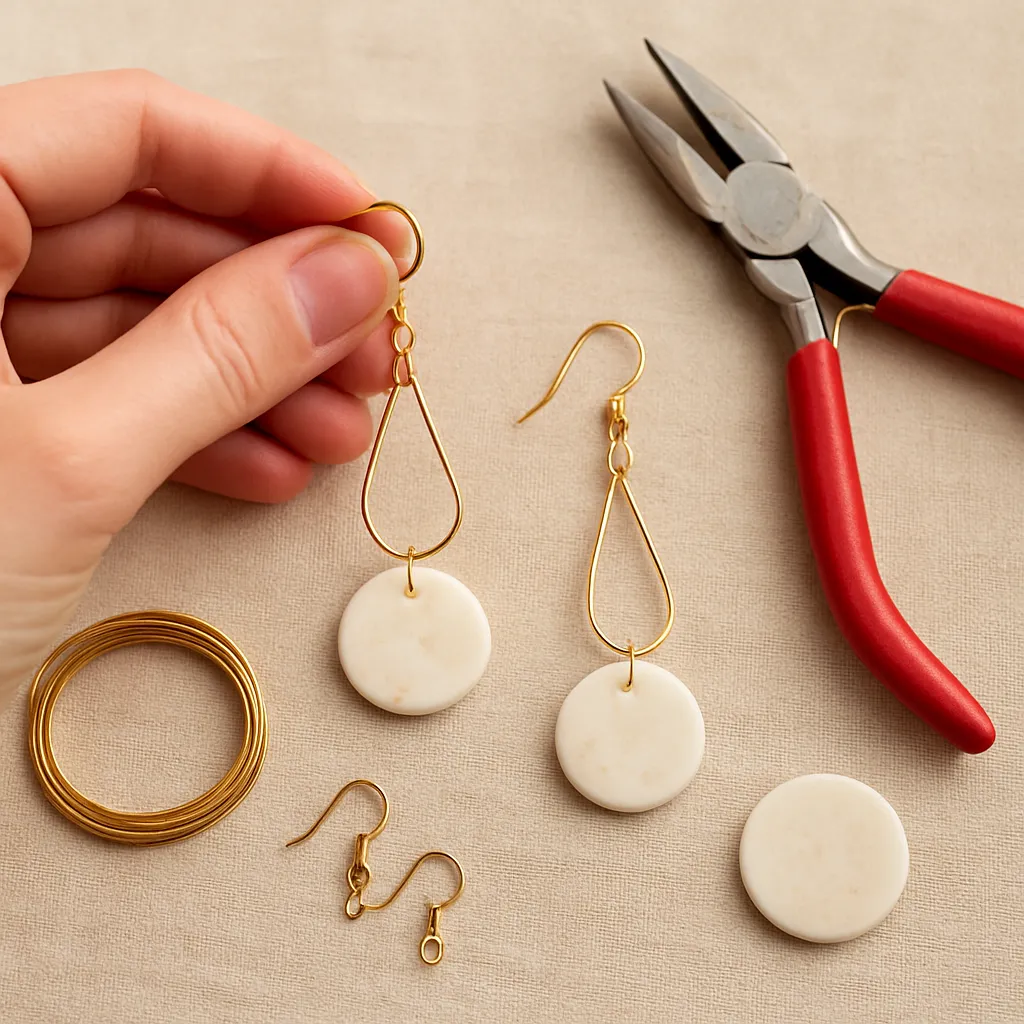
Handmade dangle earrings turn a few humble scraps—thread, paper, buttons, wire, or a bottle cap—into wearable art that dances with every step. They invite you to explore color, movement, and texture at a small scale, where tiny decisions produce big impact. Best of all, they’re light on the wallet, high on creative satisfaction, and easy to make at a kitchen table. This guide blends practical technique with design thinking so you can craft earrings that look polished, feel comfortable, and tell a story worth wearing.
Why Dangle Earrings Are a Handicraft Essential
Dangle earrings are small kinetic sculptures. Because they move, they catch light and frame the face, which means a simple shape can look unexpectedly sophisticated once it hangs from an ear. That dynamism also makes them perfect for creative experimentation: you can try textures, convert odd household items into charms, and prototype quickly because each earring is a compact project with fast feedback.
A brief creative lineage
From hammered copper hoops in ancient markets to carved bone drops, people have used local, ordinary materials to adorn themselves. Today, a soda tab or a paper disk can be the modern counterpart to those humble origins. The thread that connects past to present is the maker’s intuition—how to arrange parts, how to make them sway just right, and how to celebrate craft in daily life.
Design that moves
The magic of dangles is motion. A breeze or a turn of the head changes their silhouette. When designing, imagine your pieces not just front-on but in motion: how they twist, the sound they make, whether they catch hair. This sensitivity separates quick crafts from objects that feel designed.
Materials and Tools You Probably Already Have
You do not need a studio. A small tray, a washcloth to keep beads from rolling, and a basic toolkit are enough for most builds. Start with what you have; upgrade only as your curiosity grows.
Simple materials
- Paper: magazine pages, watercolor scraps, cardstock, gift wrap, or maps.
- Fabric and fiber: old T-shirts, denim, ribbons, lace, embroidery floss, or twine.
- Household gems: buttons, safety pins, soda tabs, washers, keys, shells, or pressed leaves.
- Wire: craft wire (aluminum, copper, brass) between 20–24 gauge for dangles; 18–20 gauge for handmade ear wires.
- Beads: anything from seed beads to broken necklace leftovers.
- Recycled plastics: clean bottle caps, food-grade containers cut into shapes.
- Air-dry clay: for sculpted charms without a kiln.
Hardware and substitutes
- Earring hooks: fishhooks or lever-backs; surgical steel for sensitive ears.
- Jump rings: tiny metal circles that connect components. Learn to open them sideways, never prying them open.
- Head pins and eye pins: rods with a flat stop or loop to hang beads.
- DIY alternatives: twist wire into loops for connectors; cut thin strips of plastic as spacers; tie fiber knots as decorative links.
In jewelry jargon, all these little connectors are called findings. You can buy a starter mix or harvest them from old, broken pieces with pliers and patience.
The minimalist toolkit
- Round-nose pliers for loops.
- Chain-nose or needle-nose pliers for gripping and opening jump rings.
- Wire cutters or sturdy nail clippers for soft wire.
- Glue: PVA (white craft glue) and a clear-drying strong adhesive for metal-to-metal bonds.
- Scissors, craft knife (with a cutting surface), and a ruler.
- Optional: small hammer and a spoon for flattening wire; nail files or fine sandpaper for smoothing edges.
Comfort and safety
If your skin is sensitive, look for materials labeled nickel-free or hypoallergenic. When using recycled metals, test them first by wearing briefly or by adding a barrier coat like clear nail polish on contact points. Always sand or file sharp edges. Keep glue and small parts away from children and pets.
Eco-aware making
A great pleasure of DIY earrings is mindful resource use. Scavenging from your recycling bin and mending broken jewelry sustain both budget and planet. Consider your stash an invitation to upcycling, where waste becomes raw material and each piece carries a bit of place-based history.
Principles of Design and Comfort
Elegance isn’t about expensive parts; it’s about decisions. The following ideas help your earrings feel intentional, wearable, and flattering.
Weight and wear time
Lightweight is king. Paper, fiber, and thin metal keep strain off the lobes. As a rule of thumb, a combined weight under 7 grams per earring is comfortable for most people, but lighter is better for daily wear.
Proportion and silhouette
Think in shapes: teardrops lengthen the neck; horizontals can broaden the look; crescents soften angles. Keep the focal piece about one-third of the overall length to create pleasing proportion. Try on a prototype with tape before committing to metal loops.
Balance and movement
Uneven weight distribution causes earrings to twist or sit oddly. Hang heavy parts closer to the hook and graduate down to lighter components. This keeps visual and physical balance aligned, which reads as calm and confident rather than fussy.
Color, texture, and contrast
Use one of three palettes: monochrome (one color family in various shades), complementary (opposites on the color wheel), or analogous (neighbors on the wheel). Repeat a texture—matte paper, glossy bead, brushed metal—twice so it feels intentional. A pop of white or black can anchor a colorful design.
Comfort through ergonomics
Beyond looking good, earrings should feel invisible. Consider ergonomics: smooth anything that touches skin, avoid snag-prone textures near hair, and let the bottom of the earring land above the collar to prevent tangles with scarves or zippers.
Composing your design
Lay components on a cloth and try arrangements before you assemble. Imagine the piece as a tiny poster: headline, subhead, copy. In jewelry terms, focal, supporting shapes, and accents. Edit until your composition feels clear from across the room.
Core Techniques You’ll Use Again and Again
Opening and closing jump rings
- Hold each side with pliers.
- Twist one side forward and the other back; never pry open sideways.
- Close with a slight wiggle until you feel a soft click as the ends align.
Simple and wrapped loops
- Simple: grip wire 1 cm from the end with round-nose pliers; bend into a loop; trim excess; close the loop flush.
- Wrapped: after forming a loop, coil the tail neatly around the neck two or three times for strength; trim and tuck the end.
Tassels from thread or fabric
- Wrap thread around a card 30–40 times.
- Slide off, tie at the top, and cut the bottom loops.
- Add a small binding wrap near the top for a clean shape; comb and trim even.
Paper hardening
- Cut shapes from cardstock or layered magazine pages.
- Seal with diluted PVA on both sides; let dry; repeat for stiffness.
- Edge with a marker or paint for a finished look.
Cold connections and no-solder joins
- Use jump rings as hinges between components to create swing without solder.
- Wrap-and-loop connections with wire are reliable and decorative.
- Lark’s head and square knots let fiber join metal securely.
Five Step-by-Step Projects from Simple Materials
1. Paper Disk Mobiles
Materials: cardstock or layered magazine circles, small beads, head pins or wire, jump rings, earring hooks, glue, needle or hole punch.
- Punch a small hole near the top of each paper disk; seal both sides with diluted PVA.
- Thread a bead on a head pin, add a paper disk, then form a simple loop on top.
- Chain two or three of these units using jump rings for a mobile effect.
- Attach to the earring hook; mirror the arrangement for the second earring.
Tip: Use a neutral disk in the middle to calm a busy print, ensuring the focal color reads clearly.
2. T-Shirt Tassel Drops
Materials: old cotton T-shirt, scissors, a small ring or wire, earring hooks, a short piece of contrasting thread.
- Cut a long, thin strip of T-shirt and stretch it gently; it curls into a cord.
- Wrap the strip around three fingers 30 times; slide off carefully.
- Thread a ring or a looped piece of wire through the bundle’s top.
- Bind 1 cm below the top with contrasting thread; tie tightly and trim the fringe even.
- Attach the ring to an earring hook.
Variation: Dip-dye the tassel ends with watered acrylics, then seal lightly once dry.
3. Bottle Cap Mosaic Dangles
Materials: two metal bottle caps, nail file, scrap paper or tiny beads for fill, strong glue, small drill or nail for a hole, jump rings, hooks.
- Flatten the bottle cap slightly with a spoon to smooth sharpness; sand edges.
- Punch a small hole near the rim for a jump ring.
- Glue a paper circle inside or fill with a few micro-beads; seal with clear glue for a glossy dome.
- Attach a jump ring through the rim hole and connect to the hook.
Design cue: Choose caps with interesting logos to celebrate place—your favorite soda, a local brewery, or a festival souvenir.
4. Button Stack Columns
Materials: assorted buttons, head pins, tiny spacer beads, earring hooks, round-nose pliers.
- Stack two to three buttons on a head pin, using spacers to prevent wobble.
- Finish with a wrapped loop for strength.
- Optionally dangle a small bead below for a playful finish.
- Attach to hooks and mirror the color order for pair cohesion.
Pro tip: Mix matte and glossy buttons for textural rhythm.
5. Safety-Pin Cascades
Materials: small safety pins, seed beads, a short scrap of chain or wire bar, two larger jump rings, hooks.
- Thread seed beads onto several safety pins; close securely.
- Hang the pins from a short length of chain or from a straight wire bar with tiny loops.
- Attach the chain or bar to a jump ring and then to the hook.
Result: Shimmery sound and a surprising elegance from the most ubiquitous hardware item.
Advanced Surface Treatments and Detailing
Color and sheen
- Acrylic paint or nail polish adds hard color. Apply two thin coats, not one thick coat, to avoid drips.
- Colored pencils over a primed paper surface can produce delicate gradients.
- Metallic leaf scraps or foil tape create highlights—burnish with a cotton swab.
Texture and age
A little history on the surface can make new pieces feel storied. Chemical patination is an advanced topic, but you can create an illusion of patina with layered washes of thin paint, wiping back the high spots so recesses look shadowed. On paper, tea or coffee stains mellow intense hues; on fabric, gentle fray can soften a strict edge.
Sealing and protection
- For paper: diluted PVA followed by a clear acrylic sealer boosts durability against humidity.
- For fiber: a light fabric stiffener retains shape without turning crunchy.
- For metal: microcrystalline wax or a clear lacquer slows tarnish.
Give the same care to the last touches—wire ends tucked, glue residue cleaned—as you do to the concept. Polished finishing elevates even the humblest material.
Troubleshooting Common Issues
- Earring flips backward: Move the heaviest element closer to the hook; add a small counterweight bead above the focal.
- Scratching edges: File, sand, or round with a bit of clear glue to dome the edge.
- Tarnish or discoloration: Store with anti-tarnish paper; clean with a soft cloth; avoid perfumes and hairsprays after putting earrings on.
- Uneven lengths: Measure components as you build; count knot repeats and bead numbers for both sides.
- Weak joins: Use wrapped loops instead of simple loops when weight or motion is high.
- Too heavy: Swap to paper or fiber elements; hollow out clay pieces; shorten the drop.
Comfort, Care, and Longevity
Comfort starts with thoughtful design but continues with upkeep. Wipe earrings after wear to remove oils. Store them flat or hanging, separated so chains don’t tangle. A silica packet in your box keeps moisture down. If an element loosens, repair with fresh glue and a new jump ring rather than forcing a fix—the earlobe deserves security.
Personal Meaning, Symbols, and Sensitivity
Earrings often say something: a favorite color, a reference to a place, or a symbol. Borrow thoughtfully. If a motif is sacred or culturally specific, research its meaning before adapting it. A respectful approach adds depth and turns handmade jewelry into conversation, not costume.
From Gift to Micro-Business
Presentation on a shoestring
- Cut earring cards from cereal boxes; cover with book pages or paint swatches.
- Punch two holes, add your name or stamp, and write materials on the back.
- Slip into small glassine or paper bags for a boutique feel.
Pricing with confidence
Track time and materials. A simple formula is materials cost plus your hourly rate plus a margin for overhead. Even if you only gift your work, knowing its value honors your effort and craft.
Quality checklist before gifting or selling
- All loops closed and smooth.
- Pairs match in length and orientation.
- Hooks cleaned and, if necessary, changed to skin-friendly metals.
- Weight tested for comfort.
Design Exercises to Spark Ideas
- Constraint play: Make a pair using only paper and wire. Notice how inventive your joins become.
- Palette pull: Choose three colors from a photograph and translate them into materials from your stash.
- Scale shift: Create a large prototype from cardboard, then distill the idea into a smaller, refined pair.
- Story prompt: Make earrings around a word like tide, ember, or orchard and see what textures appear.
Comfort-Focused Ear Wires You Can Make
Buying hooks is easy, but making your own can be both economical and tailored. Use 20-gauge soft wire. Form a small loop for the dangle, then curve a gentle arc around a pen barrel. File the tip smooth. Work-harden by tapping lightly with a spoon. This custom shape can help with fit and reduce pressure points. Keep a small batch ready so you can swap out hooks if a friend needs a different metal.
Sourcing Materials Ethically and Affordably
Look for scraps at tailor shops, frame stores (thin mat board), and hardware offcuts. Thrift-store necklaces are treasure troves of beads and chains for pennies. If you buy new metal components, favor suppliers who disclose alloy content and labor practices. Each choice quietly supports craft communities and broader sustainability goals.
Beyond Basics: Kinetic and Modular Ideas
Add hinge points with multiple jump rings to create articulated segments that ripple as you move. Try reversible components—paper collages with different faces sealed front and back—or modular earrings with removable charms that clip on for evening and off for daytime. You can also build tiny wind-chime clusters with three strands of different lengths; the trick is to keep them slim so the sound is soft, not clattery.
Testing, Iterating, and Documenting
Wear your prototypes while doing normal tasks: tying hair, zipping a jacket, or taking a call. Notice snags or unexpected spins, then adjust weights or connections. Photograph your steps and finished pairs with natural light against a neutral background. Notes and photos help you recreate favorites, teach friends, or build a personal library of techniques.
Quick Reference: Best Practices That Elevate the Work
- Mirror, not duplicate: small left-right differences read handmade; keep key measurements identical.
- Three-repeat rule: if you introduce a new material, repeat it at least three times across the pair for cohesion.
- Shine control: too glossy? Add a matte accent; too flat? One reflective bead can wake the design.
- Edge discipline: finish every cut edge—paper sealed, fiber trimmed, wire tucked.
- Audit weight mid-build: hold components at the hook as you add parts; stop before heavy.
Care for Sensitive Ears Without Compromise
If the perfect vintage button uses unknown metal, isolate it from skin with a fiber spacer or a sealed paper charm above it. Consider swapping in titanium or niobium hooks for the most reactive ears. A thin layer of clear barrier on metal parts that brush the neck can reduce irritation—a simple solution that preserves design intent.
A Few More Project Sparks
- Pressed leaf silhouettes sealed between layers of clear tape, edged with wire.
- Map snippets of a meaningful city, domed with glue for depth.
- Embroidery hoops miniaturized: a tiny circle of fabric with two or three simple stitches.
- Washer and thread mandalas: wrap thread around a small metal washer in alternating colors.
- Paper beads rolled from magazine triangles; pair with a single metal charm.
From Idea to Heirloom
The most memorable earrings are not flawless—they are specific. A mother’s button, a beach-found shell, a ticket stub turned into a tiny collage: these pieces carry biography. With a handful of techniques and mindful choices around weight, comfort, and form, you can translate memory into an object that lives in the world, swaying softly beside you. Keep your eyes on small details and your heart on the story you want to tell, and each pair will feel unmistakably yours.
One Last Walkthrough: Building for Lasting Delight
- Plan: sketch the silhouette and note the focal.
- Layout: audition materials and test drop length against a mirror.
- Assemble: prioritize secure joins—wrapped loops, properly closed rings.
- Refine: file, seal, and polish contact points; check swing and orientation.
- Test: wear for an hour; adjust any pull or scratch.
- Present: mount on a handmade card with a note about materials and care.
With these habits, your simple materials gain the grace of intention. What begins as scraps becomes adornment, and what begins as a pastime becomes a craft. Keep crafting, keep noticing, and let small experiments add up to a wardrobe of dangles that carry comfort, color, and character in equal measure.
