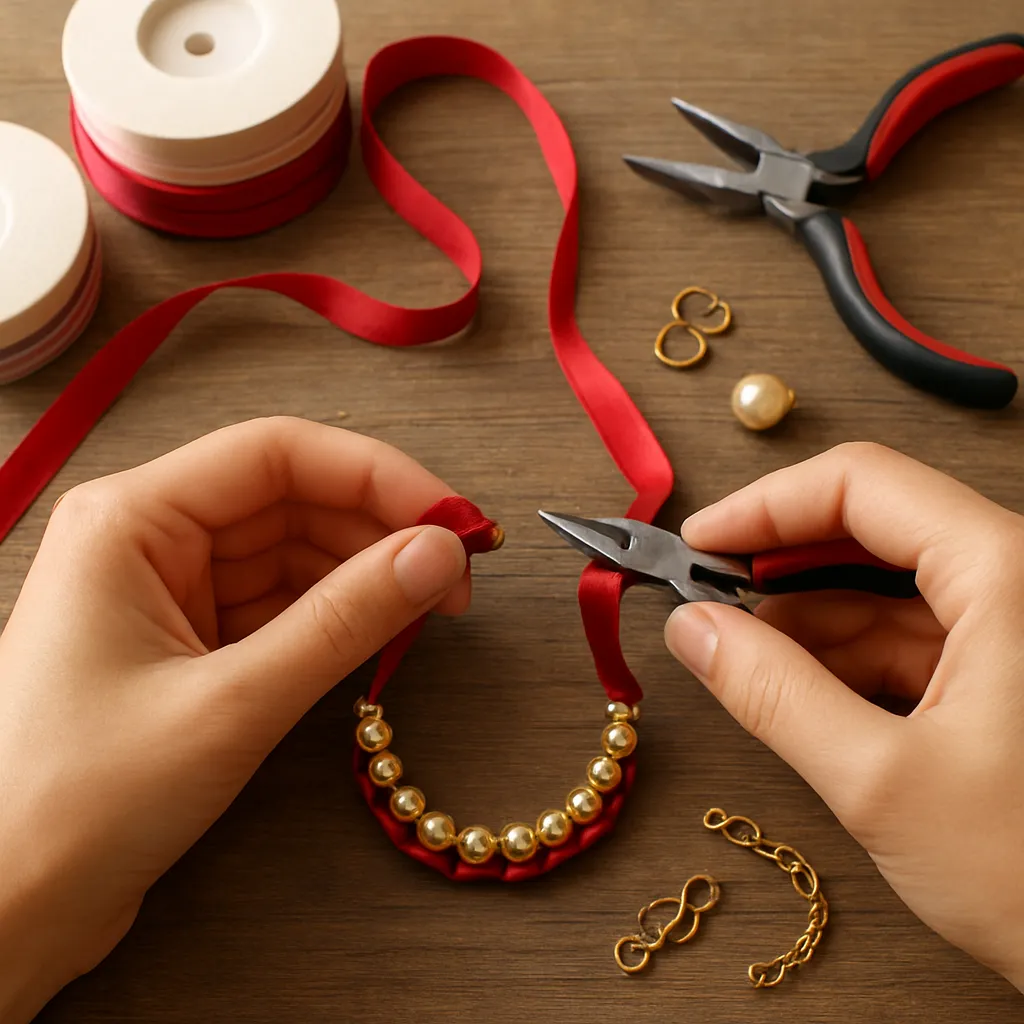
A length of satin or organza can be transformed into a keepsake within an afternoon. Few crafts deliver such immediacy as making adornments from a single ribbon: you cut, fold, stitch, and suddenly a color-saturated strand turns into expressive jewelry that feels both nostalgic and modern. Ribbon-based pieces carry the softness of textiles, the shimmer of silk, and the crisp geometry of pleats, while remaining accessible to beginners and endlessly deep for experienced makers. This is handicraft at its most tactile and personal—an art where pattern, drape, and movement are as important as shape. Whether you prefer delicate chokers or bold cuff bracelets, the medium rewards curiosity. You can raid a sewing box, thrift an old spool, or repurpose a gift bow; the palette is immediate and the possibilities wide. The work invites mindful pacing: measuring, searing edges, testing tension, choosing findings, and adding tiny details that elevate the whole. With a few core skills and a willingness to explore, you can build a signature style that tells your story in satin stitches and gathered rosettes.
Why Ribbons Make Remarkable Adornments
Ribbons are a bridge between fabric and metalwork, inherently soft yet capable of striking structure. They frame the face without weight, adapt well to body movement, and offer an enormous variety of finishes: matte, glossy, wired, picot-edged, embroidered, pleated, crinkled, velvet, or sheer. Historically, ribbons signaled status, devotion, and celebration: think of 18th-century passementerie on court attire, Victorian ribbonwork flowers adorning hats, or Japanese tsumami-zaiku petals folded for hair ornaments. For the modern maker, this heritage is a palette rather than a prescription. The same construction methods—gathering, folding, couching—translate seamlessly into contemporary bracelets, chokers, pendants, and earrings. In handicraft culture, ribbon jewelry also invites community: it’s approachable for workshops, friendly to small budgets, and wonderfully portable. Above all, the medium welcomes expressive craftsmanship—clean edges, invisible stitches, aligned pleats, and confident color choices—that reward patience and skill.
Essential Materials and Tools
Ribbon types and selection
Choose ribbon based on fiber, weave, and structure. Natural-fiber ribbons (silk, cotton) drape beautifully and take dye well, while synthetics (polyester, nylon) offer durability and lower cost. Consider:
- Satin: Smooth and reflective; great for statement rosettes and sleek chokers.
- Grosgrain: Ribbed body offers grip and architectural folds; ideal for bows, structured cuffs, and clamp-end finishes.
- Organza: Sheer and airy; layers without bulk, perfect for ethereal petals and light earrings.
- Velvet: Lush, tactile surface; suits winter palettes and dramatic cuffs.
- Wired-edge ribbons: Built-in shaping wire holds curls and scallops for sculptural pieces.
- Bias-cut silk strips: Flexible and fluid; excellent for wrapped bangles and knotting styles.
Width matters. Narrow (3–6 mm) works for delicate braids and earring dangles; mid-width (10–16 mm) suits chokers, weaves, and ties; wide (25–50 mm) excels at rosettes, gathered ruffles, and corsage-style brooches.
Findings and supports
You’ll need attachment points and closures that respect the softness of ribbons while ensuring longevity:
- Ribbon clamps (fold-over ends with teeth) for flat styles.
- End caps for cylindrical, wrapped cords.
- Crimp tubes with wire guardians for hybrid pieces (ribbon plus beading wire).
- Jump rings, split rings, and chain segments for length adjustments.
- Clasps: lobster, toggle, box, or magnetic (choose strong, fabric-friendly magnets).
- Buttons and loops for vintage appeal and easy, sewable closures.
- Backing materials: felt, leatherette, or ultrasuede to stabilize rosettes or pendants.
Adhesives, threads, and surface control
Use a flexible fabric glue that dries clear to secure edges inside clamps and to tack petals before stitching. Match thread to ribbon fiber when possible: fine silk or polyester for silk ribbons; strong nylon for synthetic grosgrain. Fray control is essential—seal synthetic edges with a gentle pass of heat (candle, thread zapper), and for natural fibers, apply fray-preventing liquid or narrow hem stitches. Double-sided fusible tapes can stabilize thin organza before folding. A light spray of starch or fabric sizing helps maintain crisp pleats.
Tools that make a difference
- Fine, sharp scissors dedicated to fabric.
- Chain-nose and flat-nose pliers for findings.
- Awl or thick needle for creating small, controlled holes in backing.
- Ruler, fabric tape measure, and heat-safe cutting mat.
- Lighter or edge sealer for synthetics; silicone finger protectors to prevent burns.
- Clips and micro binder clips to hold folds without leaving dents.
Core Techniques for Ribbon Jewelry
Ribbon welcomes sculptural work, but the key to great results is a measured approach to each technique. Mastering a handful will cover most designs.
Preparing and stabilizing
- Square cuts vs. angled tails: Decide by function; clamps prefer square cuts, while bows often favor angled tails.
- Edge sealing: After cutting synthetics, lightly melt edges to prevent fray. For organza, keep heat minimal to avoid curling.
- Backings: When building a pendant or brooch, mount the ribbon work onto a felt or ultrasuede base for durability.
Knotting and braiding
Textile knots introduce rhythm and structure. Practice even tension to avoid twisting and warping. Simple overhand knots create spacing beads; square knots form flat, decorative planes; lark’s head knots anchor ribbons to rings or bars; Chinese button knots act as elegant, built-in closures. When working in series, keep the ribbon untwisted, pausing often to smooth it. The deliberate practice of knotting opens possibilities for adjustable bracelets, layered necklaces, and airy lattice chokers.
Macramé with ribbon
Classic cords gain new character when tied with soft textiles. Flat, ribbon-based macramé feels luxurious and can cradle beads without wire. Choose mid-width, supple ribbons; tape down the anchor end, mark your pattern repeat, and maintain consistent tension. For a refined finish, taper the final rows, hide tails beneath the last knots with a tapestry needle, and reinforce stress points with tiny stitches of matching thread.
Weaving and kumihimo
Ribbons interlock into mesmerizing textures across a simple loom or braiding disk. On a foam kumihimo disk, pair narrow ribbons with cord for grip; for a loom, alternate matte and shiny strips to create lightplay. Secure the start with a strong clasp assembly: use end caps or coil ends with hidden stitching. Consider a hybrid: weave a central ribbon panel and attach it to chain for adjustability and contrast.
Rosettes, pleats, and petals
Ribbon flowers are timeless. For a gathered rosette, run a long running stitch along one edge, then pull to gather into a spiral and stitch the center from the back. For pointed petals (tsumami-style), cut squares, fold diagonally into triangles, then fold again, trimming the base and sealing; assemble around a felt circle. Pleating tools or simple finger-pleating along a marked line create ruffled chokers that read like tiny couture. Always stitch structural folds, using glue only as a temporary hold.
Wrapping and cord-making
Transform metal bangles, memory wire, or thick cord bases by wrapping with ribbon, overlapping slightly for a seamless spiral. For cords, roll bias-cut silk tightly, ladder-stitching edges along the back; cap both ends with end caps and attach a clasp. Combine textures: wrap velvet over a stiff leather core for winter cuffs, or layer sheer organza over satin for a soft glow.
Beads, charms, and mixed media
Beads sit luxuriously against fabric. Punch tiny holes in a felt-backed ribbon pendant to wire-wrap rhinestones or pearls. String large-hole beads directly onto narrow ribbons, knotting between to lock placement. Charms can dangle from jump rings anchored through sewn-in seed bead anchors or tiny grommets set into grosgrain. When weight is significant, distribute load with hidden stitches to a backing base to preserve drape.
Closures and finishing
Finishing is where pieces succeed or fail. Match closure style to visual weight: toggles suit substantial cuffs, while magnetic clasps or button loops complement delicate chokers. When using ribbon clamps, protect the ribbon with a tiny scrap of folded paper as you crimp, then remove the paper after closing to prevent tooth marks. For a no-hardware solution, tie adjustable sliding knots on a long ribbon necklace; for bracelets, a button-and-loop feels classic and lies flat under the wrist.
Designing with Handicraft Sensibility
Design decisions begin with intention. Who will wear the piece? What mood should it evoke? Consider proportion: a 40 mm rosette near the collarbone makes a statement, while two 15 mm rosettes echo as accents. Contrast is the maker’s compass—pair matte grosgrain with a single crystal for tension, or set sheer organza over opaque satin for depth. Treat light as a material: satin glints, velvet absorbs, organza diffuses. Think about texture in transitions—smooth-to-ruffled, flat-to-faceted, crisp-to-soft—so the eye travels comfortably. Color planning is equally vital: complementary, analogous, or monochrome schemes each tell different stories. A restrained, nuanced color palette often looks more sophisticated than a riot of hues.
- Create swatch cards: staple snippets of favorite ribbons and label width, fiber, and source.
- Sketch silhouettes first, then audition ribbon types to match structure.
- Prototype with inexpensive ribbon before committing precious silk.
- Balance focal weight left-to-right; mirror elements or intentionally offset with purpose.
- Echo motifs: a tiny pleat on earrings repeating a larger pleat on a necklace ties a set together.
Step-by-Step Project Blueprints
1) Grosgrain pleated choker with cameo focal
- Cut 40–45 cm of 16 mm black grosgrain; seal ends.
- Mark 5 mm intervals and finger-pleat, clipping as you go; baste along the back to hold shape.
- Stitch a vintage-style cameo to a small felt oval; then sew the oval centrally onto the pleated ribbon.
- Attach ribbon clamps; add a short extender chain and a lobster clasp.
- Optional: line the back with ultrasuede for comfort.
2) Silk rosette pendant on organza
- Cut 60–80 cm of 25 mm silk; run a gathering stitch along one long edge.
- Pull to gather, spiral into a rosette, and stitch through layers from the back.
- Back the rosette with a felt circle; add a concealed bail by stitching a small metal loop between felt and rosette.
- Thread a 10 mm organza ribbon through the bail; tie behind the neck with an adjustable bow or add clamps and clasp.
3) Ribbon-wrapped bangles trio
- Choose three thin metal bangles and three ribbon textures (satin, velvet, and printed cotton).
- Glue and wrap each bangle, overlapping edges slightly; secure ends beneath tidy stitches.
- Anchor tiny charms at staggered points, using jump rings sewn to hidden thread loops.
- Wear stacked for a rhythmic, tactile set.
4) Minimalist adjustable knot bracelet
- Cut 70 cm of 6 mm bias silk; seal edges.
- Tie a series of evenly spaced overhand knots, leaving a smooth segment at each end.
- Create two sliding knots to form an adjustable loop; secure with a tiny backstitch hidden inside each knot.
- Finish tails with small wire-wrapped beads for balance.
5) Organza petal earrings
- Cut eight squares of organza (25 mm). Fold each into a triangle, then again; trim base and lightly seal.
- Assemble four petals per earring around a felt teardrop; stitch securely.
- Add a rhinestone at the center; attach earring posts or hooks via a sewn-in jump ring.
- Back with ultrasuede for comfort and a professional finish.
Care, Wear, and Longevity
Ribbon pieces invite gentle handling. Store flat or hung to avoid creasing; keep away from perfume and hair spray, which can spot silks and tarnish metals. Dust velvet with a soft brush; spot-clean stains with fabric-appropriate methods—cool water for silk, mild detergent for polyester—testing on a scrap first. If pleats relax, a light steam from below (never touching the iron to satin) and a cool setting can refresh structure; reapply starch to crispy styles. Reinforce stress points—clasp junctions, bail attachments—with hidden stitches or a dab of flexible glue. When gifting or selling, include a small care note to help pieces age gracefully.
Personalization, Story, and Meaning
Ribbon jewelry excels at storytelling. Use school or team colors for spirited pieces, incorporate heirloom trims from a wedding dress into an anniversary pendant, or craft memory bracelets from preserved bouquet ribbons. Monograms can be embroidered or stamped on cotton ribbons. For symbolism, let shapes speak: laurel-like pleats for achievement, tiny stars for hope, or rosebuds for affection. Document your process in a notebook—record lengths, fold counts, and stitch types—so you can recreate special commissions with confidence.
Sustainable Making with Ribbons
Handicraft thrives when mindful of resources. Thrift shops and estate sales often yield beautiful vintage spools; textile offcuts make striking cords; and short lengths can become earrings or charm attachments. Practice thoughtful upcycling by turning gift-wrap ribbon into everyday pieces and by saving tail ends for tassels and bead spacers. Consider natural dyes for cotton and silk, sourcing plant material locally and keeping records for repeatable colors. If markets are part of your practice, center sustainability in your story: low-waste patterns, biodegradable packaging, and care tips that extend a piece’s life all communicate values that resonate with wearers.
Common Challenges and Confident Fixes
- Fraying edges: Re-seal synthetics with gentle heat; for naturals, use fray liquid or fold-and-stitch hems.
- Slipping from ribbon clamps: Add a scrap of interfacing inside the clamp, crimp slowly, and then reinforce with a hidden stitch through the clamp loop.
- Bulky joins: Stagger seam allowances and ladder-stitch, or conceal under a decorative element like a small bow or bead cluster.
- Uneven pleats: Mark guides with disappearing ink; baste before final stitching; steam to set.
- Weight imbalance: Distribute heavy charms along a backed panel; switch to lighter beads or add counterweights.
- Color transfer: Pre-wash and test ribbon for dye fastness; use a color catcher when rinsing silks.
- Itchy backings: Switch to ultrasuede or soft felt; avoid exposed knots against skin.
- Twisting cords: Ensure even tension during braiding; hang finished cords with a small weight to relax before attaching clasps.
From Hobby to Small-Batch Studio
Ribbon jewelry fits elegantly into a microbusiness model. Materials are space-efficient, pieces ship lightly, and custom work is approachable. For pricing, track materials down to the centimeter and include labor time, packaging, platform fees, and a profit margin that funds experimentation. Create a cohesive collection by repeating a handful of motifs—edge-pleated chokers, petite rosette studs, woven cuffs—in seasonal colorways. Photograph with soft, diffused light that flatters fabric surfaces; show scale by styling near the collarbone or wrist. Package in breathable pouches with a care card. When selling in person, keep a repair kit on hand for quick adjustments and offer simple customization (alternate clasp, added extender). Choose hypoallergenic findings and clearly label metals; many customers seek nickel-free options.
Expanding Skills: Practice Pathways
Skill-building is most effective through deliberate repetition. Spend a week mastering just three knots, then design a set around them. Create a “library” of petals—round, pointed, curved—mounted on cards with notes. Explore edge treatments: picot trims, scallops, and wired curls. Study historical ribbonwork and interpret it with modern lines. Keep a box of small offcuts to experiment with dyeing, beading, and mixed media. Join local maker groups or online communities to exchange methods and feedback; teaching a beginner class will also refine your process and language. Over time, your hands learn the tension of silk, the spring of grosgrain, and the choreography of folds, and your pieces will show the confidence of practiced hands.
Inspiration Sources and Creative Prompts
- Seasonal palettes: Translate autumn leaves into velvet cuffs with ombré rosettes.
- Architecture: Pleat motifs echoing window mullions or stair balusters in a structured choker.
- Botanical studies: Ten variations of a single flower rendered in different ribbon widths and fibers.
- Minimalism: One smooth strand, a single knot, one bead—explore restraint.
- Textural contrast: Pair coarse linen ribbon with a high-shine charm for tension and balance.
- Monochrome challenge: Five whites—sheer, satin, matte—layered for depth without hue shifts.
Safety, Comfort, and Wearability
Comfort ensures frequent wear. Keep metal away from pressure points; line statement pieces; avoid sharp-edged findings near delicate fabrics. Test for snagging—organza and lace can catch on prongs, so opt for bezel-set stones or smooth beads. For kids’ pieces, prioritize robust stitching over glue, and use breakaway clasps. If earrings are large yet light, counter them with silicone backs for security. Think about climate: silk breathes, velvet warms, organza suits heat; tailor your designs to seasons and lifestyles.
A Living Craft
Working with ribbons makes you attentive to detail: how an edge gleams when perfectly sealed, how a pleat deepens a shadow, how a clasp feels against the skin. Each project teaches the next—your fingers learn to predict the behavior of fibers, to judge when a flower needs one more petal or when a cuff requires a backing. As you iterate, your pieces will gather a quiet authority. Keep notes, keep swatches, keep curiosity. With every careful cut and measured stitch, a humble strand becomes wearable art, and the practice of making becomes part of you—patient, expressive, and beautifully human.
