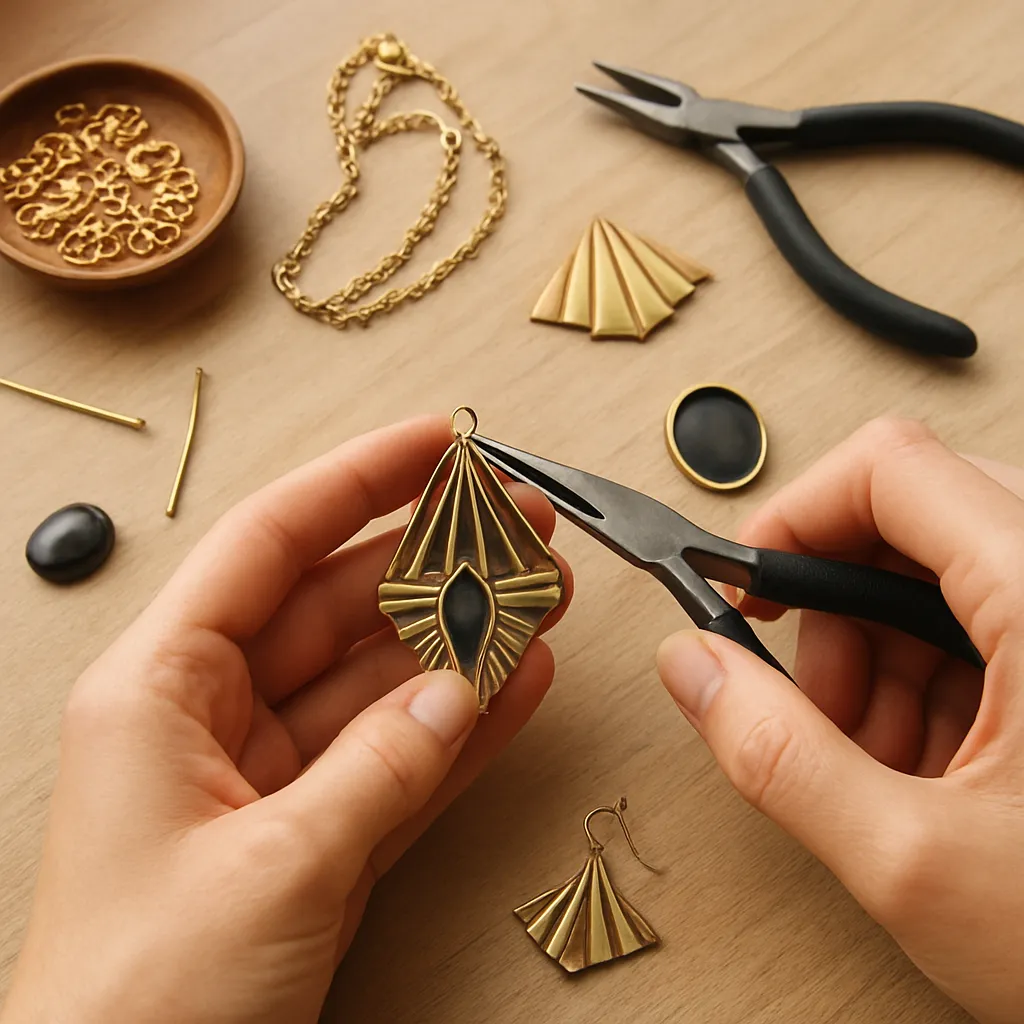
Art Deco jewelry condenses the optimism, speed, and vertical thrust of the early 20th century into wearable architecture. It celebrates streamlined silhouettes, precise lines, and bold contrasts—qualities that makers can translate beautifully at the bench without industrial machinery. This guide shows how to observe Deco forms, design with intention, and execute pieces with hand tools, all while maintaining the tactile soul of handicraft. From the disciplined sketch to the final polish, you’ll learn how to capture the era’s dynamism without copying it note-for-note.
The DNA of the Art Deco Aesthetic
Art Deco emerged between the two World Wars, harmonizing machine-age ambition with traditional ornament. In jewelry it reads as clarity: clean profiles, strategic color, and a confident visual beat. Where Art Nouveau’s vines and whiplash curves flow, Deco steps, stacks, and sharply reframes space like a skyline at dusk. Understanding these core traits provides a compass for every design decision you’ll make at the bench.
Motifs and Forms to Study
- Sunburst and fan: Repetitive rays spreading from a focal point, excellent for pendants and brooches.
- Chevron and zigzag: Rhythmic, angled repetitions ideal for bangles, ring shoulders, and articulated pendants.
- Stepped skyscraper tiers: Graduated rectangles rising in crisp layers; try them in ring galleries and bezels.
- Greco-Egyptian fusion: Lotus buds, scarabs, and papyrus abstractions, often paired with strict frames.
- Streamline curves: Not soft Baroque curves, but engineered arcs—think of train nose cones and ocean liners.
When you deconstruct historical pieces, isolate three things: the dominant shape family (rectangles, circles, fans), the rhythm (even or syncopated repetition), and the contrast strategy (light/dark, gloss/matte, opaque/transparent). In Deco, contrast is the engine that powers clarity.
Visual Grammar
Two principles underpin almost every standout Deco jewel: disciplined geometry and unwavering symmetry. This is less about hard rules than about internal consistency. If your lines taper, they should taper with intent. If your pattern repeats, repetitions should share spacing tolerances you can measure with calipers. That rigor does not kill spontaneity; it simply channels it into crisp expression.
Designing Your Piece: From Mood Board to Maquette
Great Deco work begins long before metal touches flame. Treat pre-visualization as part of your craft rather than a hurdle. The more precise your design roadmap, the smoother your bench time will be.
Research and Mood Boarding
- Collect 20–30 references: architecture (Chrysler Building spandrels), typography (posters by Cassandre), vintage bracelets and cigarette cases. Prioritize sources with clear front and side views.
- Extract shapes and intervals: trace key outlines onto translucent paper. Label angles (30°, 45°, 60°) and recurring widths.
- Define a palette: two neutrals plus one statement color is a reliable Deco formula—e.g., black-and-white with a single red or green accent.
Drafting With Constraints
Translate your inspiration into constraints you can honor at the bench:
- Maximum footprint and thickness (comfort and manufacturability).
- Stone sizes available to you (especially for step and channel settings).
- Repeating module dimensions (e.g., 3 mm bars interleaved with 1 mm gaps).
Build a grid: work on squared paper or in a vector program with snap-to-grid enabled. Establish a base unit—for example, 1 mm—and make all dimensions multiples of that unit to preserve harmony. Experiment with the rule-of-thirds and cautious proportion swaps until the silhouette clicks.
From Sketch to Maquette
- Sketch three variations: push angle, negative space, or massing in each iteration.
- Make a paper or cardstock maquette: cut, fold, and layer. Test weight and visibility from arm’s length.
- Refine to a metal template: cut one clean master in thin brass; this becomes your scribe guide on precious metal.
Materials and Tools for Deco Authenticity
While platinum and diamonds define high Deco, handicraft thrives on intelligent substitution. Choice and finish matter as much as pedigree.
Metals
- Sterling silver: takes sharp edges, polishes to a cool brightness; liver of sulfur allows gray-to-black accents.
- Argentium or fine silver: reduces firestain headaches, especially helpful with crisp stepped layers.
- White gold (14k/18k): warmer-white than silver; work-hardens well for slender structural parts.
- Brass and nickel silver (German silver): budget-friendly, good for prototypes and production in color-blocked pieces.
- Platinum (advanced): exceptional for slender bezels and pavé, but demands higher heat and dedicated tools.
Stones and Inlays
- Onyx and rock crystal: high-contrast classics; pair opaque black with colorless clarity.
- Jadeite and chrysoprase: green accents against white metal read instantly Deco.
- Rubies, sapphires, emeralds: calibré cuts are iconic; consider lab-grown for cost control.
- Mother-of-pearl: pearly softness that balances hard lines.
- Vitreous enamel: glassy color that obeys edges; both cloisonné and champlevé suit Deco grids.
Tools That Reward Precision
- Calipers and dividers: enforce dimensional discipline.
- Jeweler’s saw (0/2 to 4/0 blades): for piercing sharp interior corners and crisp windows.
- Needle files, escapement files: square and knife-edge profiles keep chevrons tidy.
- Burs and rubber abrasives: for seat cutting, smoothing, and fine shaping.
- Bezel pusher, burnisher, and beading tool: essential for clean settings and milgrain textures.
- Sandblaster or matte wheels: for controlled finish contrast.
Core Techniques: Geometry Meets Handwork
Art Deco rewards clean technique. Choose methods that naturally produce flat planes, crisp corners, and predictable repetition.
Pierced Openwork and Frames
Transfer your template to sheet using a scribe and layout dye. Drill pilot holes for interior cuts, saw with short, patient strokes, and keep the plate vertical to the bench pin. Finish edges with safe-edge files to avoid chewing into corners. Aim for parallelism you can measure: a “nearly parallel” rail looks sloppy against Deco’s ordered language.
Step and Channel Settings
Stepped galleries and channels echo skyscraper tiers. Cut channels slightly undersize, then bring to final with a flat graver. For rectangular stones, square corners must be truly square; test-fit often and deburr. A snug seat is safer than deep claws—Deco prefers protective geometry over tall prongs.
Milgrain and Edge Textures
Use a beading tool to produce crisp rows of hemispherical beads along borders. Lightly roll the tool while pressing to avoid chatter. This tiny texture softens reflections and evokes fine-machine detail without actual machinery.
Guilloché Effects Without a Rose Engine
True engine turning is specialized, but you can mimic its disciplined shimmer. Cross-hatch with uniform spacing using a liner graver, then apply translucent enamel. Alternatively, use rotary radial burs to create repeating swirls; keep counts consistent across mirrored halves.
Enamel and Resin Work
For cloisonné, bend fine silver wires into right-angled cells and tack them with thin enamel; for champlevé, etch or mill the recesses directly into the metal and fill. Fire progressively from cooler to hotter colors, stone back, and re-fire for glass-flat planes. If using resin as a learning bridge, dome minimally and mask edges to preserve the crisp Deco look.
Surface Finishes and patination
- High polish on raised planes; micro-satin in recesses for controlled light play.
- Selective blackening (e.g., liver of sulfur on silver) in pierced windows to reinforce pattern clarity.
- Rhodium or palladium plating on white metals for a chic, era-accurate cool tone.
Always protect stone seats and mating surfaces before chemical treatments, and neutralize thoroughly.
Step-by-Step Project: A Fan Pendant in Onyx and Enamel
This project builds a 38 mm fan pendant with a stepped frame, black onyx tile, and white translucent enamel rays. It’s designed for a home studio with standard tools.
Bill of Materials
- Sterling silver sheet: 1.0 mm for frame, 0.6 mm for enamel bed.
- Fine silver strip: 0.3 x 1.0 mm for enamel cloisons.
- Onyx: 20 x 10 x 2 mm rectangle, polished.
- Enamel: translucent opalescent white (medium expansion); counter-enamel for backside.
- Saw blades, drill bits (0.8–1.0 mm), needle files, emery papers (400–2000 grit).
- Hard/medium solder, flux, pickle; liver of sulfur (optional).
- Chain: 45–50 cm, slender but strong.
Layout and Piercing
- Draw a 38 mm semicircle. Divide its radius into five equal steps (each ~3 mm), adding vertical risers to create a sunburst fan with tiered edges.
- Trace to 1.0 mm silver, saw outer and inner steps, and refine with files. Keep the steps equidistant—measure often.
- Drill a centered bail hole or prepare a concealed bail slot behind the top step.
Onyx Seat and Bezel
- Cut a rectangular window in the fan’s lowest tier to showcase the onyx (leave a 1.0 mm rim for strength).
- Solder a 0.6 mm silver backplate under the window to become the onyx shelf.
- Form a low bezel strip to fit the onyx precisely; solder atop the shelf, flush with the frame’s rim.
Cloisonné Rays
- Solder a 0.6 mm silver bed behind the upper three tiers (separate from the onyx area) with small vents to release air during firing.
- Form straight fine-silver cloisons radiating from the pendant’s centerline to the outer curve, matching your step divisions.
- Apply thin coats of translucent white enamel into the cells, counter-enameling the reverse. Fire at manufacturer’s specs, stoning flat between firings.
Assembly and Finish
- Set the onyx by gently pushing the bezel evenly, then burnish.
- Apply selective patination to the recessed frame if desired; protect enamel with Kapton or care and wipe immediately if contact occurs.
- Polish raised planes to a mirror; matte the inner recesses for depth.
- Attach bail or solder a discreet loop behind the top step; thread chain.
Safety Notes
- Ventilation for enamel firing and patinas; wear eye protection.
- Neutralize and rinse after pickle and patina; keep steel away from pickle bath.
- Heat-manage: enamel and onyx do not enjoy thermal shock.
Advanced Details: Calibré Cuts, Invisible Hinges, and Edge Magic
The hallmark of museum-grade Deco is precision in micro-features. Add one or two of these elements as your skills grow.
Calibrated Stones
Channel-set slivers that wrap a curve define the era. If you lack access to commercial cuts, practice light lapidary: trim small rectangles from scrap quartz or lab corundum with a thin diamond blade, then lap to uniform height and width. The goal is consistency more than brilliance. Set them with modest undercuts and even pressure—notching the channel walls at exact intervals.
Invisible Hinges and Clasps
For bracelets or brooches, hide mechanics within stepped volumes. Build a box clasp that appears as the next architectural tier; cut reliefs to clear the tongue, and align springs so the profile remains uninterrupted. Record tolerances as you go—0.1 mm matters here.
Milgrain, Bright Cuts, and Micro-Contrast
Mellow a razor edge with a whisper of milgrain or a single bright-cut facet. Use a polished onglette graver to slice one reflective line along a border; stop at corners and restart to keep reflections crisp rather than smeared.
Surface and Color: Enamel Strategy and Alternatives
Because Deco loves crisp boundaries and bold, unified fields, color application must be planful. Whether you use glass or modern synthetics, aim for planar, bubble-free finishes that respect edges.
Vitreous Enamel Planning
- Expansion match: pair enamel to your alloy to minimize crazing; consult technical charts from producers.
- Layering order: transparent colors last for maximum sparkle; opaques first to establish body.
- Flatness: stone between firings on a dead-flat surface; avoid rounding cell walls.
- Backing: always counter-enamel large panels to balance stress.
Resin and Cold Inlay
- Use high-hardness epoxies with UV stability; pigment sparingly for deep saturation.
- Mask edges with tape or shellac; overfill slightly, then wet-sand to the same plane as the surrounding metal.
- Create faux guilloché by texturing the bed uniformly before pouring translucent resin.
Finishing, Wearability, and Care
A Deco jewel should feel engineered yet humane. The back must be as considered as the front; the wearer should never feel a corner, only intent.
- Edge management: break just the outermost arris with a fine rubber wheel; leave design edges crisp to the eye, gentle to the skin.
- Weight and balance: pendants should hang perpendicular to the chest; test with tape and adjust bail position.
- Surface hierarchy: declare one finish the hero (mirror or satin). Use the other as support, not competition.
- Care card: advise no ultrasonic cleaning for enamel or assembled stones; warm soapy water and soft brushes only.
Sustainable and Accessible Approaches
Deco’s ethos of clarity meshes well with mindful making. You can honor both the look and the planet without compromise.
- Metals: recycled silver and gold from reputable mills perform identically to virgin stock.
- Stones: lab-grown rubies, sapphires, and emeralds supply intense color at predictable sizes for channels and steps.
- Upcycling: reclaim onyx from vintage beads; slice into tiles for inlay.
- Modular design: develop a repeatable unit (e.g., a 6 x 3 mm bar) to build multiple pieces with near-zero scrap.
Troubleshooting and Common Pitfalls
- Wavy lines in pierced work: your saw is wandering—raise blade tension, cut slower, and support fully at the bench pin.
- Mismatched steps: check your grid and measure each riser; correct by filing the taller side, not both.
- Channel stones chipping: seat is too tight or bur left a burr; polish seats lightly and relieve pressure at corners.
- Enamel pitting: underfiring or contamination—clean thoroughly, sift finer, and fire a touch hotter.
- Patchy patina: metal not degreased; scotch-brite and detergent wash before dipping.
- Overbusy fronts: Deco thrives on restraint; remove one motif and expand negative space.
Inspiration Exercises and Practice Regimen
Skill grows fastest with small, repeatable challenges. Build muscle memory for clean lines and crisp corners; your future self will thank you.
- Chevron drills: saw and file ten identical 60° chevrons in brass; arrange them into a bracelet module.
- Stepped tiles: make five 12 x 12 mm stepped squares with 1 mm risers; experiment with polish/matte combinations.
- Color studies: enamel or resin three rectangles using only black, white, and one accent; compare emotional impact.
- One-stone gallery: design and fabricate a stepped gallery for a 6 x 4 mm baguette; aim for snug fit without glue.
Photographing and Presenting Your Deco Work
Presentation is part of the craft. Deco rewards controlled light and disciplined framing in photography, echoing its architectural soul.
- Background: matte neutral gray with one hard-edged prop (a cube or prism) to reinforce the geometric mood.
- Lighting: combine broad soft light with a narrow specular highlight to reveal polished steps without blowing them out.
- Angles: front elevation, side elevation, and a 45° three-quarter view; include a macro of edges or enamel cells.
- Story: pair images with a material list and a brief on inspiration (building, poster, or artifact) to contextualize your decisions.
Bringing It All Together
To craft Art Deco inspired jewelry by hand is to balance discipline with delight. You’ll lean on rigorous layout, repeatable tolerances, and focused contrasts, yet leave room for the human spark that machines cannot replicate. Favor declarative silhouettes over clutter, crisp junctions over fussy curves, and a palette that makes every decision legible at a glance. Whether you frame a sliver of jade in stepped silver, cast a fan brooch with opaline cells, or engineer a bracelet that snaps shut with an invisible seam, let the piece radiate purpose. The spirit of Deco isn’t just in its motifs; it lives in the integrity of your craftsmanship, the patience of your file strokes, and the rhythm of decisions that respect both time and touch. Hold fast to measured lines, curate your contrasts, and refine until the click of rightness arrives—then stop. Your jewel will do the rest.
As you continue, consider a compact checklist for each new design: Does the silhouette read from arm’s length? Are edges consistent and justified? Is the dialogue between metal and color balanced? Have you chosen one feature—the stepped frame, the enamel field, the stone’s cut—to lead, while the others support? With practice, these questions become second nature, and your bench becomes a small atelier where past and present meet. When in doubt, return to the fundamentals: clear proportion, honest materials, judicious texture, and a single strong idea. Everything else in Art Deco flows from that core.
For further growth, keep a sketchbook of recurring grids and modules, maintain a library of sample tiles for finishes and edge treatments, and revisit architectural references that continue to surprise you. Try adding a line of slender bar earrings with stepped onyx tips, a cuff with scalloped rays in champlevé, or a compact signet with a fan motif engraved and inked. Each project sharpens your eye and hand, drawing you deeper into the satisfying precision of Deco without losing the warmth of the bench. And remember to sprinkle in one stretch skill—maybe a first attempt at filigree within a strict frame, a neater milgrain border, or a small experiment with calibré tiles—so your practice keeps unfolding.
