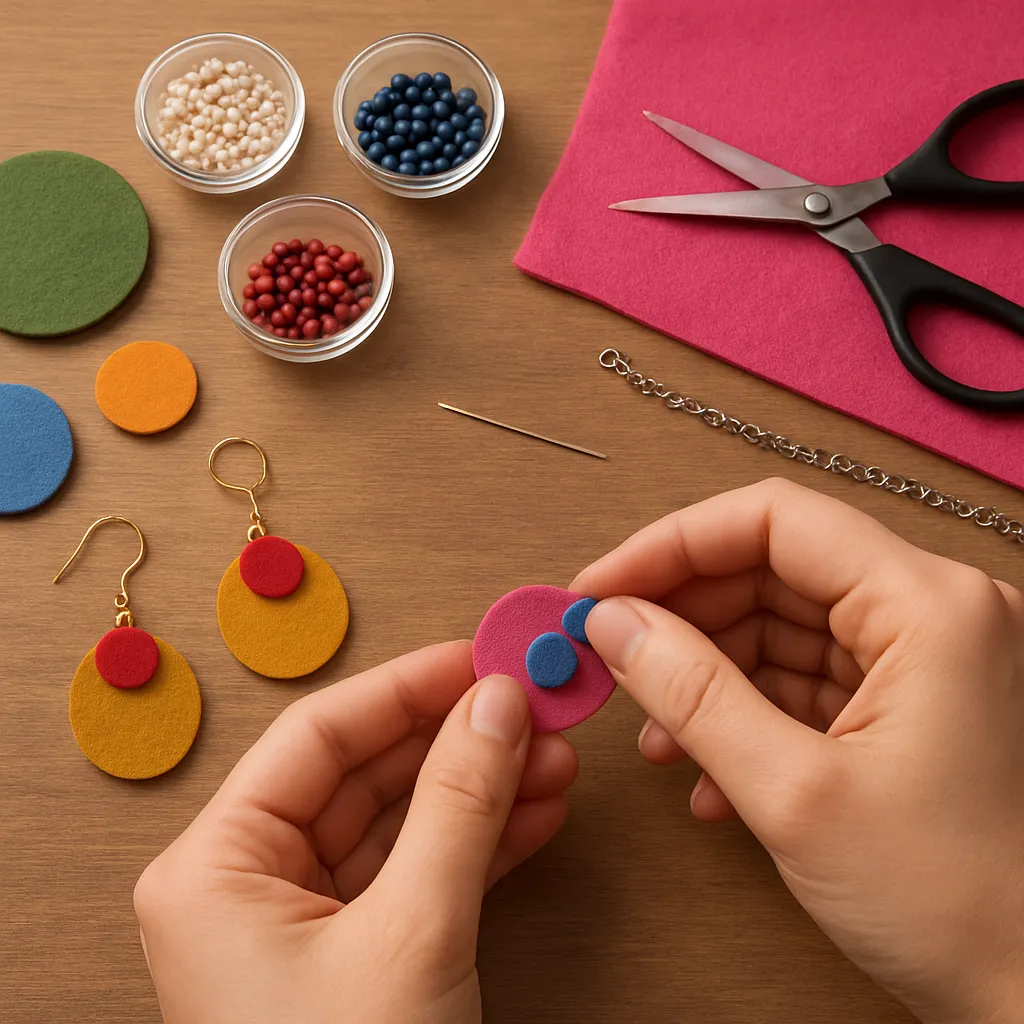
Felt jewelry marries softness with structure, offering a playful way to turn fiber into wearable art. It is approachable for complete beginners yet endlessly rich for experienced makers who enjoy sculpting forms, mixing fibers, and layering surface details. Lightweight, quiet against the skin, and forgiving to handle, felt is perfect for statement pieces that remain comfortable throughout the day. With simple tools, a small workspace, and a dash of patience, you can shape colorful components, join them with metal findings, embroider or bead the surface, and finish them into earrings, pendants, cuffs, brooches, and rings that look refined yet undeniably handmade.
Understanding Felt and Choosing Materials
Felt is a non-woven textile made by interlocking fibers. That interlocking can be done mechanically, with barbed tools, or chemically/thermally in industrial settings; for handcraft, you’ll mostly use wool fibers, water, soap, and motion, or specialized needles to tangle fibers. Pre-made felt sheets are also widely available and useful when you want crisp graphic shapes rather than sculptural forms.
Types of fibers and felt you may encounter include:
- Wool roving or tops: unspun fibers from sheep, often merino for fine surface, Corriedale for springy body, or blends with silk and plant fibers for shimmer and strength.
- Wool felt sheets: dense, pre-felted fabric in precise thicknesses (1–4 mm common). Choose high-wool content for cleaner cuts, better resilience, and easier stitching.
- Wool-blend felt: typically 20–60% wool mixed with rayon; it cuts nicely and is affordable but is less heat- and wear-resistant than pure wool.
- Synthetic felt (acrylic): inexpensive, bright colors, good for trials and kid-friendly projects, but it pills faster, melts under high heat, and doesn’t wet-felt.
When selecting materials, prioritize dense structure, even fiber distribution, and color saturation. Pinch and rub a corner—quality felt will resist thinning and tearing. If you plan to wash the finished piece, test for colorfastness by dabbing with warm soapy water on a scrap. For comfort and longevity, natural wool remains the gold standard for hand-felted jewelry, though blending in silk, ramie, or bamboo can add luster and drape.
Essential Tools and Findings
- Felting needles: sizes 38 (all-purpose), 36 (faster sculpting), and 40–42 (fine detailing). Protective finger guards and a dense foam pad or brush mat are strongly recommended.
- Wet-felting kit: warm water, mild soap, a spray bottle or ball brause, bubble wrap or bamboo mat for rolling, and a textured mat or shelf liner for controlled agitation.
- Cutting and shaping: precision scissors, craft knife or rotary cutter, circle cutters, leather punch for holes (1–4 mm), small awl, and metal ruler.
- Hand-sewing: sharps or milliners needles, beading needles, strong polyester or waxed linen thread, thimble, and beeswax block for conditioning.
- Jewelry hardware: earring hooks/studs, jump rings (4–8 mm), head and eye pins, chain, cord ends, crimps, lobster clasps, adjustable ring blanks, brooch bars, and magnetic clasps.
- Adhesives and finishes: a flexible fabric glue or contact cement for porous materials, PVA-based textile medium for edge sealing, and optional water-repellent spray for felt.
- Measurement aids: small calipers, soft tape, and a bench block with two pairs of pliers (chain-nose and round-nose) for opening/closing rings cleanly.
Core Techniques: Wet-Felting, Needle-Felting, and Sheet Construction
Wet-Felting Basics
Wet felting transforms loose fibers into solid forms using moisture, alkalinity, heat, and friction. Plan for some shrinkage—typically 25–40%—which you can harness to densify and harden pieces for jewelry.
- Layout: Tear fibers (don’t cut) into wisps and cross-layer them in perpendicular directions. For a small bead or pendant blank, start with a modest puff; for a cuff, build a layered sheet.
- Wet and soap: Mist warm water and add a light lather of soap. A gentle press settles fibers without shifting layout.
- Felt and full: Begin with slow circular rubbing under plastic or netting. As the fibers tangle, increase pressure, then roll the bundle in a mat 50–100 passes in multiple directions. Rinse and shock with hot-cold water to full and firm the structure.
- Shape and dry: Pinch edges, press curves over a dowel or spoon, and set forms to dry with good airflow.
To make hollow or podlike beads, employ a flat resist (thin plastic or heavy paper) between wool layers. Felt until the sides unite, trim a small opening, remove the resist, and continue fulling to shrink into a light, strong shell that can be threaded.
Needle-Felting for Sculptural Detail
Felting with a barbed needle is dry, precise, and perfect for tiny components or surface motifs. Repeated pokes drive barbs through the fibers, catching and entangling them. Start with a loose core ball, then consolidate by needling from multiple angles, rotating as you go to maintain symmetry. For petals, roll a tapered strip and needle-flatten the base while doming the tip. For flat inlays, lightly lay colored wisps onto a felt sheet and tack them in with shallow pokes to embed the design without piercing through the back.
Sheet Construction and Hybrid Methods
Pre-felted sheets shine when you want crisp geometrics and consistent thickness. Cut shapes with a fresh blade, punch clean holes for findings, and stabilize edges as needed. Hybrid approaches are common: needle-felt a motif onto a cut sheet, wet-felt it lightly to lock fibers, then stitch a backing for structure. For cords, roll a damp fiber rope under your palms until smooth, then full firmly; you can also core the rope with cotton cord for extra strength and predictable length.
Project Tutorials: From Simple to Sophisticated
Felt Bead Earrings (15–30 minutes)
Small spheres show off color and create delicate movement. They’re a classic first project that still looks gallery-ready when paired with tasteful metal caps.
- Materials: roving in two colors, warm soapy water, beading needle and strong thread, 4–6 mm metal bead caps, head pins, 5–6 mm jump rings, and earring hooks.
- Make beads: Wet-felt pea-sized balls, full them until firm, and let dry. Aim for 10–12 mm finished size. You can marble by layering wisps of the second color.
- Pierce: Use an awl to open a pilot hole straight through. Thread the head pin with a cap, bead, cap; bend, trim to 7–8 mm, and form a loop.
- Assemble: Attach loops to hooks with jump rings (opened by twisting, not pulling apart). Check that both earrings hang the same length.
Variation: Needle-felt petals and attach five around a central bead to create tiny blossoms that dangle from a single jump ring.
Geometric Sheet Earrings (30–45 minutes)
- Materials: 2–3 mm wool felt sheet, precision knife, leather punch (2–3 mm), small eyelets (optional), jump rings, and hooks.
- Cut: Stack two contrasting colors and cut diamonds, circles, or arches. Slightly round corners for comfort.
- Reinforce: Set a tiny eyelet in the hanging hole for crispness, or seal the hole’s edge with a dab of diluted PVA.
- Assemble: Layer shapes and connect with a jump ring for articulation. Keep weight balanced to prevent twisting.
Statement Pendant on Felt Cord (60–90 minutes)
- Form: Wet-felt a small flat ellipse (about 50 × 35 mm), then needle in a contrasting spiral or abstract motif on the surface.
- Full and finish: Wet the needled area, rub gently to lock fibers, then rinse and shape edges by pinching.
- Cord: Roll a 3–4 mm felt rope and full well. Leave 2 cm of untwisted fringe at each end for inserting into cord ends.
- Assembly: Punch a centered 3 mm hole at the top of the pendant, set a grommet if desired, and hang on the felt cord with a large jump ring. Add cord ends and a clasp.
Fitted Cuff Bracelet (90–120 minutes)
A felt cuff is featherlight yet bold. Controlled thickness and a smooth interior are the keys to comfort.
- Template: Measure your wrist snugly, add 1 cm for ease, and create a paper pattern. Plan for 25–30% shrinkage in length and width.
- Layout: Cross-layer fibers to the pattern, three to four layers for roughly 3 mm final thickness. Add a thin strip of silk or cheesecloth inside for anti-stretch reinforcement if you like.
- Wet-felt and full: Focus on even pressure. Check shrinkage against the pattern; stop when the cuff is dense yet slightly flexible.
- Closure: Mark a 15–20 mm overlap. Stitch on low-profile snaps or set a Chicago screw. Round the corners and seal edges with light PVA if the felt is especially open.
Surface options include needle-felted motifs, line embroidery, or bead clusters at the outer edge to catch the light without snagging sleeves.
Brooch and Ring Set (60–90 minutes)
- Cabochon: Needle-felt a domed disk for the ring top (about 18–22 mm) and a larger bloom or abstract form for the brooch (35–50 mm).
- Backings: Cut a clean circle from sheet felt for each. Ladder-stitch the dome to its backing with nearly invisible bites.
- Hardware: Glue a ring blank pad to the backing with a thin, even layer; for the brooch, stitch or glue a bar pin. Allow full cure time before wear.
Hair Ornaments and Headbands (45–75 minutes)
Flat or low-relief shapes are best to avoid tangling. Mount them to wrapped headbands or alligator clips.
- Create: Cut layered leaves or needle-felt a low-relief rosette.
- Reinforce: Stitch a matching backing with a wide bridge of felt that the clip can pass through; this reduces stress on a single point.
- Attach: Slide in the clip or stitch to a headband; secure with a few hidden tacks so the ornament can be removed for washing or restyling.
Surface Decoration, Structure, and Finishing
Jewelry lives in the intimate zone of daily movement, so surface and structure matter. Plan details that bring tactile interest without catching on hair or clothing.
Embroidery
Short, dense stitches emphasize contours; longer lines can cut across forms to elongate or slim a silhouette. Backstitch outlines, chain stitch vines, satin stitch fills, and tiny French knots are classics. Condition thread with beeswax to minimize tangles and add light water resistance. Consider couching metallic threads for shimmer without stiffening the felt.
Beads and Mixed Media
Seed beads, crystals, and metal spacers punctuate the matte fiber surface. Stitch beads with a beading needle through stabilized felt or add a hidden backing layer for strength. Wooden or ceramic elements add warmth; lightweight resin elements keep scale without weight. Keep the profile smooth on ear and wrist pieces for comfort.
Appliqué, Inlay, and Cutwork
- Appliqué: Layer thin felt shapes and secure with tiny edge stitches. The soft edge reads refined if your cuts are crisp.
- Inlay: Cut a motif from the base, slot in a contrasting piece of the same size, and stitch the seam invisibly; this keeps thickness even.
- Cutwork: Pierce windows with a punch, then oversew the rim for clean definition and strength.
Edge and Surface Sealing
Strategic sealing prolongs durability while preserving hand. Brush a very thin textile-medium wash along cuffs’ edges and in earring holes. Avoid stiff, glossy varnishes that defeat felt’s hand. For pendants and cuffs, a light water-repellent spray adds stain resistance; always test on scrap first.
Comfort and Metalwork Tips
- Open jump rings by twisting sideways with two pliers, then twist back for a tight seam.
- Use wire guardians or bead tips where thread meets metal for longevity.
- Choose nickel-free findings and smooth any burrs that might catch on fibers or skin.
Design Principles, Ergonomics, and Personal Style
Good design begins with the wearer. Felt allows big shapes without weight, but scale still needs balance with the body’s proportions. For earrings, consider how pieces move; components that hinge at the lobe will swing and draw the eye. For necklaces, center of mass and drape matter—felt cords won’t behave like chain, so test length on a form. For cuffs, contour to the wrist and keep closures low profile. Aim for graceful curves near the body and bolder forms farther away (pendant ends, outer edges of brooches) where they won’t rub.
Color is felt’s playground. High-contrast palettes read graphic; analogous hues give depth; complementary pops energize neutrals. If you layer translucent fibers, subtle optical mixing occurs, creating nuanced texture that’s hard to achieve with paint alone. Consider the wardrobe context: a deep, saturated pendant can anchor a simple outfit; a soft, tonal cuff complements patterned textiles without competing.
Finally, iterate. Work in families—three related pairs of earrings with swapped layers, or a brooch and ring sharing a motif—so you refine proportions and techniques while building a cohesive mini-collection.
Care, Repairs, and Troubleshooting
Routine Care
- Cleaning: Spot clean with a damp cloth and a drop of wool wash. Avoid soaking metal findings. Pat dry in shape.
- De-pilling: Use a sweater comb or a piece of hook-and-loop (loop side) gently to lift pills without fuzzing the surface.
- Storage: Keep flat in breathable pouches; add cedar or lavender against moths. Separate metal chains to prevent impressions on felt.
Repairs
- Reshape: Steam lightly and press over a curved form (spoon, dowel) to restore domes and cuffs.
- Re-densify: A few careful needle pokes will tighten a fuzzy edge or reinforce a pierced hole.
- Hardware: If a jump ring opens, replace rather than rebend repeatedly. For delaminated glued parts, scrape old glue, reapply sparingly, and clamp softly.
Common Issues and Fixes
- Droopy earrings: Either shorten the stack or switch to a lighter center; consider adding a small, rigid spacer bead.
- Warping cuffs: Under-fulled felt will stretch; continue fulling in hot-cold cycles until dense, or stitch in a hidden stabilizer strip.
- Fraying holes: Punch, then seal edges or add eyelets. For thick felt, stitch a tight buttonhole around the rim.
- Metal sensitivity: Use surgical steel, niobium, or titanium hooks for a more hypoallergenic option.
Sourcing, Ethics, and Studio Practices
Thoughtful sourcing elevates both quality and conscience. Seek mulesing-free merino, traceable farm fiber, and OEKO-TEX dyes where possible. Explore recycled felt made from post-consumer textiles, and upcycle fulled thrifted sweaters into richly colored sheets. Efficient nesting of patterns on felt sheets reduces waste; the slivers you do create are excellent for marled cores or inlay details. Beyond materials, good ventilation during gluing and a tidy workflow protect your health and keep fibers clean.
Felt’s link to sustainability is strong: it’s long-wearing, repairable, and requires low-energy tools. Pair it with durable, recyclable metal findings and minimal packaging to complete the circle.
Taking It Further: Advanced Forms and Techniques
Hollow Pods, Bells, and Beads with Resists
Resist work opens a world of lightweight volume. Cut a plastic oval slightly smaller than your desired finished size plus expected shrinkage. Lay fibers on both sides, felt until the edges fuse, then slice a small aperture to remove the resist. Continue fulling; the form will firm up while shrinking around the void, yielding airy components that don’t drag on the ear.
Nuno and Entrapment
Nuno felting bonds wool to a gauzy fabric (silk chiffon, scrim) to create a tough, thin laminate ideal for pendant blanks and sleek cuffs. Capture fragments of lace, organza, or even metallic mesh within the surface layer for subtle glint without bulk.
Armatures and Sculptural Stability
For structured collars and rings that keep their curve, embed thin spring wire or a pre-formed brass blank along an interior layer while wet-felting. Fully encased metal won’t snag and gives crisp lines. Seal exit points where hardware emerges with a few extra fibers and controlled fulling.
Laser and Die Cutting
If you have access to a craft laser or steel-rule dies, you can mass-cut flawless shapes from dense wool sheets. After cutting, lightly brush char from laser edges and air out to remove odor. Combine precise shapes with hand-needled gradients to balance machine perfection and human touch.
Professional Polish
- Consistent pairs: Use templates and calipers to match earring components within 0.5 mm.
- Hang tests: Suspend finished pieces for an hour to ensure they sit correctly; adjust loops and weights before final photography or gifting.
- Edge logic: Decide which edges get stitched, sealed, or left soft; consistency across a collection signals intent.
Inspiration, Composition, and Storytelling
Let a single constraint guide a whole series—circle-only forms, a three-hue palette, or a botanical theme translated into abstract silhouettes. Document each iteration with quick sketches and swatches of felted samples; they become a visual vocabulary you can revisit. Consider cultural motifs respectfully and research meanings before stylizing them into wearable forms. Jewelry invites touch and conversation; a note about your process, fiber origin, or dye method adds context and deepens connection with the wearer.
Safety, Comfort, and Quality Benchmarks
- Weight and movement: Keep single-earring assemblies under 6–8 g for comfort unless balanced with large hooks or cuffs.
- Skin contact zones: Smooth, stitched edges against the skin; reserve beads and sharp hardware for outward faces.
- Magnet caution: If you use magnetic brooch backs or clasps, advise wearers with medical devices to avoid them.
- Testing: Tug-test every connection point and flex-test cuffs 20–30 times before release or wear to check assembly integrity.
Glossary and Quick Reference
- Fulling: The stage after initial felting when heat, moisture, and agitation compact fibers to maximum density.
- Resist: A removable barrier (plastic/paper) used to create hollow forms or layers that don’t initially bond.
- Z direction: Fiber depth; adding or compressing fibers along this axis thickens or thins a piece without changing its footprint.
- Hand: The tactile feel and drape of a textile; with felt jewelry, you’re aiming for smoothness at skin points and sculptural resilience elsewhere.
- Findings: Metal components—hooks, rings, clasps—that connect jewelry parts.
Checklist for a Confident Finish
- Are edges clean and intentional—soft, stitched, or sealed where appropriate?
- Do pairs match in size, weight, and hang?
- Is the surface free of lint and stray fibers after de-pilling?
- Are all jump rings properly closed, knots secured, and glues fully cured?
- Does the piece feel comfortable on the intended body zone when worn for at least 10 minutes?
Closing Thoughts
Felt jewelry rewards curiosity. Each pass of the hand bonds fibers, sculpts silhouette, and builds a quiet resilience that welcomes daily wear. Start with a handful of colors, master a few forms, and let your practice evolve—from simple spheres to layered cuffs, from crisp sheet geometry to ethereal nuno laminates. As you refine your technique, don’t forget to celebrate the qualities that make felt special: its softness, sculptability, and readiness to carry subtle embellishments without noise. With patience and play, you’ll craft pieces that look polished, feel good, and tell a tactile story every time they’re worn.
