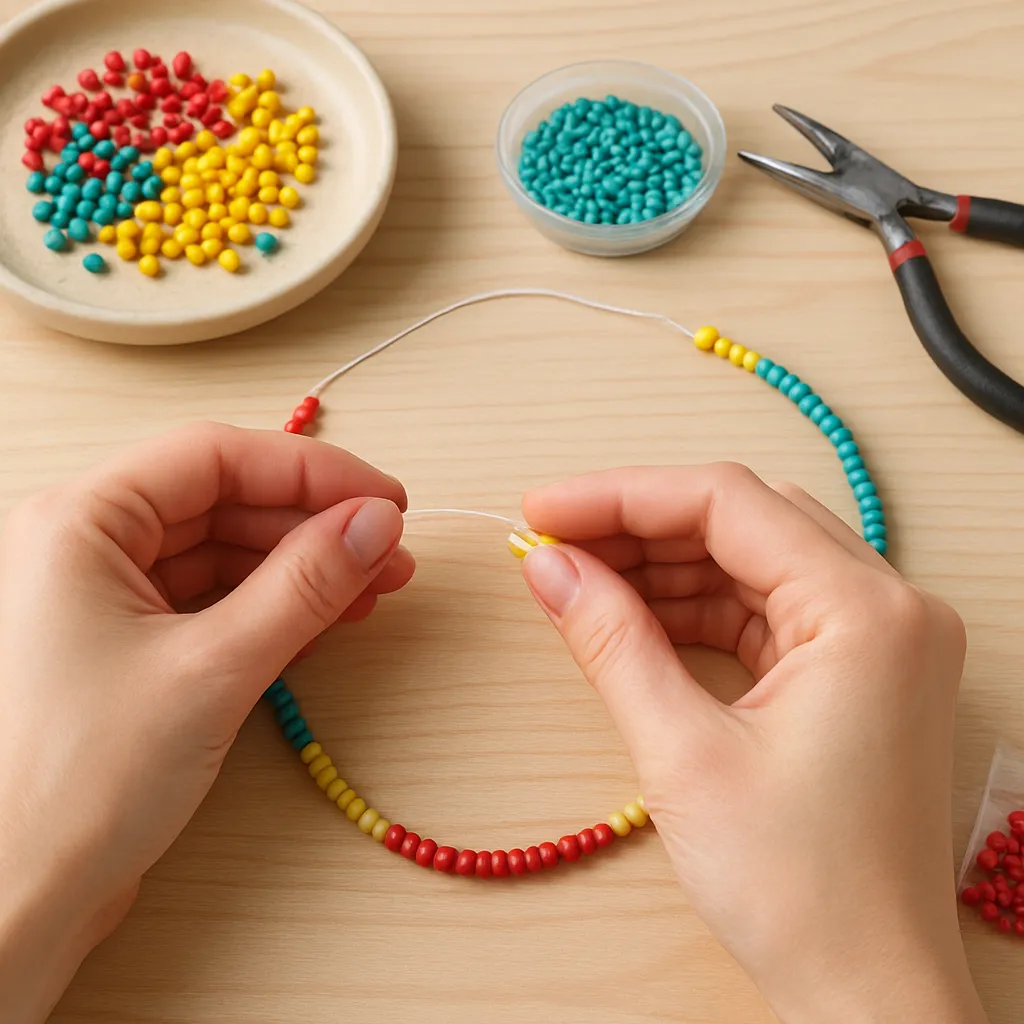
DIY color-blocked beaded jewelry unites the clarity of graphic design with the meditative rhythm of handwork. Unlike patterned beadwork that interweaves many motifs, color-blocking focuses on clean zones of hue placed edge to edge, letting form and shade set the tone. The result can be minimal or exuberant, sculptural or soft, but it is always intentional. This guide bridges aesthetic strategy with practical technique so you can conceive, build, and finish pieces that feel contemporary, wearable, and deeply personal.
Why Color-Blocked Beaded Jewelry Captivates
Color-blocking grew from modernist painting, textile experiments, and mid-century fashion. Think crisp rectangles, decisive diagonals, and confident stripes that celebrate color in its own right, unburdened by figurative imagery. Transposed to beading, these blocks become tactile planes that catch light differently depending on bead material and surface: matte seed beads yield velvety areas; faceted crystal creates gleaming facets; ceramic or wooden beads offer a grounded, organic counterpoint.
What makes color-blocked pieces engaging is the way planes of color negotiate space on a small canvas. A necklace might anchor a saturated swath at the collarbone and balance it with a quiet neutral at the clasp. Earrings can frame the face using vertical bands that emphasize length or horizontal tiers that spotlight cheekbones. Because beaded construction is modular, it naturally suits iterative experimentation—shift ten beads from one block to another and the mood of the whole piece can change from playful to poised.
There is also a pleasing dialogue between order and spontaneity. A deliberate block boundary reads like a graphic line, but each bead is a tiny unit that introduces nuance, reflection, and shadow. Lean into this duality. Use the language of color-blocking to establish structure, then let the materials speak through texture and light.
Materials, Tools, and Sourcing
Before sketching a design, familiarize yourself with core materials and how they affect both build and wear.
Beads and Surfaces
- Seed beads: Size 8/0 and 11/0 are versatile for loom and off-loom stitches. Cylindrical types create crisp block edges; rounded types feel softer.
- Pressed glass and crystal: Provide sparkle; use sparingly within blocks to avoid visual noise unless aiming for a luxe, light-catching field.
- Gemstones: Offer natural variation; great for earthy blocks or statement centers. Drill quality varies—inspect holes for clean edges.
- Heishi and vinyl: Flat discs create strong graphic stripes and are lightweight for larger blocks on earrings and necklaces.
- Wood and ceramic: Warm and tactile; useful to ground a high-chroma scheme.
- Polymer clay beads: Customizable hues and sizes let you fine-tune block dimensions and color.
Stringing and Weaving Media
- Beading wire (7–49 strand): Flexible for necklaces and bracelets; excellent for crisp linear blocks with consistent drape.
- Nylon thread or gel-spun fiber: Ideal for seed-bead weaving and loom work; strong with minimal stretch.
- Silk or poly-silk cord: For knotted designs with pearls or larger beads; knots create visual separators between blocks.
- Elastic cord: Suitable for simple block bracelets; choose premium elastic and pre-stretch before stringing.
Findings and Components
- Clasps: Toggle for ease; lobster for security; magnetic for seamless lines in minimal designs.
- Jump rings and split rings: Connect components; consider soldered rings for heavy pieces.
- Crimps and covers: Anchor beading wire; covers can appear as decorative beads at block ends.
- Ear wires and posts: Hypoallergenic options expand wearability.
Tools
- Flat- and chain-nose pliers, round-nose pliers, and flush cutters.
- Crimping tool matched to crimp size; awl for tightening weaves.
- Beading needles, thread conditioner, scissors, thread burner.
- Bead board with measurement channels and cups for block planning.
- Small ruler or calipers for counting beads per centimeter.
Sourcing affects aesthetics and ethics alike. When possible, choose vendors that disclose glass origins, gemstone treatments, and metal alloys. Reclaimed beads from broken jewelry or thrifted strands lend history and reduce waste, supporting project sustainability.
Planning Your Color-Blocked Design
All great color-blocked jewelry begins with a plan that respects color, scale, and human comfort. Gather swatches, lay out beads on a neutral surface, and photograph combinations in daylight to check for unexpected shifts.
Color Theory in Practice
Define a focused palette of three to five hues. Limiting choices boosts clarity. Decide what role each color plays: anchor, accent, bridge, or neutral. Consider complementary pairs for maximum contrast (e.g., teal and coral), analogous sets for calm transitions (e.g., lime, chartreuse, olive), and a single unexpected note that adds tension without chaos.
Value (lightness/darkness) and saturation (intensity) matter as much as hue. A pale block next to a dark block feels architectural; two mid-value colors may blend visually. Metallics read as values too—antique brass sits mid-dark, while brushed silver reads mid-light. Use these as neutrals that still reflect light.
Composition and Structure
Blocks can be uniform or asymmetrical. Decide early on whether your design relies on symmetry or deliberate imbalance. Symmetric bracelets and necklaces prioritize wearability and ease of pairing. Asymmetric earrings can feel artful if they share echoes—matching widths, recurring spacer beads, or a mirrored proportion.
Sketch several layouts and annotate bead counts and block widths. Keep an eye on proportions: On small wrists, a 30 mm block can dominate; on a long neck, slender vertical blocks elongate. Test with a paper mock-up cut to measured widths and lengths to visualize how the piece will sit on the body.
Measuring and Sizing
Accurate sizing keeps blocks aligned where you intend them to fall. Measure the wrist or neck, then account for bulk from beads and findings. Larger beads consume internal length, so you may reduce string length to maintain true fit.
Quick sizing formula: Target length = body circumference + allowance. Allowance typically equals average bead diameter × 0.6 for snug bracelets, or × 1.0 for relaxed styles, plus clasp length. Use a test strand with similar bead sizes to dial in the allowance.
Planning Boundaries and Transitions
Clean boundaries are the hallmark of color-blocking. You can create hard edges by switching bead type, inserting a spacer, or using a crimp cover as a visual line. You can also blur edges intentionally with a tiny two-bead bridge that repeats at each transition to unify a set.
Techniques for Crisp Blocks
Stringing on Beading Wire
Best for linear designs with beads 2–10 mm. Build the piece from the center outward to maintain symmetry if desired. To secure blocks, place tiny metal spacers or seed beads at boundaries for a crisp visual stop. Use double crimps at the clasp for strength on heavy designs.
Loom Weaving
A loom gives unparalleled straight lines. Map each row on graph paper or software by color. Keep tension even; uneven tension causes curved edges. For finishing, weave tails back through several rows and add a sewn clasp bar or slide-on ribbon crimps that match the block widths.
Off-Loom Peyote or Brick Stitch
These stitches produce precise edges and are perfect for earrings and pendants. Flat even-count peyote creates checkerboard-style planes; switch colors row by row for crisp blocks. Brick stitch allows stepped edges and diagonal block boundaries.
Wirework Frames
Use square or half-round wire to build a rectangular or geometric frame, then wrap or stitch beads as filled blocks within. Frames emphasize lines, making color-blocking extra graphic. Hammer lightly to work-harden the frame without flattening too much.
Knotting Between Larger Beads
Silk or poly cord knots create deliberate spacing. A knot can read as a fine boundary line between blocks of contrasting beads. Maintain consistent knot size, and use bead tips or clamshells for a tidy clasp connection.
Two Starter Projects
Project A: Three-Block Everyday Bracelet
Concept: A neutral–color–neutral sandwich that works with many outfits.
- Materials: Size 6/0 seed beads in soft gray, saturated teal, and soft gray; 0.46 mm beading wire; 2 crimps; 2 crimp covers; small lobster clasp; 2 wire guardians; 2 jump rings; 2 tiny round spacers.
- Plan: Gray 30 mm, Teal 40 mm, Gray 30 mm on a 165 mm wrist with a 15 mm clasp.
- Steps:
- Cut 25 cm of beading wire; add a crimp, wire guardian, and clasp. Loop back and crimp; add a crimp cover.
- String 1 spacer, all gray beads for the first block, 1 spacer, all teal beads, 1 spacer, remaining gray beads, 1 spacer.
- Add the jump ring and crimp on the other end; cover the crimp. Check fit and adjust bead counts if needed.
- Roll the strand between your palms to settle beads and align spacers as clean boundaries.
- Notes: Use a caliper to determine how many seed beads equal 10 mm; multiply to hit each block length precisely.
Project B: Stacked-Block Fringe Earrings
Concept: Two stacked blocks with a slim gold line between them, finishing in a short fringe echoing the top color.
- Materials: Cylinder seed beads in mustard and midnight, 10 small gold-plated spacers, beading thread, size 12 needle, two earring posts with flat pads, jewelry-grade adhesive.
- Plan: Top block mustard, bottom block midnight, separated by a single spacer column. Fringe repeats mustard.
- Steps:
- Weave a flat brick-stitch rectangle in mustard. Edge-stitch to tidy the perimeter.
- Add a single column of spacers using a ladder stitch, then brick-stitch a rectangle in midnight beneath.
- Attach short fringe (5–8 beads each) to the bottom edge in mustard for rhythmic movement.
- Back the beadwork with a thin felt or ultrasuede piece for comfort, then glue onto earring pads and cure fully.
- Notes: Keep the spacer column consistent to avoid twisting. Pair the set by mirroring the order or swapping colors left to right.
Advanced Ideas to Expand Your Practice
Gradient blocks: Create ombré within a single block by grouping three values of the same hue. The block still reads as one color from a distance but reveals depth up close.
Negative space: Use transparent beads over a colored backing thread or memory wire to let skin or clothing read as a block. This keeps large designs lightweight.
Inset geometry: Frame a small contrasting square inside a larger block for a nested effect. Keep the frame color in two or more places to unify the composition.
Modular connectors: Build individual beaded bars as blocks and join them with jump rings. You can rearrange order and swap colors depending on mood.
Reversible pieces: On loom or peyote, weave a block in matte beads on one face and luster beads on the reverse. Flip for daytime versus evening polish.
Finishing, Fit, and Longevity
Great finishes elevate perceived craftsmanship. Hide thread tails neatly, match metal tones across components, and deburr wire cuts. For beading wire, use wire guardians to prevent abrasion; for woven work, reinforce edges with a final stitch pass. Test all crimps by pulling with firm, steady pressure. If you see gaps within a block after stringing, massage the beads by rolling the piece between your palms, then add or remove a bead to remove slack before final crimping.
Comfort determines whether pieces are worn often. Check that block transitions do not dig into the skin and that heavy sections are balanced. Counterweight asymmetric earrings to prevent tilting. Consider lightweight materials for larger blocks placed high on the chest.
Longevity is a combination of design and materials. Stainless or gold-filled findings add durability when abrasion or moisture is expected. For bead-woven items, a double pass along the outermost rows safeguards edges that take the most friction. When cutting threads, a micro thread burner seals with precision and reduces fray.
Troubleshooting and Best Practices
- Blocks drifting off-center on a necklace: Recalculate clasp length and bead bulk; move one bead from the longer side to the shorter and rebalance spacers.
- Loom edges curving inward: Increase warp tension evenly and check that weft rows are tapped into place without overpacking.
- Elastic bracelet loosening: Pre-stretch cord, tie a surgeon’s knot plus a half-hitch, dot with flexible adhesive, and hide the knot inside a large-holed bead.
- Color bleeding or rub-off: Test bead colorfastness by soaking a sample; avoid alcohol on coated beads and store away from chemicals.
- Uneven block boundaries in peyote: Use cylinder beads for edges and switch to rounded only inside blocks; add a final edge stitch for a tight outline.
Care, Styling, and Gifting
Store pieces flat to protect block lines from kinks. Keep away from perfumes and hairspray, which can cloud finishes. Wipe with a soft cloth after wear; for metal findings, use appropriate polishing cloths but avoid harsh dips near porous stones or dyed beads.
Styling is about echo and contrast. Pair vivid blocks with neutral clothing to let the jewelry speak, or mirror a color from a print to create cohesion. Layering works when widths vary: a slender color-blocked choker above a medium pendant, followed by a long chain, creates a satisfying vertical rhythm. For gifting, include a card that sketches the color story and care tips; this adds perceived value and helps the recipient remember your creative intent.
Sustainable and Ethical Making
Thoughtful sourcing turns craft into stewardship. Upcycle vintage glass strands, repurpose broken pieces into new blocks, and choose recycled metals for findings when possible. Map your supply chain: ask vendors about labor standards and alloy contents. Small actions—like buying locally made ceramic beads or supporting social enterprises producing seed beads—compound into meaningful impact. Designing for repair also supports versatility: choose modular structures so you or your client can swap a worn clasp, replace a block, or update colors without discarding the whole piece.
Pricing, Selling, and Storytelling
Color-blocked designs can be photographed beautifully on matte backgrounds with directional light to emphasize edges and texture. Show both the overall silhouette and close-ups of transitions. When pricing, factor materials, time, studio overhead, and design development. Limited color runs signal scarcity and collectibility. Write product notes that explain your color logic—why a warm neutral steadies a bold central hue, how the blocks frame the collarbone—so buyers can imagine the piece on themselves.
Comfort disclosures build trust: note weights of earrings, metal types, and closure styles. For markets and pop-ups, display bead swatches and sketches to invite conversation. Many customers fall in love with the design story as much as with the finished item.
Design Prompts to Spark New Work
- Use three values of one hue to make a monochrome piece where separation relies on value, not hue.
- Translate a cityscape at dusk into blocks: concrete gray, window gold, sky cobalt, street charcoal.
- Build a seasonal capsule: four bracelets sharing a neutral block but swapping the accent block each season.
- Create sister earrings: related but not identical, sharing one block but reversing the other two.
- Design for motion: blocks on flexible fringe that align at rest but separate as you move.
From Idea to Heirloom
Beaded color-blocking rewards patience and curiosity. Start with a small project to master boundaries and counting, then scale up to complex compositions. Keep a swatch library—a strand or square for each color pairing and bead finish. Over time, your eye becomes honed to subtle temperature shifts and value steps, and your hands develop the steady rhythm that underpins clean joins and resilient builds. Honor both aesthetics and engineering, and each finished piece becomes a study in clarity—blocks that invite the gaze to travel, rest, and return.
Above all, let material and method guide one another. Respect the grid of a loom when you want geometry; choose soft stringing and knots when you want flow. Embrace a limited scheme to heighten focus, then add a single unexpected turn. With practice, you will find elegant solutions to every constraint, and your jewelry will carry the quiet authority of thoughtful design, realized with care and intention.
As you continue, revisit the fundamentals—composition, symmetry, measured proportions, and fine finishing—while allowing your sense of play to roam. Whether you craft for yourself, for loved ones, or for a wider audience, color-blocked beaded jewelry offers endless space to experiment, refine, and express. The harmony you build bead by bead will reflect not only your choices of hue and line but also the calm satisfaction of work done with attention and heart.
