Few handmade arts feel as immediate and personal as turning a found crystal and a length of wire into a pendant that lives close to the heart. Wire wrapping asks little to begin—some pliers, a coil of metal, a stone—and rewards curiosity with forms that are at once protective, expressive, and timeless. More than decoration, a wrapped crystal becomes a record of your hands and decisions: every curve, twist, and pause visible to the eye. It’s a practice that builds patience, touch, and precision while offering meditative focus and portable beauty. Whether your goal is gifts, a side business, or simply mindful play, this beginner’s path will carry you from first wraps to confident, repeatable results grounded in traditional handcraft.
What Wire Wrapping Is—and Why Crystals Make It Special
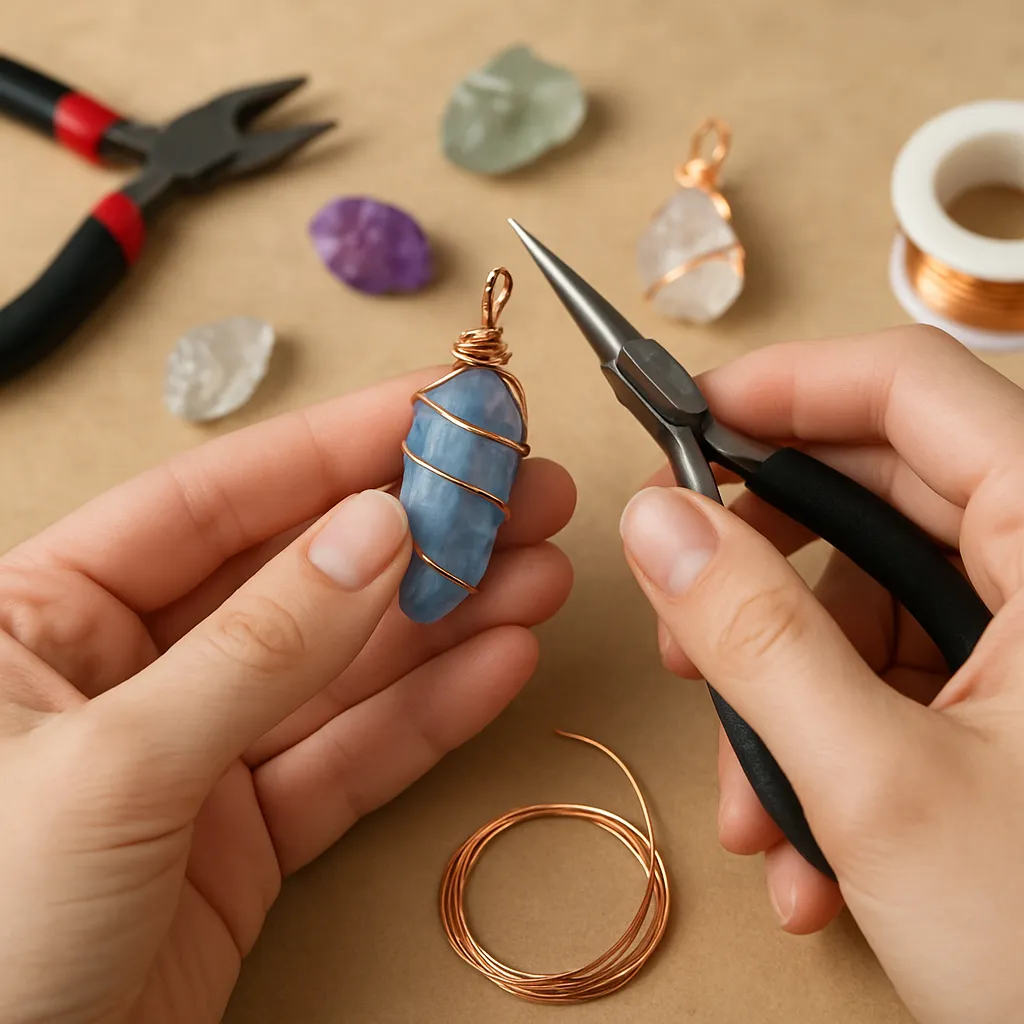
Wire wrapping is the art of encasing and securing an object—here, a crystal—using only wire, pressure, and mechanical locks formed by twists, coils, and structural frames. Unlike soldered jewelry, there is no torch and no melting; the design is constructed cold with hand tools. The method predates the bench jeweler’s studio: ancient examples feature spiraled gold and hammered copper forming bezels for stones long before widespread solder use. Today, it remains approachable precisely because it relies on simple tools and direct manipulation.
Crystals offer unique challenges and opportunities. Their edges, cleavage planes, and irregular geometries require solutions that adapt rather than force conformity. A point of quartz, a tumbled amethyst, and a flat opal cabochon each demand different strategies. This variety trains your eye to read forms and pick a wire path that is both secure and elegant. For many makers, the stone “tells” the design: a ridge becomes an anchor, a natural curve suggests a bail, a tiny pit becomes the perfect seat for a prong.
Another reason crystals pair beautifully with wire is weight and balance. Wire provides structure with minimal mass, letting light travel through transparent stones and across facets. It can create negative space that emphasizes the crystal instead of burying it. The technique also respects stones sensitive to heat or chemicals, since wrapping avoids high temperatures and harsh processes.
In the broader culture of handcraft, wire wrapping sits at the intersection of metalwork and textile thinking—your wraps become “stitches,” your weaves “fabrics,” your frames “looms.” Developing skill means learning when to add, when to subtract, and how to let the material reflect your growing craftsmanship. The pleasure is real: you’ll feel it the moment a clean bail forms or a wrap clicks into the perfect notch on the stone.
Building a Beginner’s Kit: Tools, Materials, and Safety
Essential Tools
- Chain-nose pliers (smooth jaw): Your general-purpose tool for gripping, angling, and pressing. Smooth jaws help prevent marring.
- Round-nose pliers: For forming loops, bails, and smooth radii. The tapered profile allows different loop sizes.
- Flush cutters: Choose a quality pair; neat, clean cuts reduce filing work and snagging.
- Nylon-jaw pliers: For straightening and work-hardening without scratching. They also help tame coil memory.
- Needle files or a cup bur: Deburr cut ends so they don’t catch on fabric or skin.
- Ruler and scribe or fine marker: Measuring wire lengths improves repeatability.
- Mandrels: A pen, knitting needle, or dedicated mandrel helps create consistent coils and bails.
- Polishing cloth: For quick shine and gentle cleanup after finishing.
Wires You Can Trust
- Copper: Affordable, forgiving, and beautiful with or without a dark finish. Ideal for learning and prototyping.
- Brass: Slightly stiffer; yellow gold look on a budget. Good for structural frames.
- Silver-filled or sterling silver: Noble luster, excellent workability, and professional finish. Costs more but sells well.
- Stainless or craft wire (coated): Holds shape but can be hard on tools and fingers; use after building control.
- Artistic aluminum: Very soft and colorful; great for practice or playful designs but less wear-resistant.
Crystals and Stones
- Cabochons (flat back, domed front): Easiest for bezel-style wraps due to predictable geometry.
- Points (terminated crystals like quartz): Natural ridges and tips give clear anchor points.
- Tumbled stones: Smooth, irregular shapes push you to develop custom cages and tension locks.
- Raw chunks and druzy: Textured surfaces offer micro-grips but require careful placement to avoid scratches.
Findings and Consumables
- Jump rings: Connect pendants to chains; close them properly to avoid gaps.
- Chains or cords: Leather, waxed cotton, or metal chains complement different styles.
- Tape and microfiber cloth: Protect fragile surfaces while you test-fit wire.
Safety Basics
Safety first: Wear eye protection when cutting wire, keep your workspace well lit, and capture small offcuts in a dish. Avoid deep tool marks on wire that can create stress points and eventually crack. If using patinas or polishes, ventilate your space and follow product guidance.
Wire Types, Hardness, and How to Choose the Right Size
In wire wrapping, size means gauge: the smaller the number, the thicker the wire. For most pendants, frames live in the 18–22 gauge range; binds and weaves use 24–30 gauge. Thicker wires (14–16) make strong frames or heavy bails for large stones, while thinner wires (28–32) allow intricate weaves and decorative stitching.
Hardness describes how a wire behaves. Dead-soft bends easily and is friendly for beginners, especially when training your hands to make smooth curves. Half-hard holds shape more firmly but requires confident plier work to avoid kinks. Spring-hard (rare in craft shops) is excellent for clasps or when you need a snap-back feel, but it’s demanding to control.
Different metals have different malleability. Copper moves readily, silver is buttery and predictable, and brass resists slightly with a snappy feel. Heat treatments and historical methods, such as annealing, change hardness by relaxing internal structure. While torches are not necessary for beginners, understanding that repeated bending increases stiffness (work hardening) helps you plan: do most shaping early, and avoid unnecessary re-bends. The right choice balances look, handling, and final durability.
Reading Crystals: Shapes, Features, and Strategic Anchors
Every stone offers cues. Practice orienting it in your palm and notice:
- Natural notches or grooves: Perfect for capturing a wire cross-over without slipping.
- High points and flats: High points invite decorative arcs; flats become hidden seats for structure.
- Center of gravity: Spin the stone between fingers; find the balance point so the pendant hangs straight.
- Surface hardness and fragility: Quartz tolerates more pressure than softer calcite or fluorite; adjust force.
For cabochons, the dome height and edge taper decide how much wire is needed in a bezel-like wrap. For points, consider whether you want the termination up or down; a top termination points upward like a wand, while a downward termination suggests a sleek spearhead. For tumbled stones, think in terms of three “belts”: one central belt that encircles the stone’s widest point, and two cross-belts that lock vertical movement. You can combine belts into subtle S-curves or bold X-frames.
Core Techniques: Loops, Bails, Coils, and Tension
Mastering a few fundamental moves will unlock most designs:
- Clean cuts and deburring: A crisp, flush cut finishes beautifully. Smooth ends with a file or cup bur.
- Right-angle bends: Establish crisp corners where frames turn; use chain-nose pliers for control.
- Loops and bails: Form with round-nose pliers in two motions—pre-curve, then close—so the loop stays round.
- Coils and wraps: Wrap bind wire steadily, each turn snug against the last. Consistency shows control.
- Weaving basics: Ladder weaves, figure-eight weaves, and basket weaves add texture and function as strong bindings.
- Prongs and claws: Gentle arcs that press onto the stone; prongs should seat on stable planes, not sharp ridges.
- Cages: Flexible frameworks that compress slightly as you fit the stone, then rebound to hold it.
Perhaps the most important invisible quality is tension—not too loose or the stone shifts, not so tight that the wire kinks or crushes an edge. Good tension behaves like a spring: firm, elastic, and evenly distributed. It results from steady hand pressure, proper wire angle, and the discipline to adjust a small section before committing to the next. Pair it with symmetry in critical areas (the bail, top frame, and main belt), even if the rest of the design flows organically. These two concepts—balanced tension and structural symmetry—produce reliable, professional wraps.
Project 1: Minimalist Point Pendant (Beginner)
A clean, modern wrap for a quartz point or similar terminated crystal.
- Materials: 20 gauge copper for frame (30–40 cm), 24 gauge copper for binds (30 cm), one crystal point.
- 1. Pre-shape a gentle U in the 20g wire around the crystal’s midsection, marking where the wire crosses at the back.
- 2. Create a small right-angle bend at each mark. This becomes the “waist” that hugs the crystal.
- 3. Place the crystal in the U. At the front, cross the arms so they overlap neatly below the top termination.
- 4. Wrap the crossover with 24g wire 4–6 times to lock the belt. Keep coils tight and parallel.
- 5. Bring the 20g ends up the sides to form two rails. At the top, form a bail by bending the wires around a mandrel.
- 6. Bind the base of the bail with 24g, then tuck and file ends smooth. Adjust the rails to pinch gently over natural flats.
- 7. Check hang: Add a jump ring and cord. The point should hang centered without twisting.
Tips: Add a small decorative coil on one side to balance a stone that wants to twist. If the crystal is slippery, place a single prong near the back termination to block upward movement.
Project 2: Four-Claw Cabochon Wrap (Beginner–Intermediate)
This classic approach uses four prongs to hold a flat-backed cabochon.
- Materials: 18 gauge (frame) 50 cm; 24 gauge (bind) 50 cm; 30 x 22 mm cabochon.
- 1. Form an oval frame slightly larger than the cabochon’s perimeter. Overlap ends at the top by 1–1.5 cm.
- 2. Bind the overlap with 24g to create a stable base for the bail. Ensure the frame sits flat on the table.
- 3. Cut two short lengths of 18g (about 2.5–3 cm each) to become prongs. Lash them across the frame at 2 and 8 o’clock with 24g.
- 4. Repeat with two more prongs at 4 and 10 o’clock, checking that each points toward the cab center.
- 5. Seat the cabochon inside the frame. Use round-nose pliers to curve each prong down and over the shoulder of the cab, capturing the edge without covering too much face.
- 6. Shape a bail from the frame’s overlapped ends; bind its base, then finish with a neat trim and file.
- 7. Test security: The stone should not rattle. Tiny micro-adjustments to each prong balance pressure.
Style note: Replace straight prongs with graceful S-curves for a vintage look, or flatten the prong tips slightly to create “tabs” that grip low-profile cabs.
Project 3: Freeform Cage for a Tumbled Stone (Beginner)
A forgiving, sculptural approach ideal for irregular shapes.
- Materials: 20 gauge (80–100 cm), 26 gauge (50 cm), tumbled stone.
- 1. Wrap the 20g wire around the stone’s equator to establish the main belt. Cross at the back; bind the cross with 26g 5–7 times.
- 2. Bend the ends upward to follow the stone’s sides, then form gentle hooks that meet at the top.
- 3. Bind the hooks together; then create a bail loop. Return each end down the opposite side, spiraling in a subtle S that intersects the main belt.
- 4. At each intersection, add two 26g wraps to lock the path. Continue until three belts exist and the stone feels captive but not crushed.
- 5. Tuck final ends in low-visibility spots. Adjust curves to avoid rocking and to accentuate the stone’s best face.
Design hint: Leave intentional negative space. The air around a stone can be as sculptural as the metal holding it.
Weaving for Texture and Strength
Wire weaving adds both beauty and function. Practice on off-stone frames:
- Figure-eight weave: Alternating wraps between two base wires forms a flexible, handsome band perfect for bails.
- Ladder weave: Single wraps around each base wire with occasional crossovers; ideal for edging and stiffening.
- Basket weave: Multiple wraps on each side in set counts (e.g., 3–3–5–5 repeats) create pattern and depth.
Keep count aloud or mark repeats to maintain uniform spacing. When transitioning from one weave to another, hide splices under future crossovers or at the back of the pendant.
Finishing: Polish, Color, and Long-Term Wear
Finishing elevates your work from good to great. After the final fit, gently burnish high spots with a polished spoon or agate tool to smooth tiny flats. A polishing cloth removes fingerprints and brightens copper or silver. Many makers apply a controlled patina to add depth, then buff back the high points so the design reads crisply.
To slow tarnish, store pieces in anti-tarnish bags, keep silica gel nearby, and advise wearers to avoid lotions and pools while wearing copper or silver. Sealants exist but can wear unevenly on high-contact areas; when used, apply lightly and test for yellowing. Ultimately, how a piece ages is part of its story, and a light refresh with a cloth often restores luster.
Design Principles: Flow, Balance, and Stone-First Thinking
Think in lines and anchors. Start with the stone’s primary axis—vertical for points, centered for ovals—and let wire lines echo or intentionally counter that axis. Use pairs of lines to suggest strength; single lines to suggest delicacy. Keep bails in proportion to the stone and the chain it will wear on. Make the back neat; a tidy backside signals intentionality even if rarely seen.
Balancing ornament and structure is a hallmark of maturing style. Decorative spirals look best when they resolve into functional intersections. If you add a flourish on one side, reference it subtly on the other with a shorter arc or matching coil to keep the eye moving. Above all, let the stone lead—stone-first thinking preserves authenticity and prevents overbuilding.
Troubleshooting: Common Pitfalls and How to Fix Them
- Kinks in wire: Don’t pull harder; stop and massage the bend flat with nylon-jaw pliers, then resume with smaller motions.
- Gapping in coils: Slide the coil back with chain-nose pliers while supporting the wire ahead of it; correct early rather than after 20 sloppy turns.
- Stone slips in cage: Add a micro-prong or a cross-belt at a hidden spot; tiny structural additions often beat heavy reworking.
- Uneven bail: Re-round over a mandrel; if asymmetry persists, unwrap to the last clean binding and redo it. Save wire by reversing only the flawed section.
- Scratches on soft stones: Tape the stone during test fitting; polish away light scuffs with a soft cloth and non-abrasive compound suitable for the mineral.
- Tool marks on wire: Use lighter grip; let the tool shape, not crush. Consider wrapping plier tips with tape.
Ethics and Sourcing: Stones and Metals You Can Feel Good About
Responsibility adds meaning to making. Seek suppliers who disclose origin and treatment, especially for popular stones that are dyed or stabilized. Recycled copper and silver reduce environmental impact and often work as predictably as newly mined metal. Lab-grown quartz and gemstones offer beauty without heavy extraction. When gifting or selling, share what you know about a stone’s journey; it deepens the connection and respects the land and hands behind your materials.
Care Instructions for Wearers
- Put jewelry on last, take it off first. Perfumes and hairsprays can dull finishes.
- Wipe after wear with a dry cloth to remove skin oils. Store in a pouch or box away from humidity.
- Avoid sleeping, swimming, or heavy exercise in wrapped pieces to protect both stone and frame.
- If a wrap loosens, do not yank. Seek a maker or a local jeweler; small adjustments restore fit quickly.
A 30-Day Practice Plan to Build Skill
- Days 1–3: Tool handling drills—make 50 identical loops; practice flush cuts and deburring until automatic.
- Days 4–7: Frame shapes—ovals, teardrops, and rectangles. Aim for clean corners and consistent widths.
- Days 8–10: Tension study—wrap and re-wrap a marble in a simple belt cage until it’s secure without deformation.
- Days 11–14: Weave library—figure-eight and basket weaves on scrap frames.
- Days 15–18: Project 1 repetition—three quartz points with incremental refinements.
- Days 19–22: Project 2—two cabochons with prong variations (straight and S-curve).
- Days 23–26: Project 3—two tumbled stones, emphasizing clean intersections.
- Days 27–30: Design your own piece—start with a sketch; build, then critique with photos from front, side, and back.
Going Further: Rings, Earrings, and Assemblies
Once pendants feel comfortable, rings teach tight curves and ergonomic sizing. Use 16–18 gauge for the shank and 24–28 gauge for binding a small cabochon or bead. Earrings demand balance and weight mindfulness; pair small stones and opt for lighter wire to avoid fatigue. Assemblies—where you build subcomponents (e.g., a woven bail, a pronged charm) and unite them—encourage modular thinking and cleaner problem solving.
Ergonomics, Workflow, and Consistency
Good workflow protects your hands and boosts output. Alternate tasks that stress different grips: weave for 10 minutes, then shape a frame, then file ends. Keep a bench mat to catch offcuts and reduce bounce. Photograph finished pieces in consistent lighting against a neutral background to evaluate proportions. Maintain a notebook with wire lengths, stone sizes, and results; you’ll build personal templates that speed making and ensure consistency across pairs and sets.
Pricing, Gifting, and Telling the Story
If you choose to sell, track material cost plus time and add a margin for overhead and growth. Your story matters: where the stone came from, why you chose this wire path, what lessons the piece taught. For gifts, include a care card and a short note about the design choices—it transforms an object into a keepsake.
Glossary for New Makers
- Bail: The loop through which a chain passes.
- Bezel (wire-wrap sense): A frame that holds a stone, analogous to a metal bezel but formed from wire.
- Half-hard: Wire temper that holds shape better than dead-soft but still workable.
- Weave: Repeated pattern of fine wire binding across base wires.
- Prong: A wire finger that bends over the stone’s edge to secure it.
- Work hardening: Stiffening of metal from repeated bending or forming.
Mindset: Patience, Curiosity, and Finishing Strong
Wire wrapping rewards small, consistent steps. When a move feels rushed, pause and reset your hands. Measure twice, bind once. Trust your eye: if something looks off now, it won’t fix itself later. As you gain confidence, set personal challenges—fewer tool marks, tighter weaves, cleaner backs. Keep a few early pieces visible to track growth; the comparison will encourage you on days when progress feels slow.
Final Touchstones for Confident Beginner Wraps
- Plan the path: Identify at least three anchors on the stone before cutting wire.
- Cut clean, file ends, and hide splices under coils or at the back.
- Maintain even hand pressure; let the wire flow rather than forcing it.
- Keep bails proportional and centered for comfort and visual balance.
- Finish thoughtfully: a quick polish, clean photos, and a note about materials used.
Above all, approach every piece as a conversation between your hands, the wire, and the stone. The more you listen, the more gracefully your wraps will form—and the more beautifully your creations will wear. With practice, you’ll develop the quiet hallmarks of quality: confident lines, resilient structure, and surfaces that age with character rather than chaos. That is the path from beginner experiments to steady, satisfying artistry in crystal wire wrapping.