A bead loom turns thread and tiny glass beads into fabric-like art that can be as minimal as a single stripe or as ornate as a museum tapestry. Learning how to plan, warp, weave, and finish transforms a simple frame into a precision tool for jewelry, accessories, and decor. This guide explains the concepts behind loom beadwork so you can build confidence row by row—how to read a pattern, choose materials that behave well together, and translate a paper sketch into a resilient, wearable design. Whether you’re building your first narrow bracelet or venturing into gallery-wide panels, you’ll find practical methods, math that actually helps, and solutions to the small problems that often stall beginners.
The anatomy of a bead loom and essential supplies
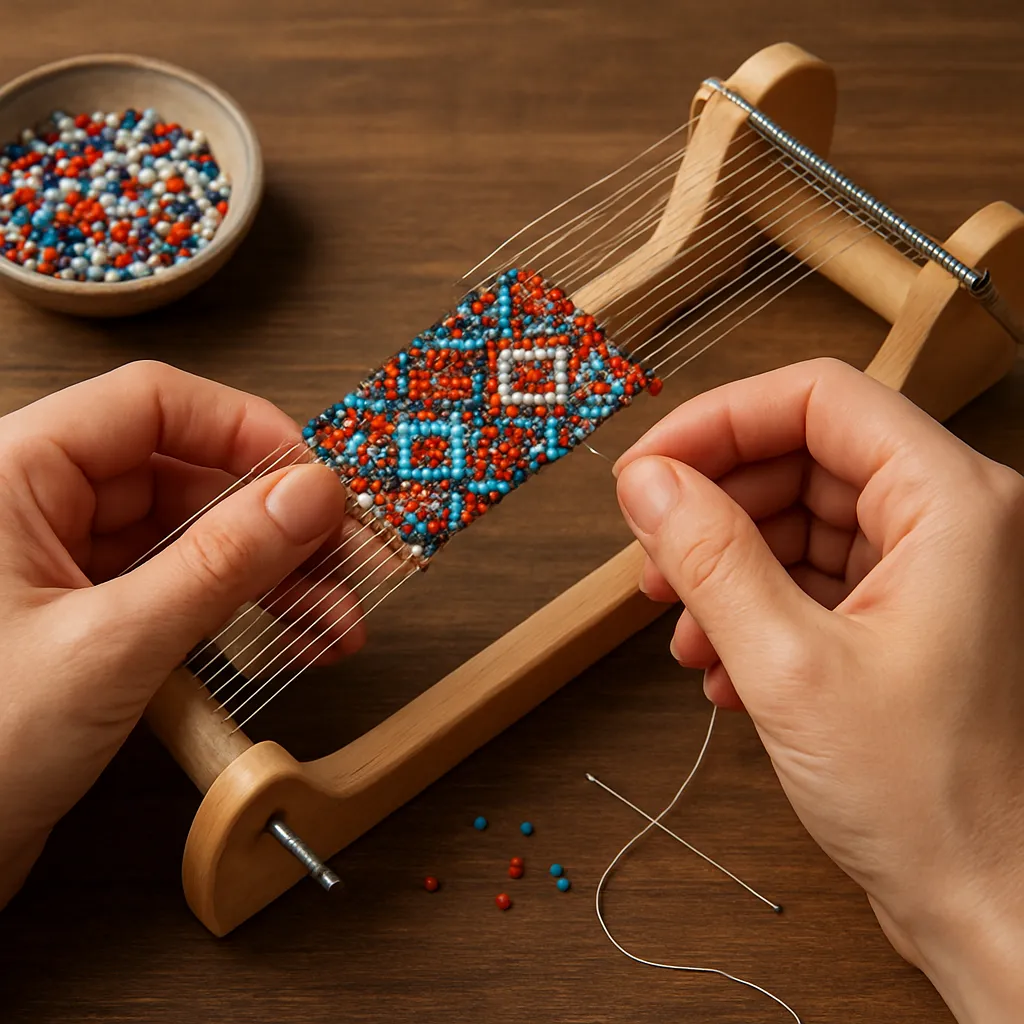
Bead looms range from simple homemade frames to professional rigs with threaded tension knobs and shedding devices. All looms do the same two jobs: hold parallel warps at consistent spacing and keep everything taut so your rows line up. Small tabletop looms are portable and great for bracelets and badges; medium looms let you create cuffs, chokers, hat bands, or bookmarks; and large floor or pipe-frame looms support belts, straps, or wall art.
Look for features that make work easier: a spring or comb to space warps, clear access beneath the warp plane for your hands, smooth edges so threads don’t fray, and some way to fine-tune tension. Many makers also keep a small travel loom for sampling colors or testing motifs before committing to a main project.
- Beads: Cylindrical Japanese Delicas and Aikos click together like pixels and yield crisp lines; round seed beads create a softer, more organic surface. Mixes can work, but consistent quality and size uniformity give the cleanest results.
- Needles: Size 10–12 beading needles pass through most 11/0 beads multiple times; size 13–15 for 15/0 work. Keep spares; tips dull after many passes.
- Thread:
- Bonded polyethylene (e.g., FireLine, WildFire) resists abrasion and stretch, excellent for high-friction loom work and for jewelry that sees daily wear.
- Nylon (e.g., Nymo, KO, S-Lon) is manageable and knot-friendly; pre-condition with a bit of beeswax or thread conditioner to reduce fray and twist.
- Tools: Scissors or thread snips, flat or chain-nose pliers, beading mat, ruler or calipers, painter’s tape, binder clips or small clamps, and a fine awl or beading fork (for coaxing stubborn beads into line).
- Findings and backing: Slide ends, ribbon clamps, soldered jump rings, toggles or magnetic clasps, extender chain, crimp tubes if appropriate, and leather or Ultrasuede for backing when making cuffs and barrettes.
- Adhesives (optional and sparingly): Flexible, jewelry-safe glues to secure knots inside findings—used minimally so the piece remains supple.
There are also specialty accessories like warp separators, weighted clips for tail threads, bead spinners for fast loading, and shedding devices that raise alternating warps for tapestry-style passes. These are helpful but not necessary to begin.
Planning and designing your project
Great loom work starts long before the first thread is tied. Planning determines proportions, bead counts, clasp fit, and the clarity of your imagery. The more deliberate your planning, the more relaxing your weaving will be.
Define use and constraints
- Purpose: Bracelet, choker, watch strap, hat band, belt, wall panel, patch, bookmark, guitar strap, or trim.
- Wearability: Consider skin contact, snag risk, and ingress of sweat or water. For everyday jewelry, opt for smooth edges, corrosion-resistant metal finishes, and threads with higher abrasion resistance.
- Dimensions: Measure the wearer or target object. For bracelets, measure wrist snug, add comfort ease (typically 1.5–2 cm), and subtract clasp length to find beadwork length.
Choose bead size and count the width
Common sizes: 11/0 Delicas are roughly 1.6–1.8 mm wide and 1.3–1.5 mm tall; 11/0 rounds are about 2.0 mm wide. For crisp pixel art, go with Delicas; for a softer look or more texture, use rounds. Multiply bead width by the number of beads across to estimate the finished width.
Example: You want a 20 mm-wide bracelet using 11/0 Delicas (~1.6 mm each). Target width ÷ bead width = 20 ÷ 1.6 ≈ 12.5 beads. Round to an even 12 or 13 beads across depending on the pattern symmetry you want. Remember a small amount of extra spread can occur with round beads; test a 1–2 cm swatch to confirm.
Color strategy and legibility
- Value contrast: Strong light/dark separation keeps motifs readable even when the palette is subtle.
- Saturation: Highly saturated colors together can vibrate; balance intense hues with neutrals.
- Finish mixing: Matte beads calm glare; metallics add sparkle; transparent beads glow on pale threads but darken over black. Test combinations in a small sample.
- Lightfastness: Some dyed or galvanized finishes may fade or rub with wear; reserve fragile finishes for accents.
Pattern sources and formats
Graph paper, cross-stitch charts, pixel-art software, and dedicated bead design programs all work. For loom use, your pattern is read in linear rows. Mark starting points, row numbers, and color keys. If your pattern includes gradients or photo-like shading, simplify with dithering: alternate two colors in a checker or staggered pattern to create optical blends.
Warping the loom: math and method
Plan your warps before a single knot. A quick rule: number of warps = beads across + 1. For a 12-bead-wide strip, that’s 13 warps. Space them evenly using the loom’s comb or spring. Keep a generous tail at both ends for finishing methods.
Calculate length and thread requirements
- Finished length = beadwork length + allowances for fold-overs or attachment into findings.
- For continuous warping, allow at least 4× the length of the beadwork per warp if you plan to tie off and weave tails back; adjust according to your loom’s path.
- Use a sturdy line for warp threads if you expect high wear or heavy beads.
Step-by-step warping
- Anchor the first warp: Tie a secure double half-hitch or surgeon’s knot onto a back rod or anchor point. Place the line into the comb/spring channel.
- Run the thread straight to the front anchor, around, and back to the rear, zigzagging across the comb so each channel holds one thread. Avoid crossing lines.
- Maintain even slight tension as you lay each warp. Consistency across threads matters more than absolute drum-tightness.
- Count and recount: Beads across + 1 warp. Verify spacing by laying a short straw of beads across the warps; each bead should sit cleanly between two warps.
- Tie off the last warp securely. Add small pieces of tape near the anchors if the frame is slick.
If your loom includes a spring bar, seat each thread into a tooth. If it doesn’t, slide a cardstock spacer with evenly cut slots under the warps to keep them aligned while you start weaving.
Weaving fundamentals
With warps in place, threading the first rows establishes rhythm. Start with a comfortable working length of thread, typically 1–1.5 m to minimize tangles; longer lengths save rethreading but increase twist and fatigue.
The core pass
- String a row’s worth of beads onto your needle on the working thread, which functions as the weft.
- Slide the beads under the warps, then push each bead upward so it pops between its warp pair.
- With your off-hand holding the beads in place from below, pass the needle back through the entire row from the top side. This locks the beads above the warps.
- Seat the row gently with a beater or the flat edge of your needle. Avoid striking; coaxing maintains alignment and protects finishes.
Repeat for subsequent rows, checking the alignment of the outermost beads—the edges set the tone for the whole panel. For very wide pieces, rest a straightedge along the last row to keep the line even while you seat the next.
Starting and ending threads
- To start a new thread, weave a ladder of 4–6 beads in prior rows, change direction, and exit at your new starting point. This locks the tail invisibly.
- To end, weave through a staircase of beads for 2–3 cm, reversing direction at least twice. Clip excess thread flush.
Two-needle method
Some artists use two needles: one passes under warps carrying beads, the other passes over to lock the row. This can be faster on wide pieces and reduces the chance of missing an edge bead.
Managing tension, edges, and accuracy
Control over tension is the difference between a board-straight bracelet and a wave-prone one. Think of tension as shared among three actors: your loom, your warp material, and your stitching hand.
- Set initial tension so the warps yield slightly when pressed. Over-tight warps make it hard to seat rows and can cause breakage; too slack and rows sag.
- Equalize: After every 5–10 rows, run a fingertip lightly across the surface to feel for tight or loose spots and nudge rows into line.
- Edge ethics: Keep a consistent habit for the outer bead—either slightly snug or just shy of snug every time. Inconsistent edges create scallops.
- Row drift: If rows climb, you’re seating too firmly on one side; alternate which hand beats the row or rotate the loom periodically.
- Twist and flare: Check that warps remain parallel. Realign with a spacer card if needed, especially in the first centimeter of work.
Advanced techniques for intricate designs
Intricacy can emerge from color logic, structural choices, or both. Beyond literal pixel patterns, you can layer effects to create depth, highlights, and implied curves.
- Multi-drop loom weaving: Load two or three beads per warp space at a time to block in broader strokes, then refine with single rows in focal areas.
- Selective stair-steps: Use progressive half-height motifs to gesture curves and diagonals; keep value contrast high so edges read cleanly.
- Shaped and specialty beads: Bugles make crisp lines but are abrasive—pair with tough threads, add spacer rounds to stabilize, and test for sharp edges.
- Color blending: Dither between two hues using checker or brick dithers; introduce a third transitional color for smoother fades.
- Negative space: Let the ground color do as much talking as the motif; restraint often increases legibility.
- Raised details: After weaving the base, embellish on top with picots, fringe, or couching to add relief while preserving the panel’s underlying structure.
- Split-loom panels: Work complex motifs in sections on separate looms, then join with invisible ladder stitch along the warp columns.
For photographic conversions, reduce the palette to 6–12 colors first, then map to available bead finishes. Test a small swatch to check real-world color shifts under natural and artificial light; beads interact with light in ways screens can’t fully predict.
Finishing methods: from panel to wearable art
How you close and protect your beadwork affects comfort, security, and looks. Choose finishing methods that match the project, your time, and the desired durability.
Option A: Slide ends and soldered rings
- Trim the panel to length, leaving 3–5 mm of extra warp beyond the last bead row.
- Weave weft tails into the body. Lightly tape the beadwork to a firm card to keep edges aligned.
- Insert the beaded end into a slide finding sized to your panel width. If it’s slightly loose, add a shim of ultrasuede or card behind the last row.
- Add soldered jump rings to the slide loops and attach clasp components.
Option B: Ribbon clamps
- Place a strip of thin ultrasuede above and below the warp tails as a cushion.
- Align the clamp teeth with the last bead row. Close gradually with nylon-jaw pliers for even pressure.
- Check that no threads are cut; reinforce with a tiny dab of flexible adhesive inside the clamp if needed.
Option C: Sewn fold-over with edging
- Extend the beadwork by 2–3 empty warp spaces at each end (no beads), then fold this tab to the back.
- Stitch through edge beads and backing to encase the fold, adding a brick-stitch or picot border to protect edges and give a finished outline.
- Sew on loops or directly mount to a barrette base, leather cuff blank, or headband.
Always tug-test your closures before wear. On bracelets, slightly rounded corners and soft edges help prevent snagging sleeves or skin.
Care, repair, and longevity
Store beadwork flat or gently curved on form; avoid crumpling. Keep away from lotions, perfumes, and chlorine, which can cloud finishes. Wipe with a soft cloth after wear. If a bead cracks or a stitch loosens, secure the area by weaving in a new thread 2–3 cm back from the damage, replace beads, and lock off with direction changes. For pieces with plated metallic beads, expect patina or wear on high-friction spots; choose solid glass, ceramic, or metal components there if you want a pristine look long-term.
Ethics, tradition, and cultural respect
Loom beadwork has deep roots in many cultures, including numerous Indigenous communities who maintain vibrant practices and motifs. When drawing inspiration from traditional patterns, credit your sources, avoid claiming heritage you don’t hold, and consider supporting Native artists and suppliers. Distinctive ceremonial or clan designs may be restricted; seek guidance when in doubt. Ethical material sourcing—buying from small bead shops, fair-wage suppliers, and responsibly produced findings—supports the living ecosystems of craft.
Ergonomics and studio setup
- Lighting: Neutral daylight (around 5000–5500 K) with a diffuse task lamp reduces eye strain and reveals true color.
- Seating: Keep forearms level with the loom; shoulders relaxed; change position hourly. A small cushion under the loom can raise the work to a comfortable height.
- Magnification: Headband loupes or a swing-arm magnifier help with 15/0 beads and on-the-fly inspections.
- Flow: Keep beads in shallow trays by color; label and arrange from light to dark to speed decisions and reduce mispicks.
Step-by-step sample project: geometric bracelet
Goal and specs
A crisp, 12-bead-wide bracelet in 11/0 cylinder beads, finished length 16.5 cm, with a 1.5 cm toggle clasp. Target beadwork length: 15 cm. Palette: charcoal ground, pale silver lines, teal accents.
Materials
- 11/0 cylinder beads: ~7 g charcoal, ~2 g pale silver, ~2 g teal
- Thread: bonded polyethylene, smoke gray
- Loom with 12-bead width capacity (13 warps)
- Needles size 11 or 12
- Slide ends for 10–12 mm width, toggle clasp, soldered rings
- Beading mat, snips, ruler, tape
Warp math and layout
- Warps needed: 12 + 1 = 13
- Warp length: 15 cm beadwork + 3 cm handling allowance per end = 21 cm minimum path; add loom-specific extra. Cut or load continuous warps accordingly.
- Seat each thread in the comb; confirm a 12-bead test straw fits cleanly.
Weaving
- Thread a 1 m working length. Load the first row: 12 charcoal beads. Place under the warps, pop up, pass back over, seat lightly.
- Weave a 5-row charcoal header for stability.
- Begin the motif: every third row, replace the center two beads with pale silver to create a dashed vertical. Every sixth row, add two teal beads flanking the silver to make a diamond. Keep edges charcoal.
- Maintain straightness: after each motif repeat, lay a ruler along the row, press gently to align.
- Weave until 15 cm length, then finish with another 5-row charcoal header.
Closing
- Weave in any remaining weft tails 2–3 cm and clip.
- Slide a finding onto each end; if there is slight play, add a thin ultrasuede shim.
- Attach soldered rings and the toggle. Tug-test by pulling gently in multiple directions.
This design scales: widen to 18 beads and add a second vertical dash; narrow to 10 beads and condense diamonds to single-bead tips. Swap palettes to shift the mood—cream and gold for elegant, black and neon for bold, or tone-on-tone blues for subtle.
Troubleshooting quick reference
- Rows bow upward: You’re pushing too hard while seating. Reduce force; use a straightedge guide.
- Edge scallops: Inconsistent pull on outer beads. Decide on a consistent “barely snug” habit; double-check the last bead engages fully over the warp.
- Thread fuzz or breakage: Switch to tougher thread, wax nylon, change needles, or smooth any burrs on the loom.
- Gaps between beads: Bead size variation or loose seating. Sort outliers; switch to more uniform cylinders; seat rows with gentle, even strokes.
- Warp count off by one: If caught early, add or remove an edge column and camouflage with a border; otherwise, restart to prevent long-term alignment issues.
- Uneven width mid-project: Warps have migrated. Reinsert a spacer card and fan threads back into parallel before continuing.
- Color looks wrong in daylight: Always sample; if mid-project, introduce a transitional bead to bridge the shift rather than ripping out rows.
Building or customizing a loom
A serviceable loom can be built from a wood board and two dowels, with a metal spring or a comb to space warps. Add cork or leather pads where thread contacts wood to prevent abrasion. For fine control, incorporate a threaded bolt and wing nut at one end to micro-adjust tension. Travel looms benefit from fold-flat legs and removable rods for bag-friendly packing. Whatever you build, prioritize smoothness at all contact points and unobstructed access to the underside for your non-dominant hand.
Workflow tips for speed and sanity
- Batch work: Pre-string multiple row sets on spare needles when the pattern repeats.
- Color stations: Keep mixes shallow; deep containers slow picking and hide outliers.
- Row markers: Place a paper flag or magnetic guide under the current row on your chart. Check off rows as you go.
- Break cadence: Every 20–30 minutes, stand and check the piece from 1–2 m away. Distant viewing reveals drift and proportion hiccups.
From craft to signature style
Mastery on a bead loom is cumulative: a hundred small, consistent decisions compound into clean geometry, fluent shading, and reliable construction. Start with projects that stretch you just a little, keep excellent notes on bead sizes and finishes that behaved well together, and revisit favorite patterns to refine color choices and clasp strategies. Over time, your work will showcase not just accurate pixels, but the human hand and artistic judgments that make loom beadwork so compelling to wear and to behold.